
Asset management · 5 steps
Add an asset to the register
Record a vehicle, laptop or appliance with its category, cost, purchase date, warranty and location so its book value is tracked from day one.
Before you start: Create the categories you need first under Asset Management → Categories, and add the supplier as a vendor if you want to link one.
1Open the Asset Register and start a new asset
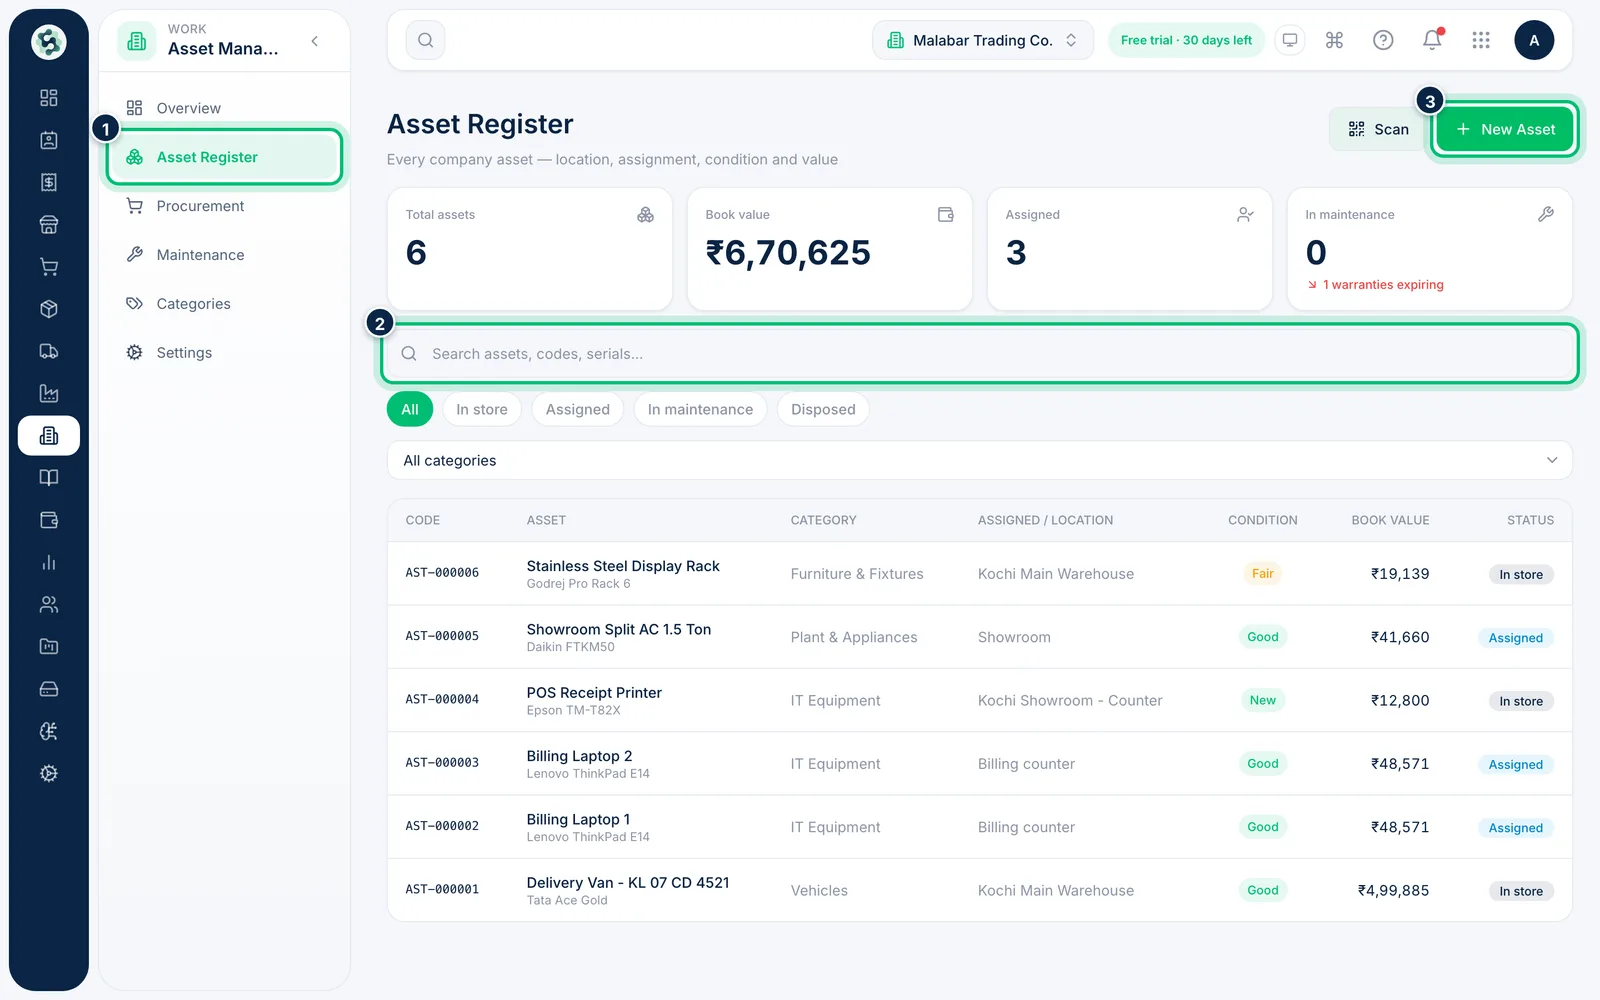
Go to Asset Management → Asset Register. Search by name, code, serial number or holder, or filter by status and category. Choose New Asset at the top right.
2Name the asset and choose its category
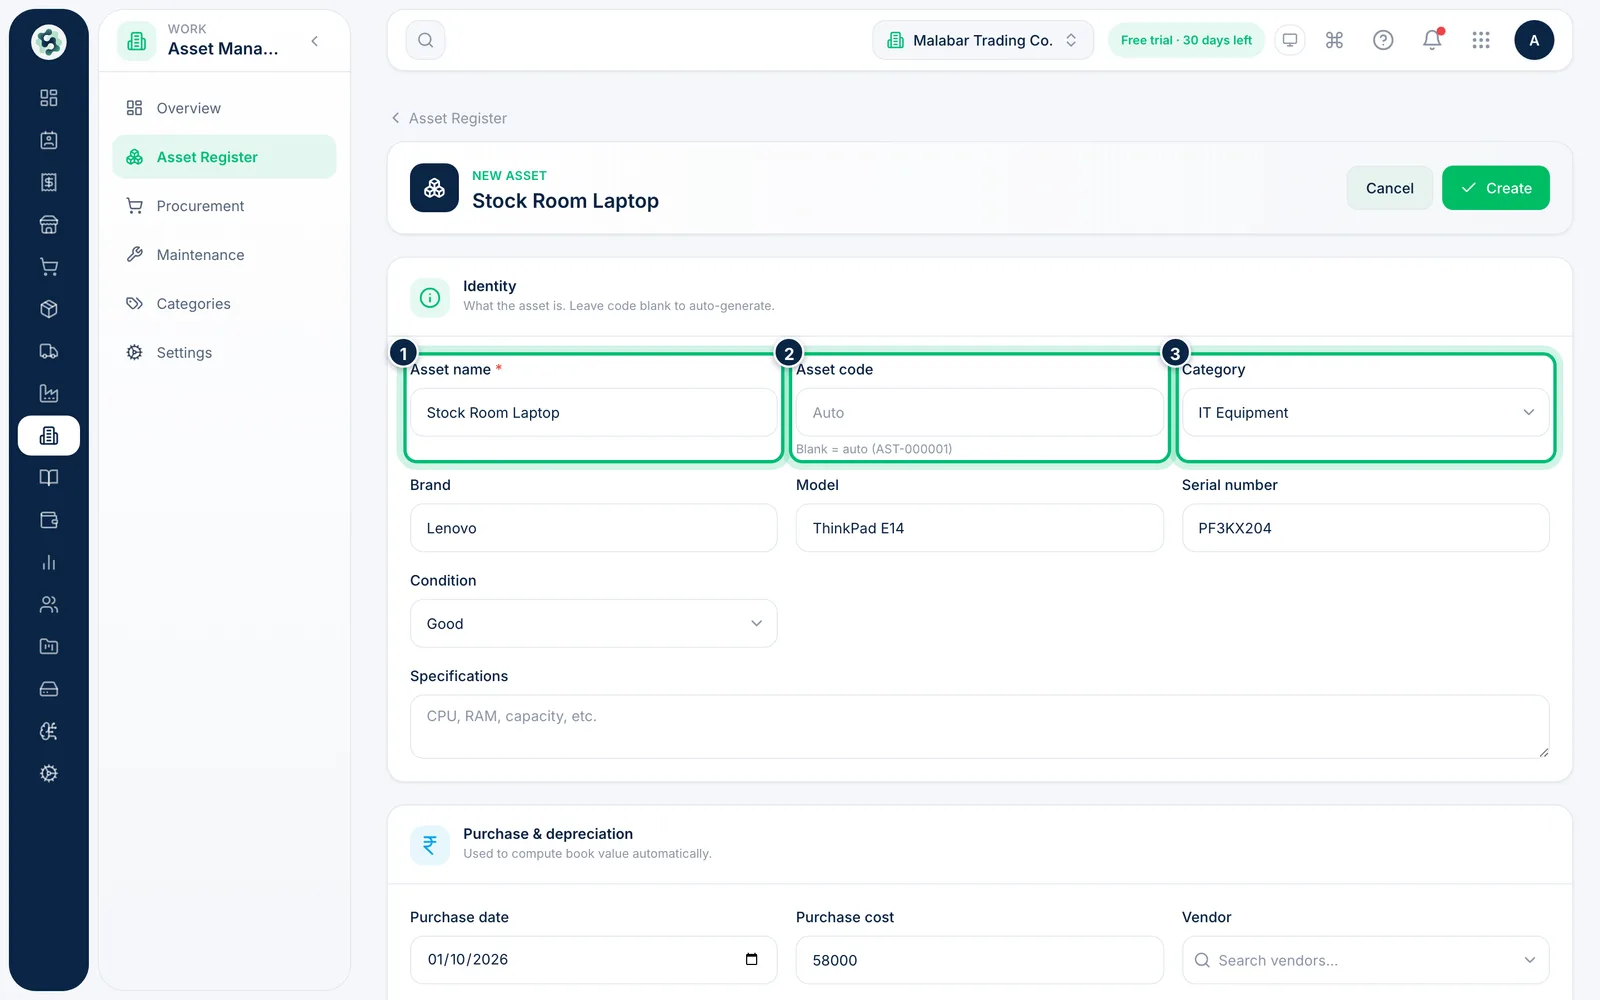
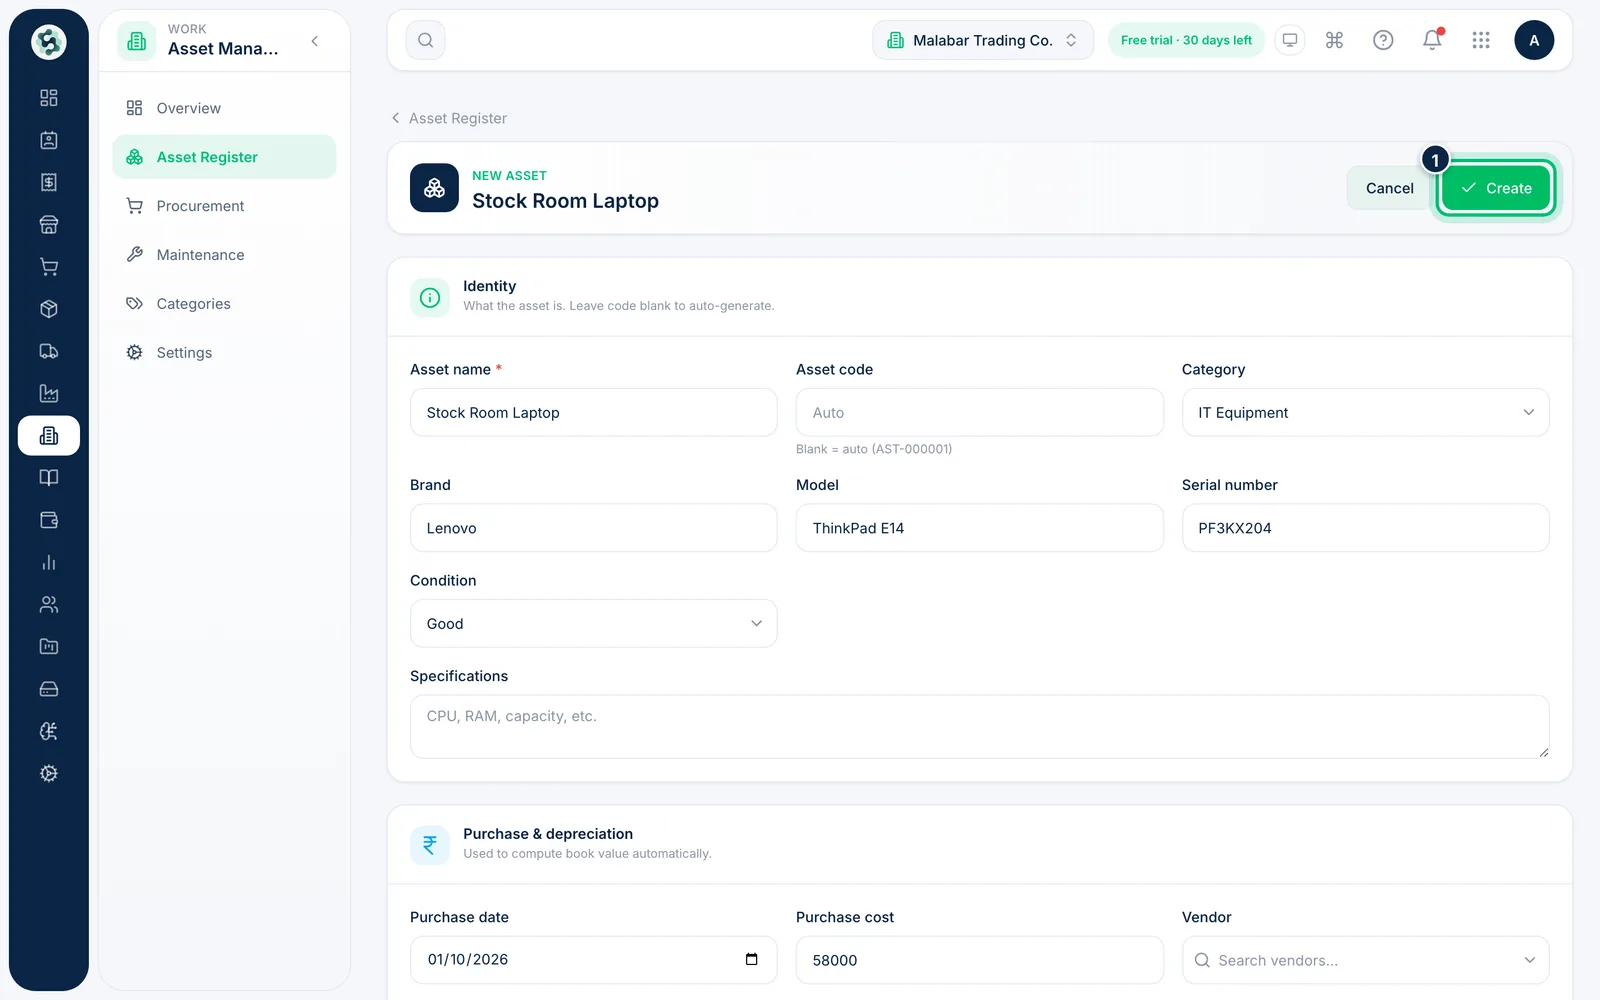
Enter the Asset name — the only required field — and pick a Category. Leave Asset code blank and the next code is generated for you, such as AST-000007. Add the Brand, Model, Serial number and Condition.
3Enter the purchase cost and depreciation
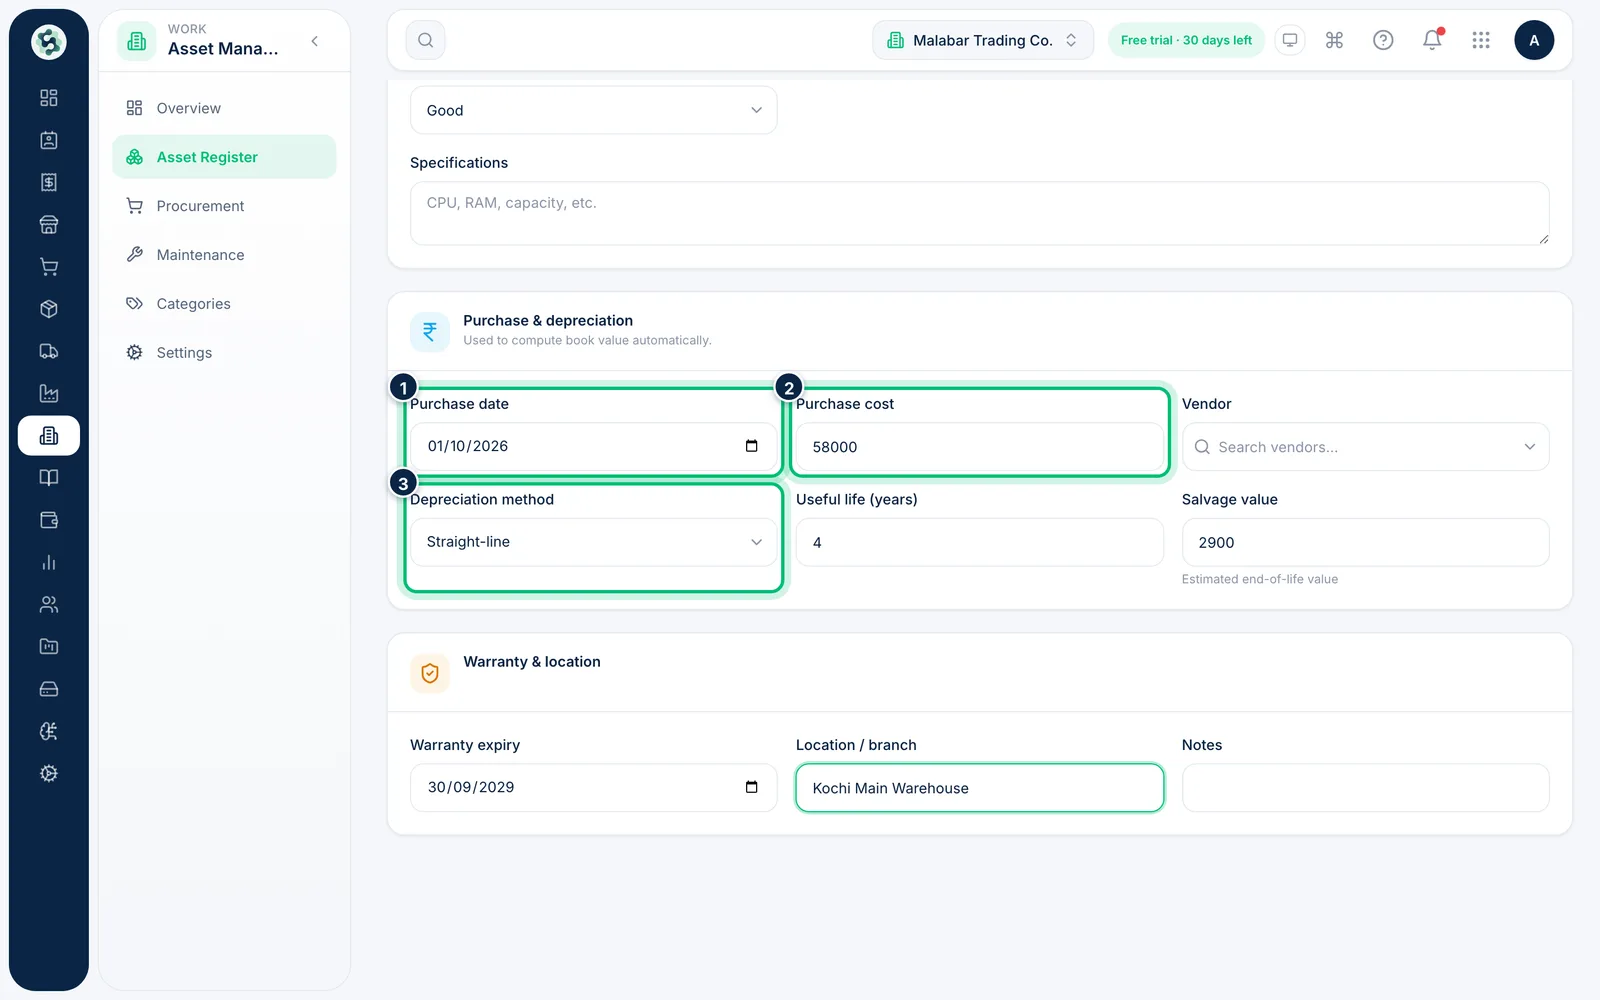
Under Purchase & depreciation, set the Purchase date and Purchase cost, and choose the Depreciation method. Enter the Useful life (years) and the Salvage value you expect at the end of it, and the book value is worked out for you.
4Add the warranty and location
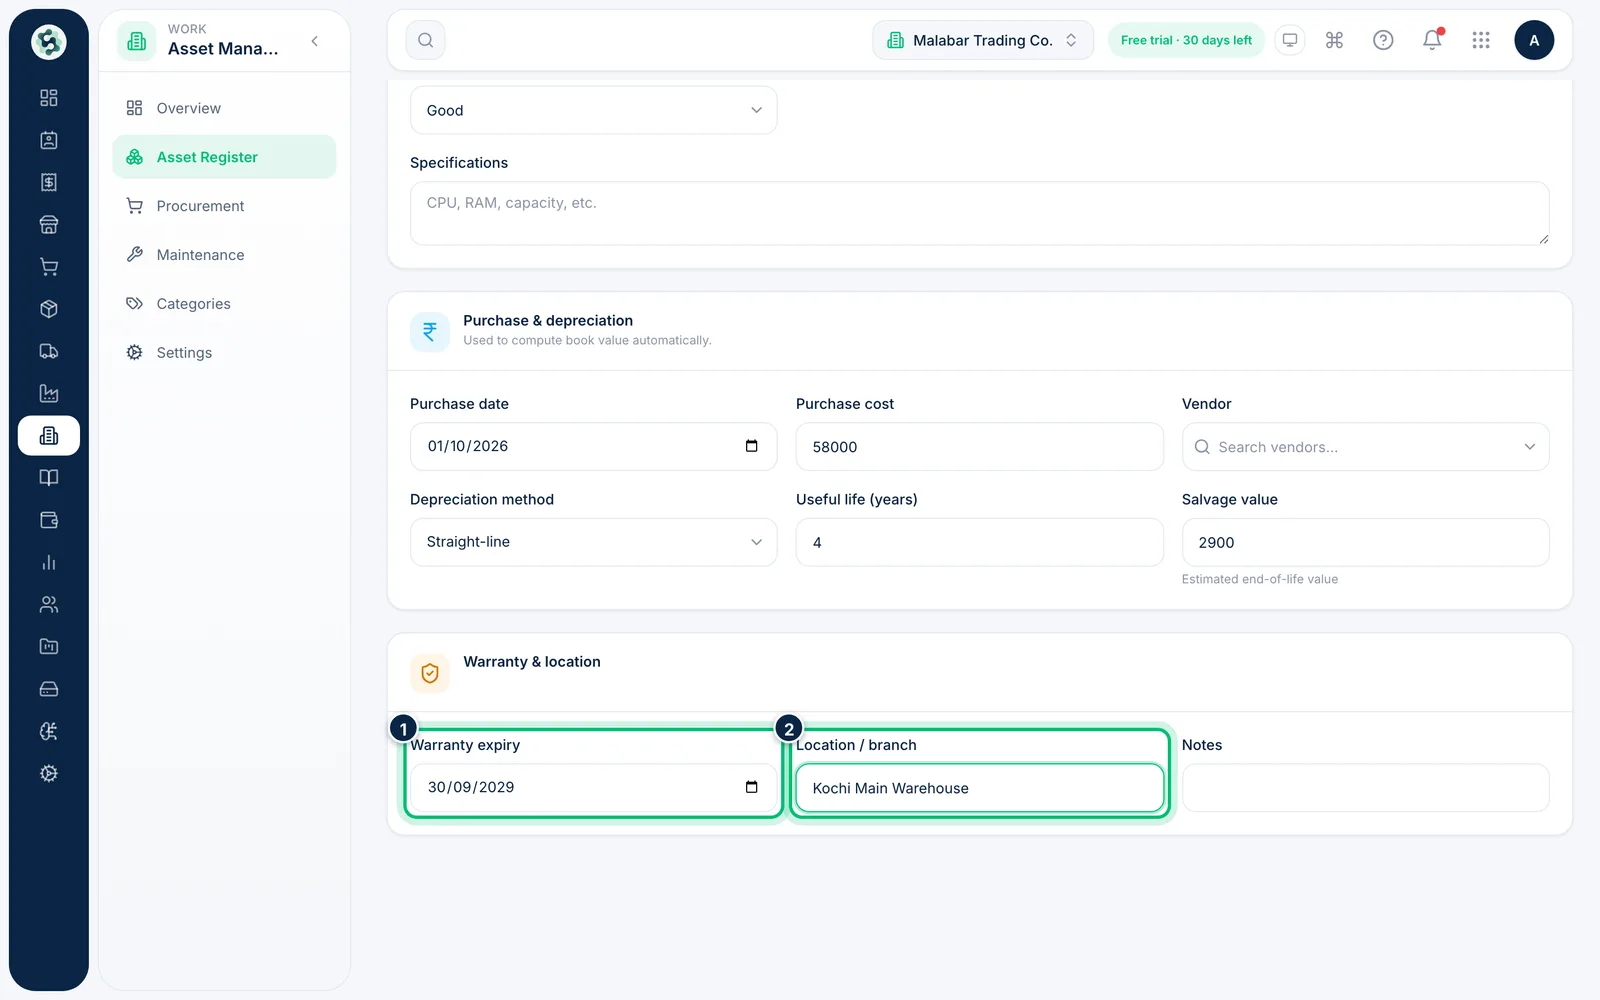
Under Warranty & location, enter the Warranty expiry date and the Location / branch where the asset sits. The dashboard warns you before the warranty runs out.
5Create the asset
Choose Create. The asset opens with its tag, depreciation and history, ready to be assigned to someone.
Related guides
Still stuck? Contact our support team — or start a free trial to try this in your own company.