
Expenses · 4 steps
Set up categories, policies and approval workflows
Create the spend heads people claim against, with limits and receipt rules, and decide who approves claims.
Before you start: You need the Categories · Manage permission to change expense settings.
1Open expense settings
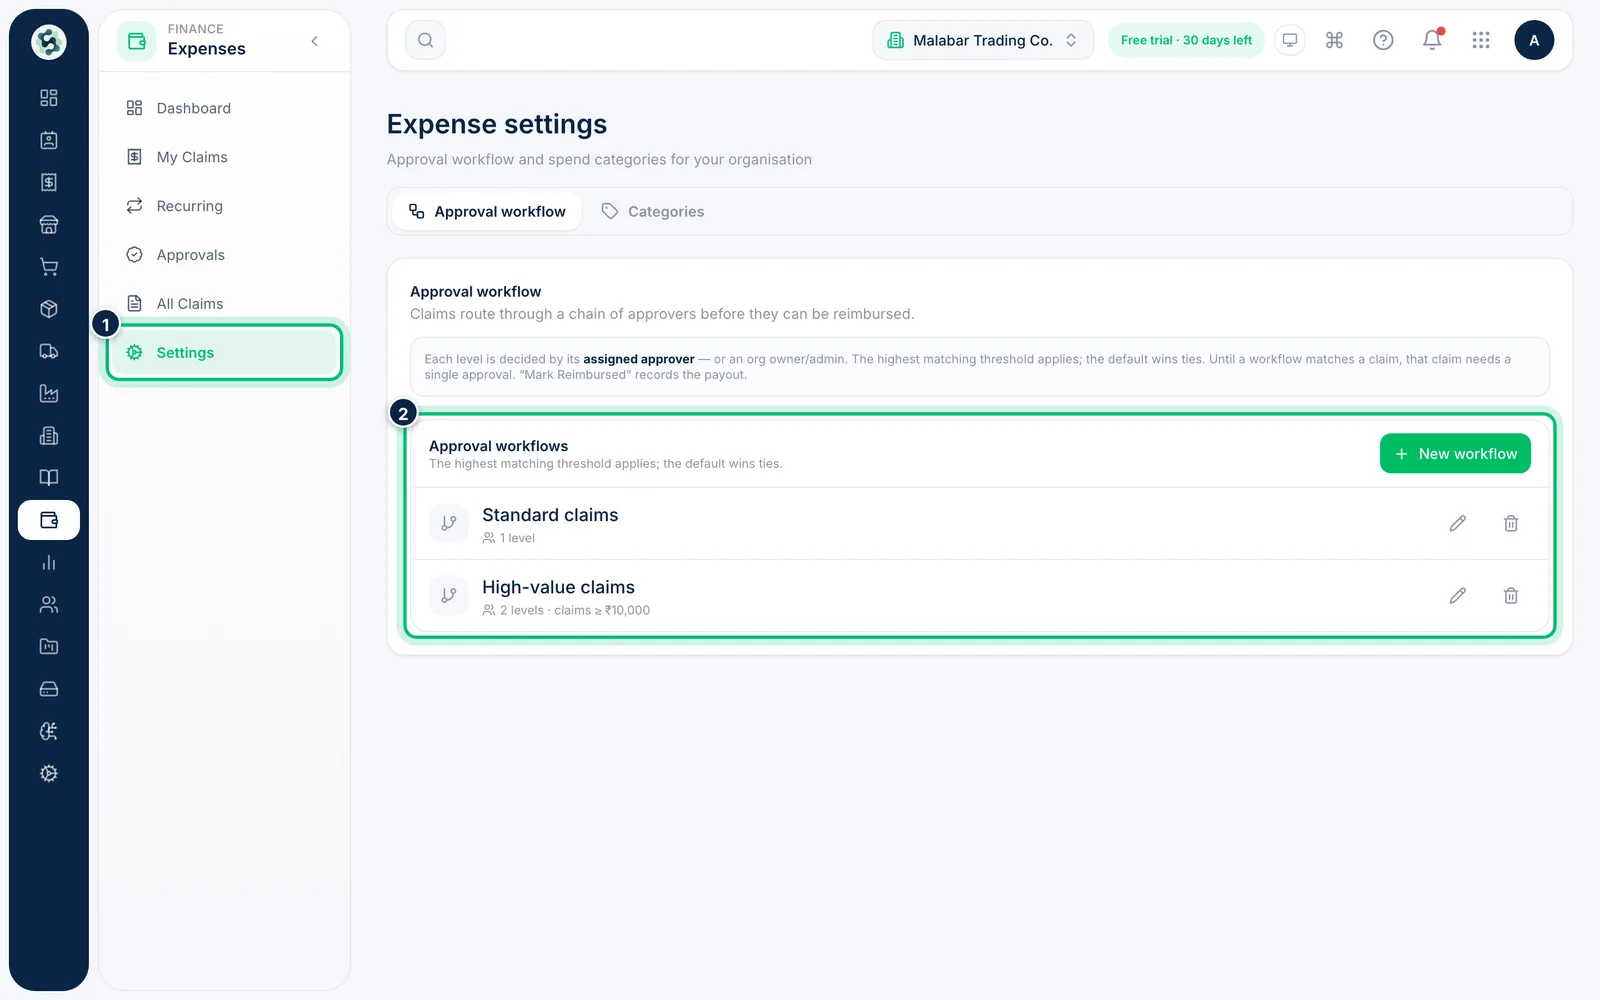
Go to Expenses → Settings. Approval workflow lists your workflows — how many levels each has and the claim amount it starts at. If workflows are off, a notice offers Turn on workflows; opening the page never changes the approval mode, only that button does.
2Add a spend category
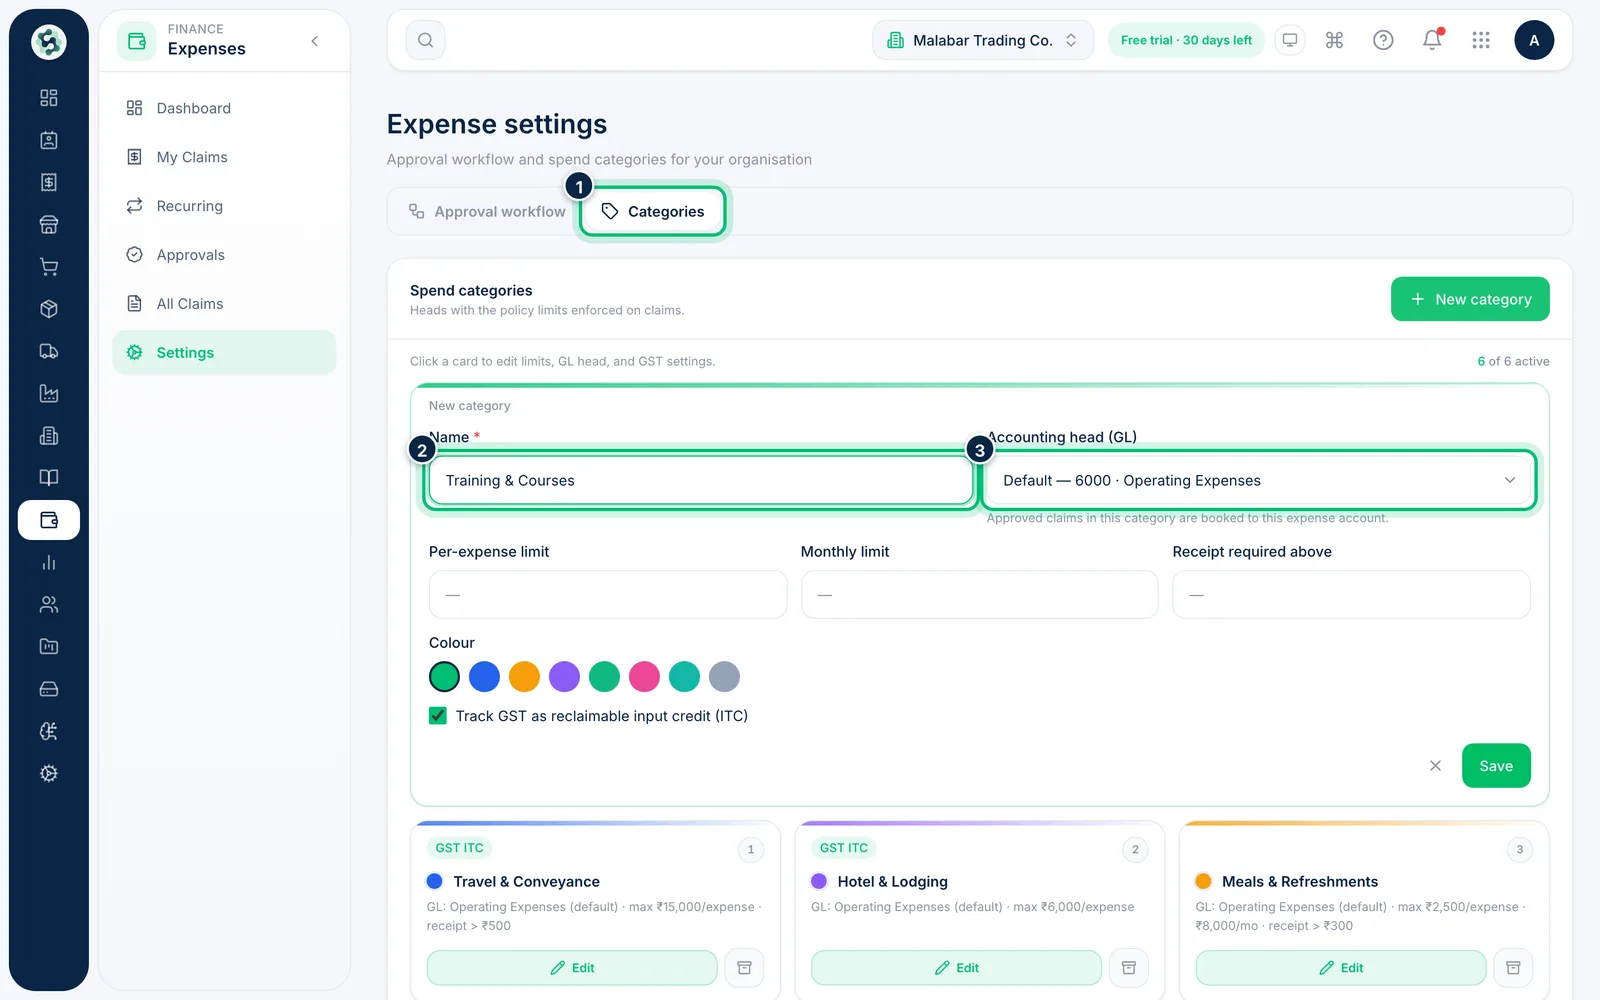
Choose the Categories tab, then New category. Enter the Name, then pick the Accounting head (GL) from the dropdown of your organisation's expense accounts. It starts as 6000 · Operating Expenses. Claims in this category post to the account you choose.
3Set the policy limits and GST
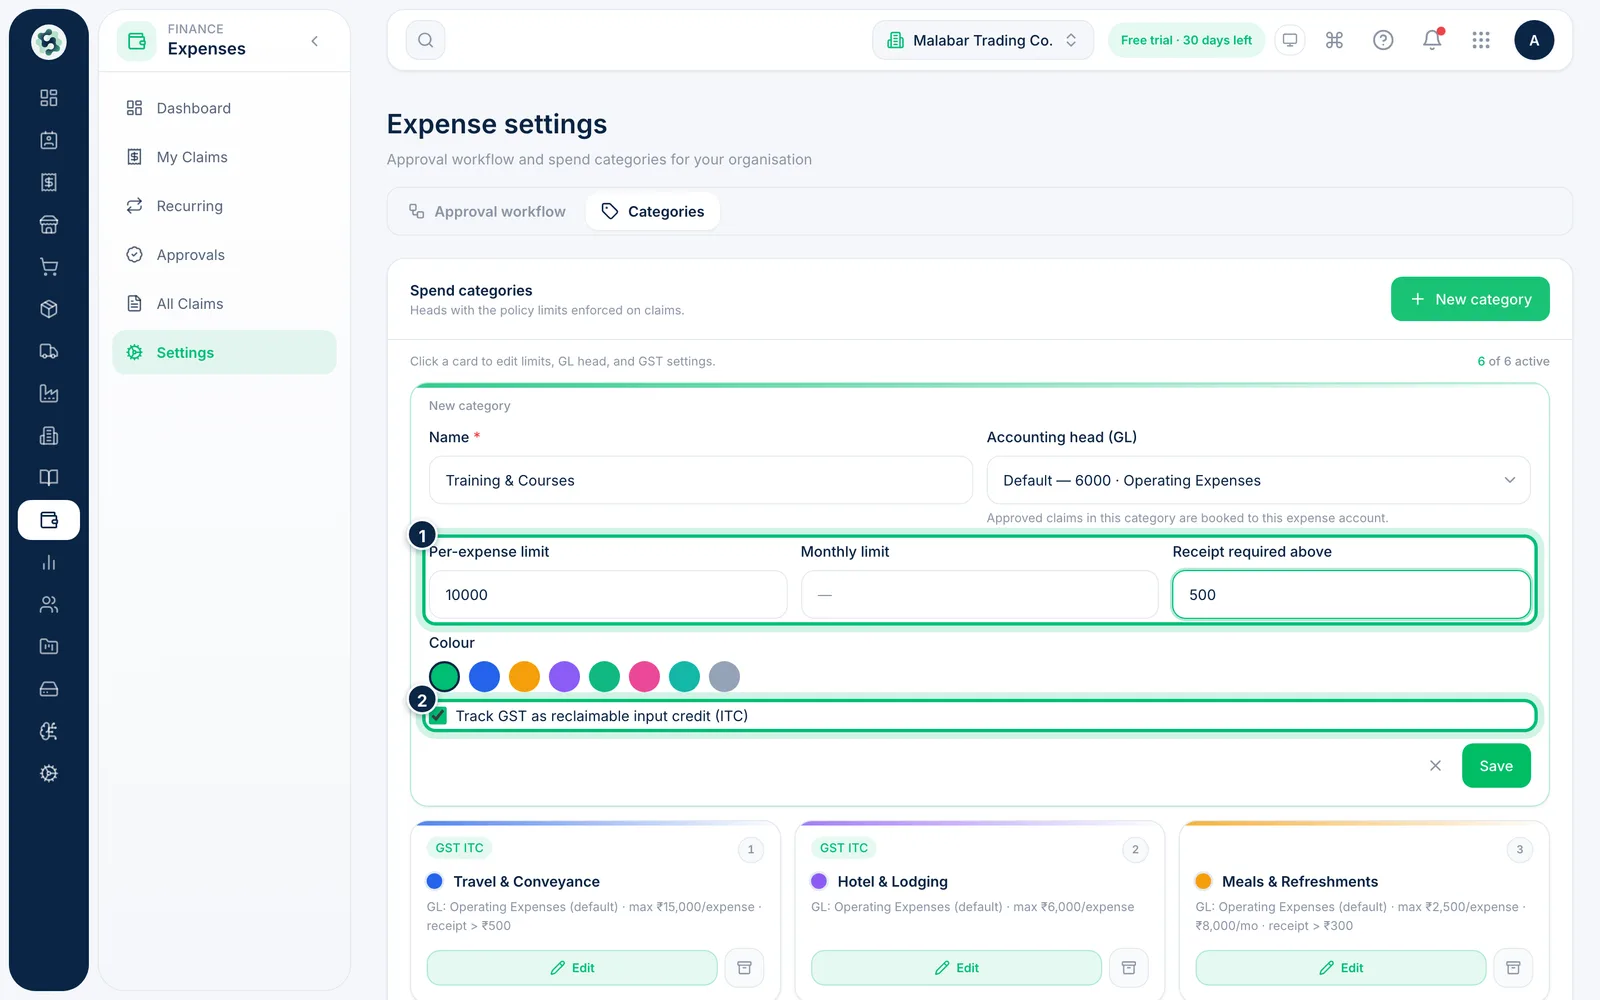
Set a Per-expense limit, a Monthly limit and Receipt required above as needed — lines that break them are flagged for the approver. Tick Track GST as reclaimable input credit (ITC) if you can claim the GST on these bills, then choose Save.
4Create an approval workflow
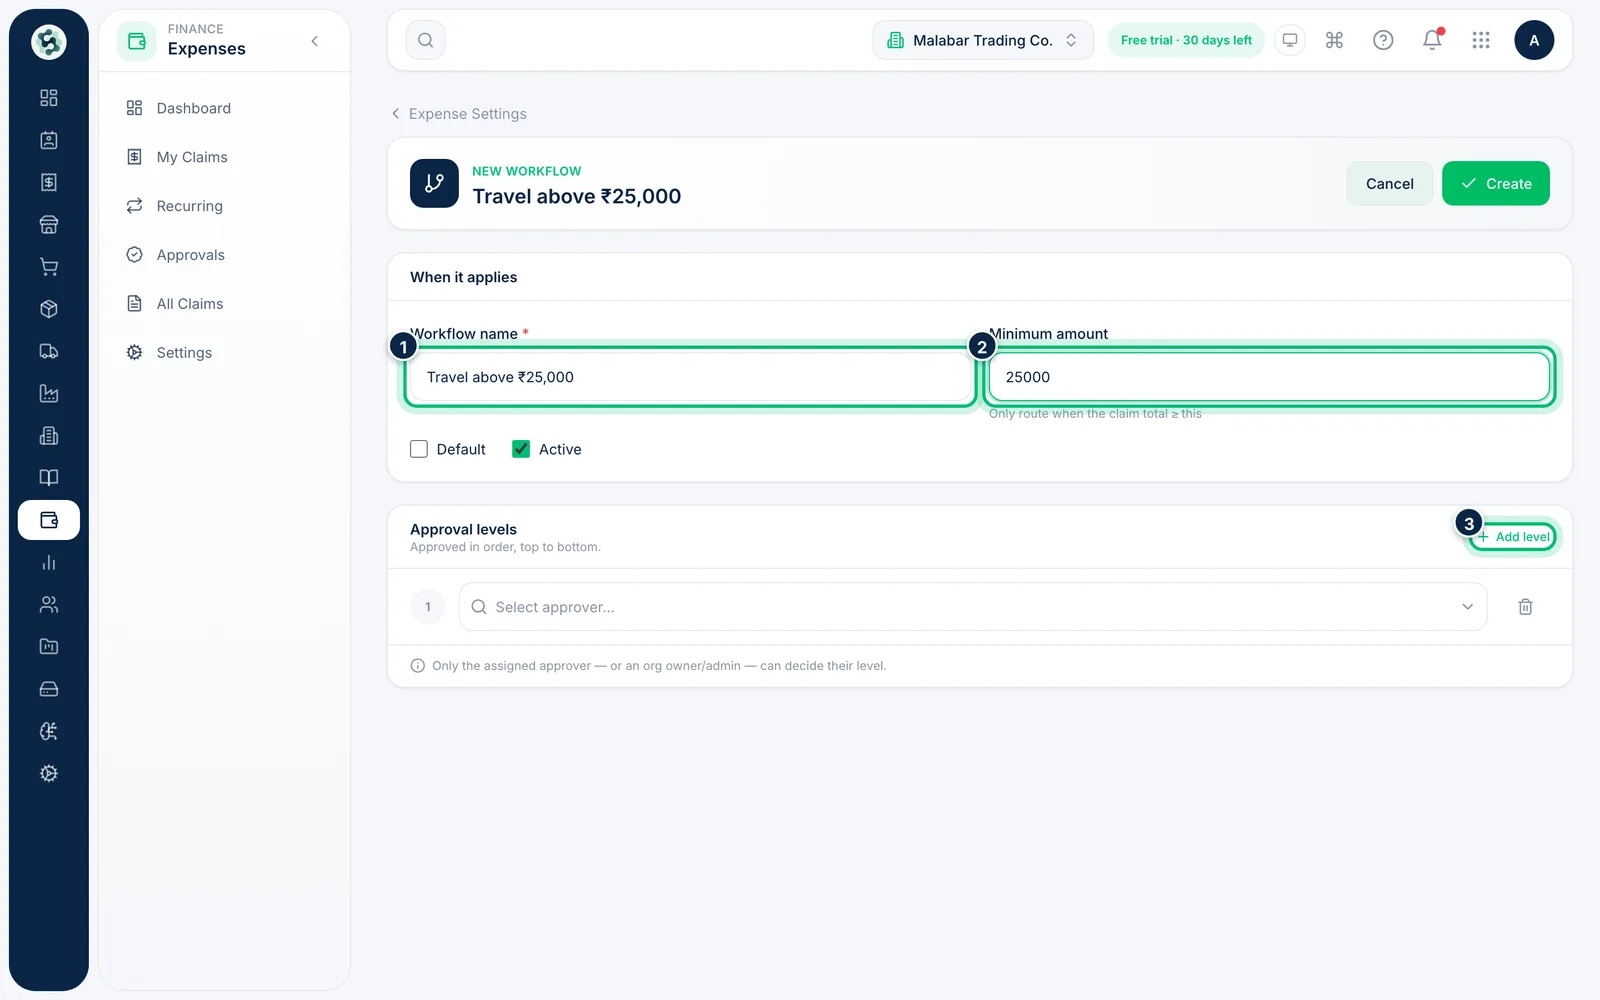
On the Approval workflow tab choose New workflow. Give it a Workflow name and a Minimum amount — it applies to claims whose total is at least that much. If several workflows match, the highest minimum amount is used. Pick an approver for each level and use Add level for more; levels are approved in order. Choose Create.
Related guides
Still stuck? Contact our support team — or start a free trial to try this in your own company.