
Purchasing & vendors · 4 steps
Set up a recurring bill
Create vendor bills automatically on a schedule — for rent, retainers or regular supplies.
Before you start: Add the vendor first.
1Start a recurring bill
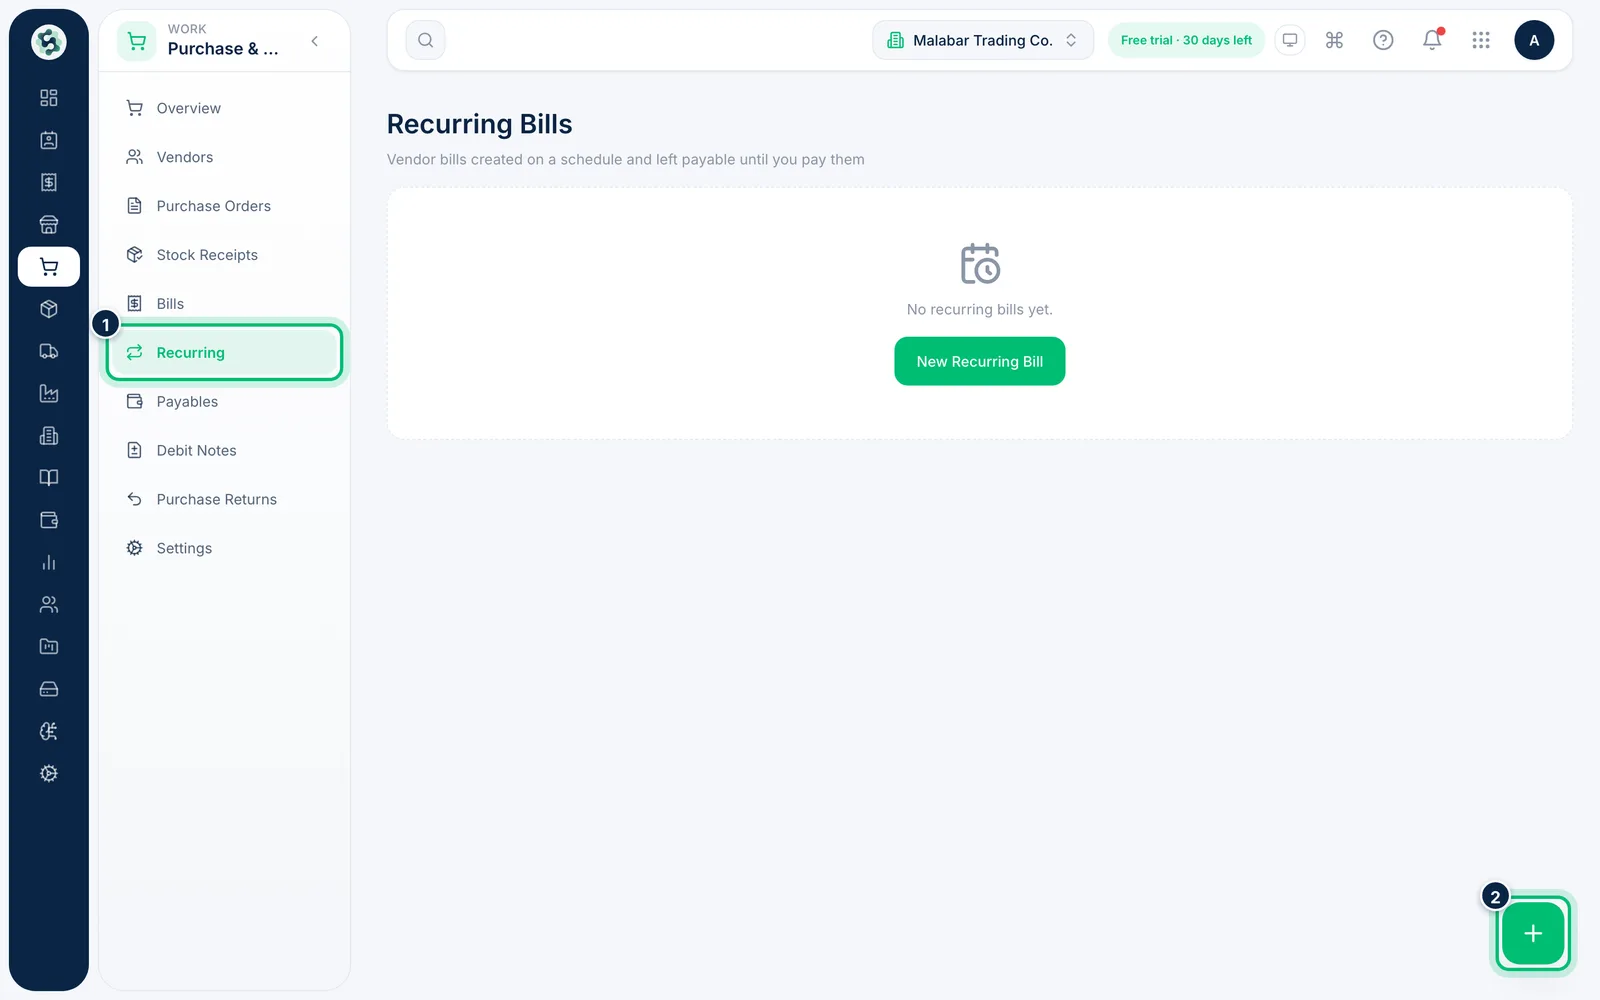
Go to Purchase & Vendors → Recurring and choose the + button at the bottom right. You can also choose Make recurring on an existing bill to copy it.
2Name the profile and pick the vendor
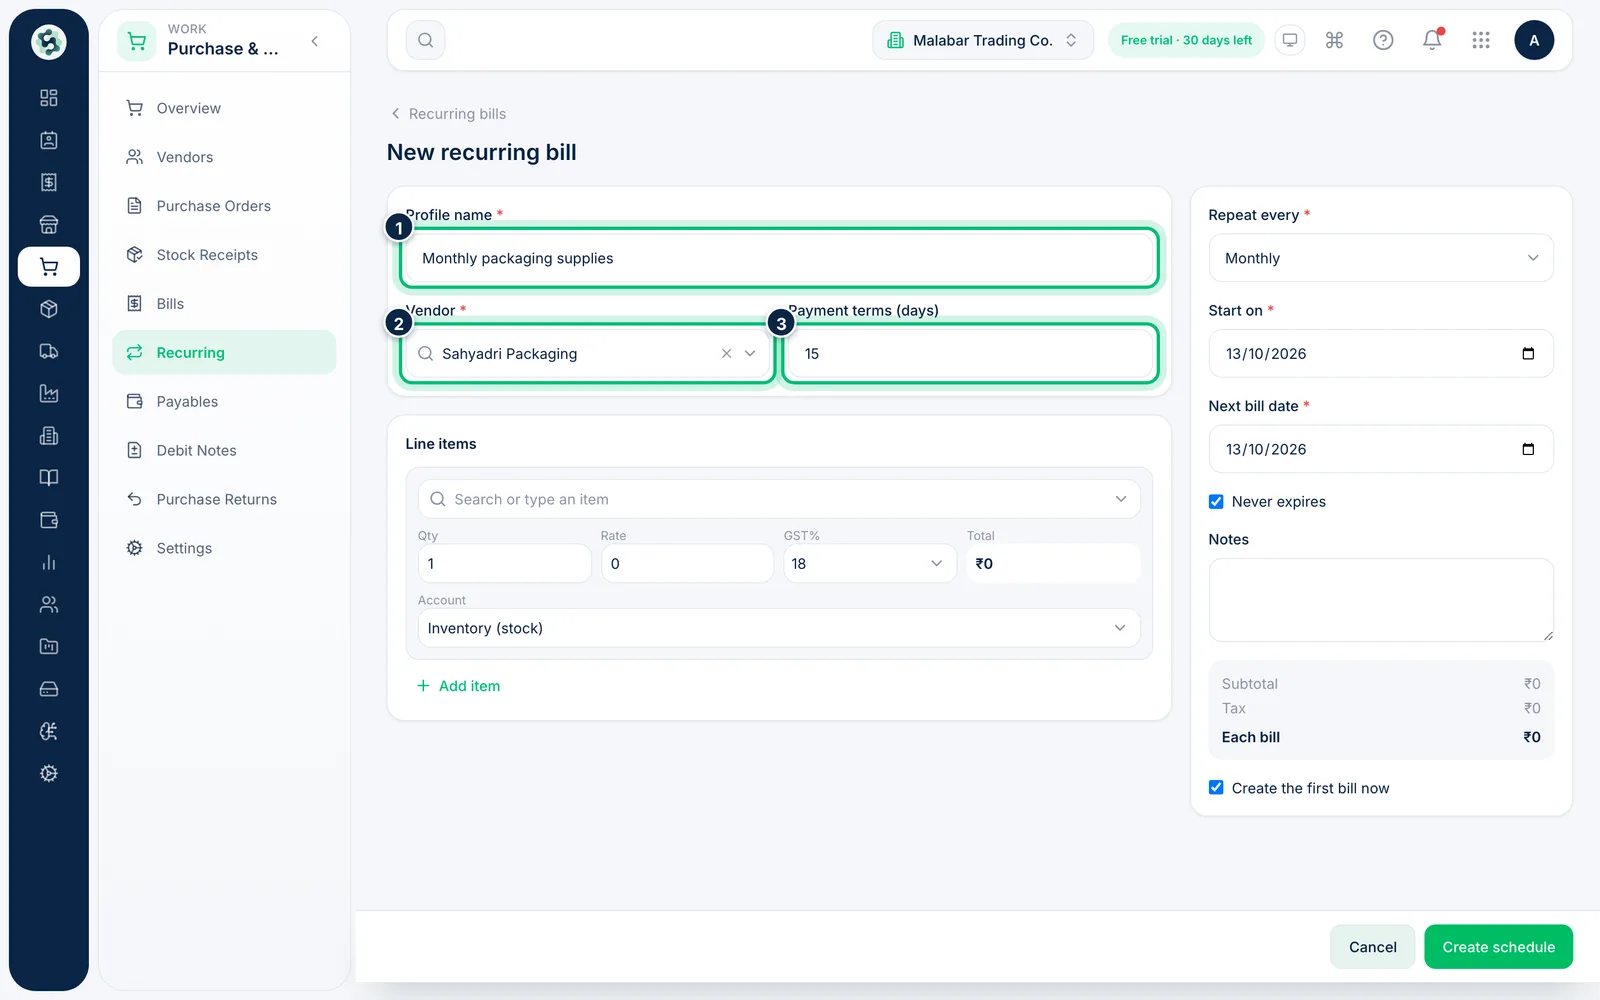
Give the schedule a Profile name you'll recognise, choose the Vendor, and set Payment terms (days) — how long after each bill date it falls due.
3Add the line items
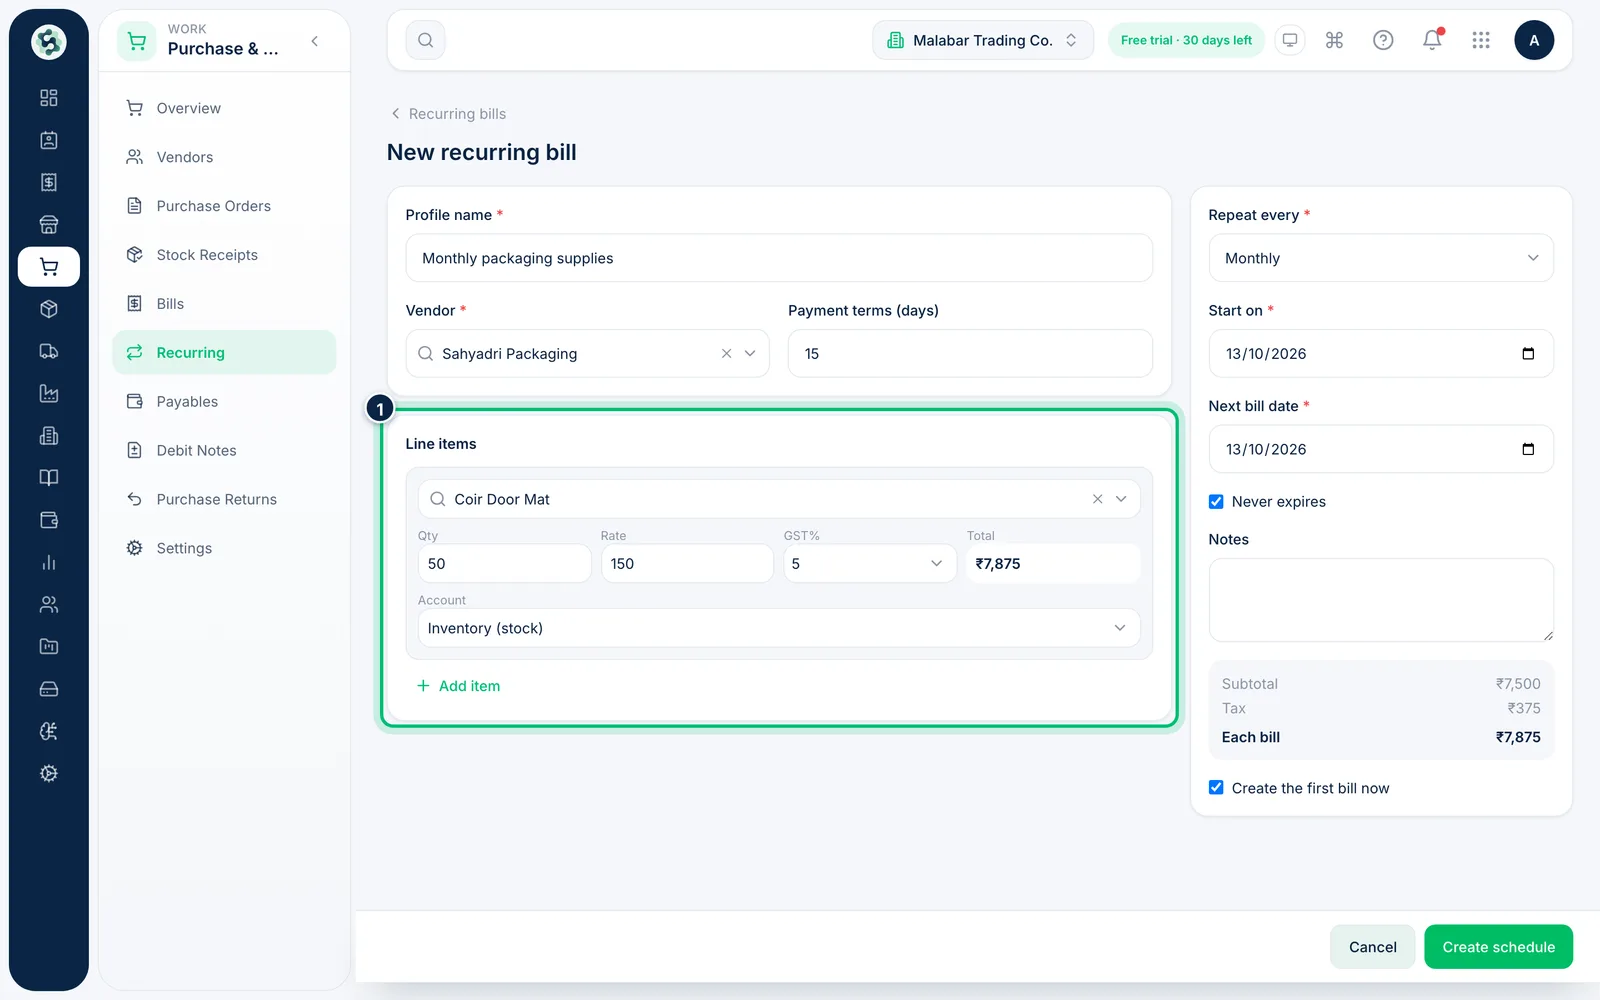
Pick an item or type a new description, then set the Qty, Rate and GST%. Account decides whether each line posts to Inventory (stock) or to an expense account.
4Set the schedule and create it
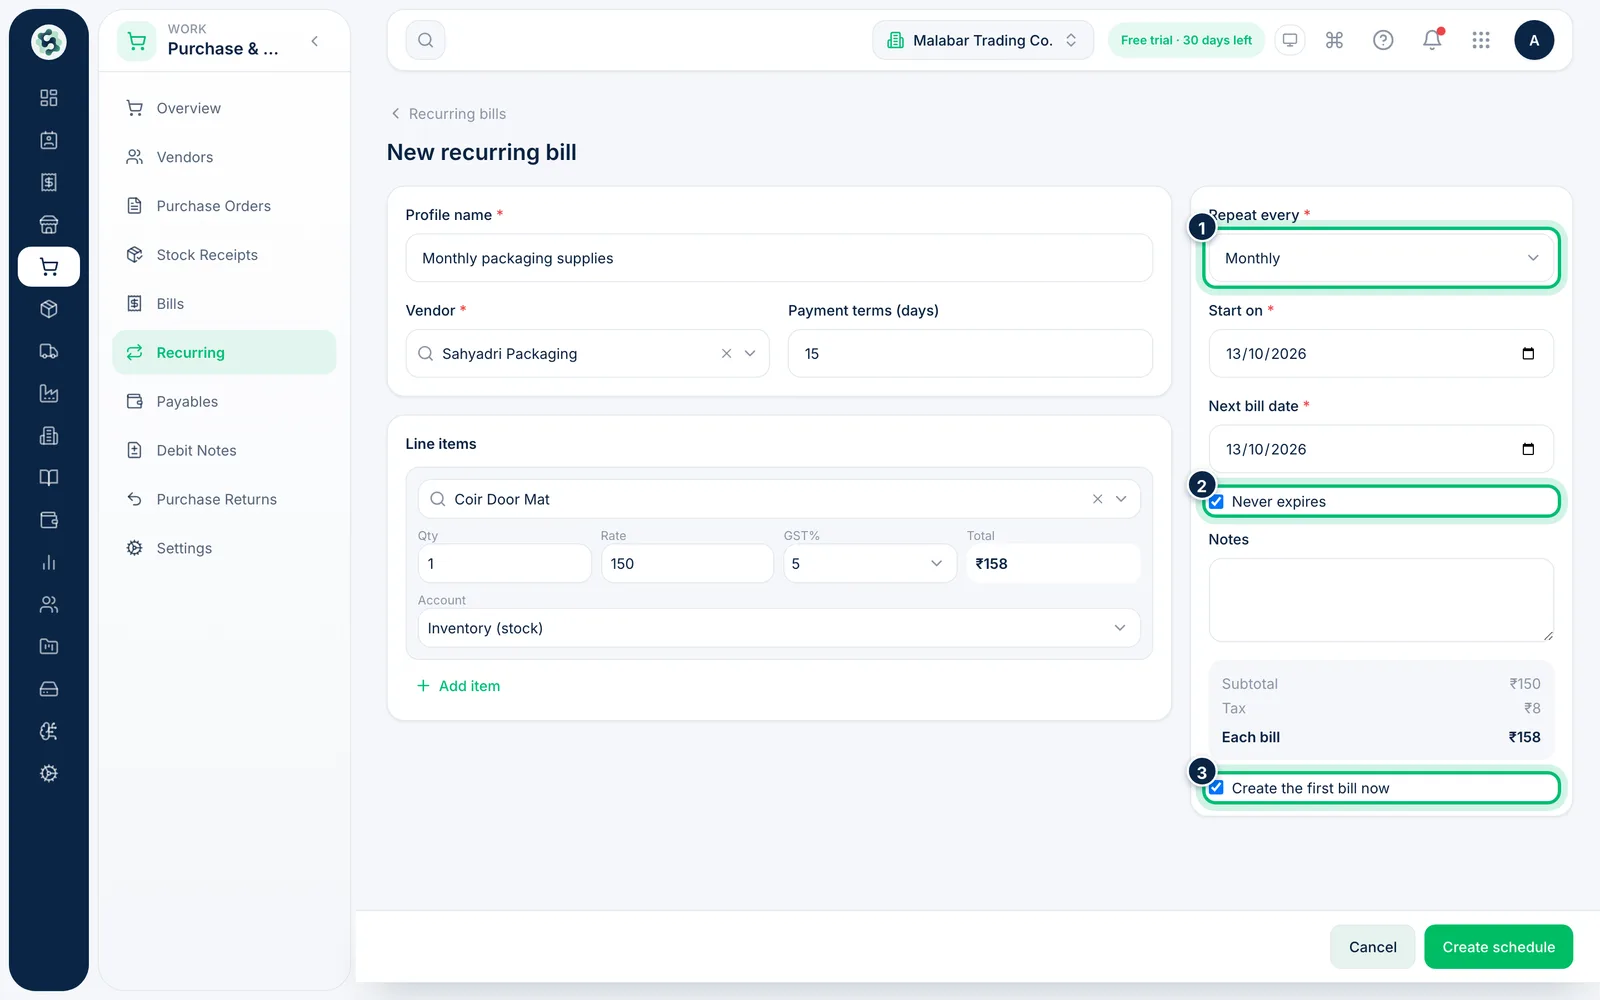
Choose how often in Repeat every, then set Start on and Next bill date. Untick Never expires to add an end date. Create the first bill now is ticked to raise the first bill straight away — untick it to wait for the next bill date. Then choose Create schedule.
Related guides
Still stuck? Contact our support team — or start a free trial to try this in your own company.