
Getting started · 8 steps
Invite users and set roles & permissions
Bring your team into Scalar360 and control exactly what each person can see and do.
Before you start: You need permission to manage users. Each user takes one seat on your plan. Only the Owner or an Admin can make someone an Admin.
1Open Users & Roles
Go to Settings → Users & Roles. The Members tab lists everyone in your organisation, with tabs for Invitations and Roles. Choose Invite to add someone.
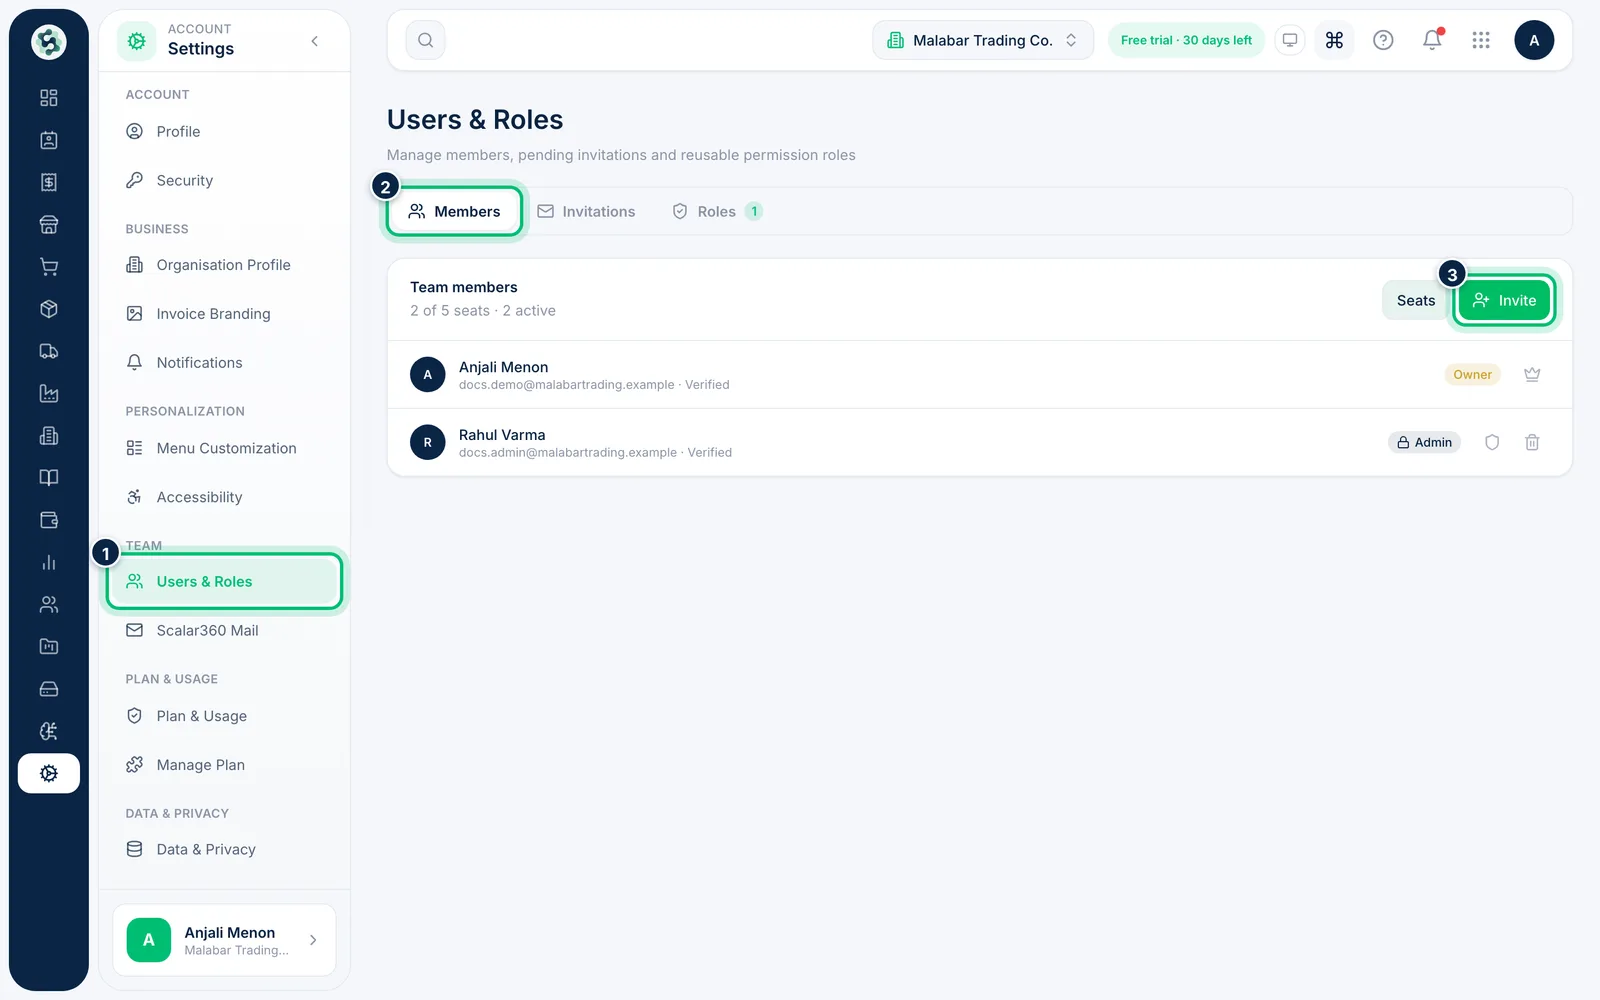
2Invite a teammate
Enter their Name and Email, then pick a Role — Staff, Manager or one of your saved roles. Choose Send and they'll get an email to join.
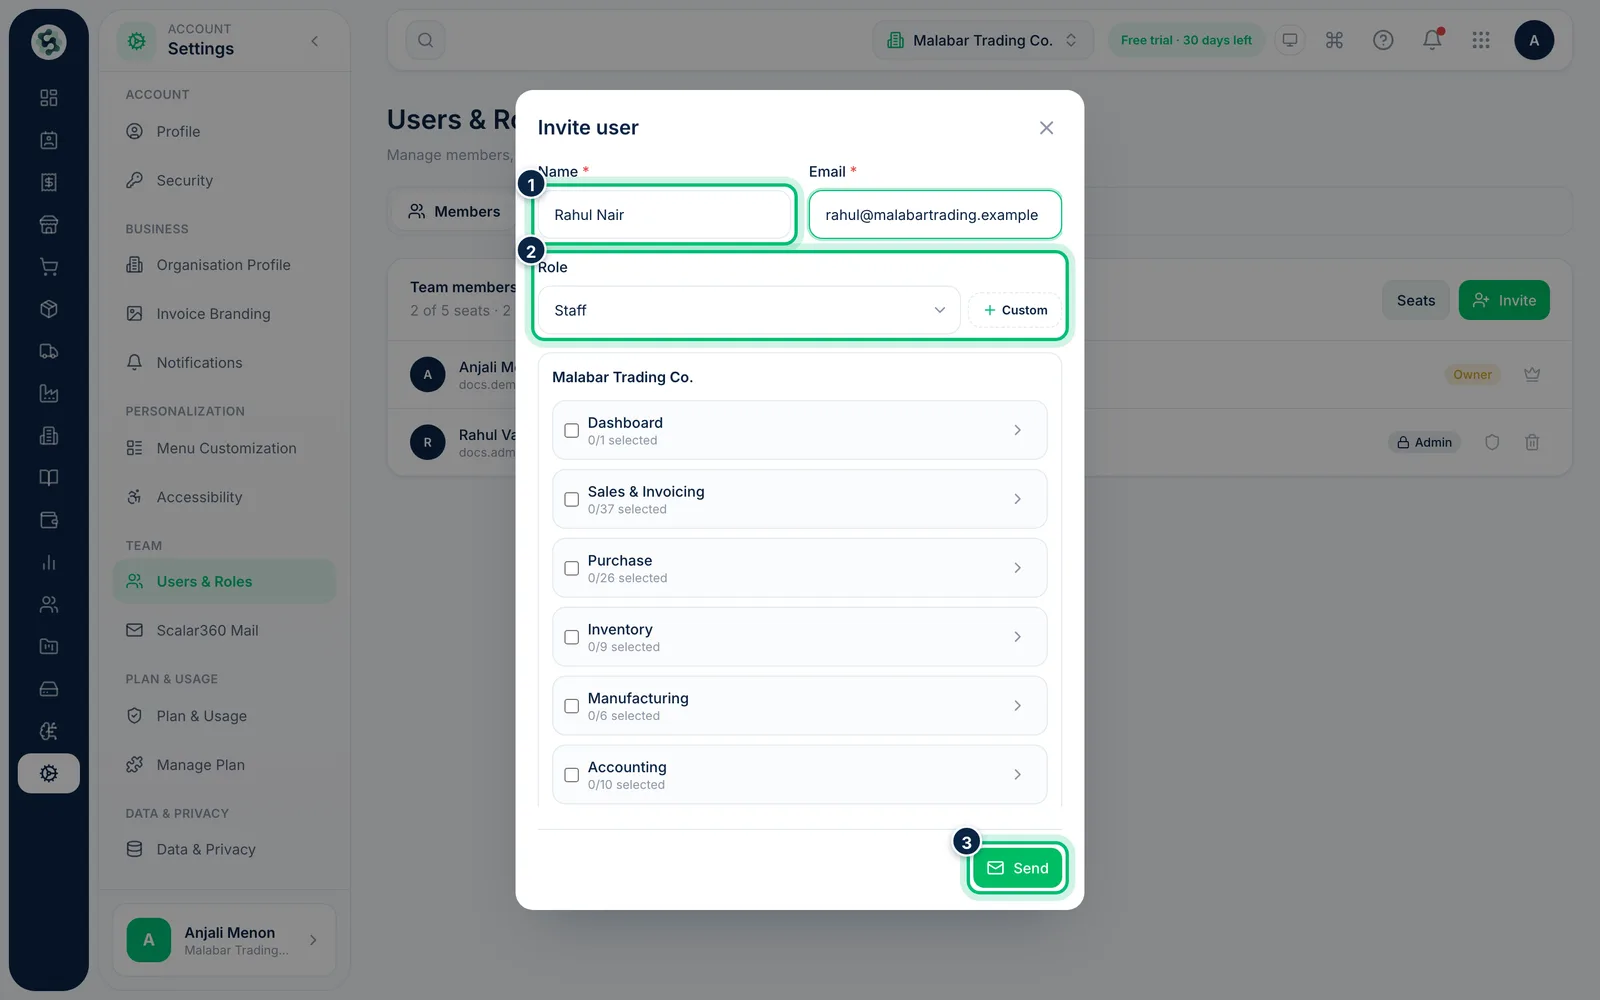
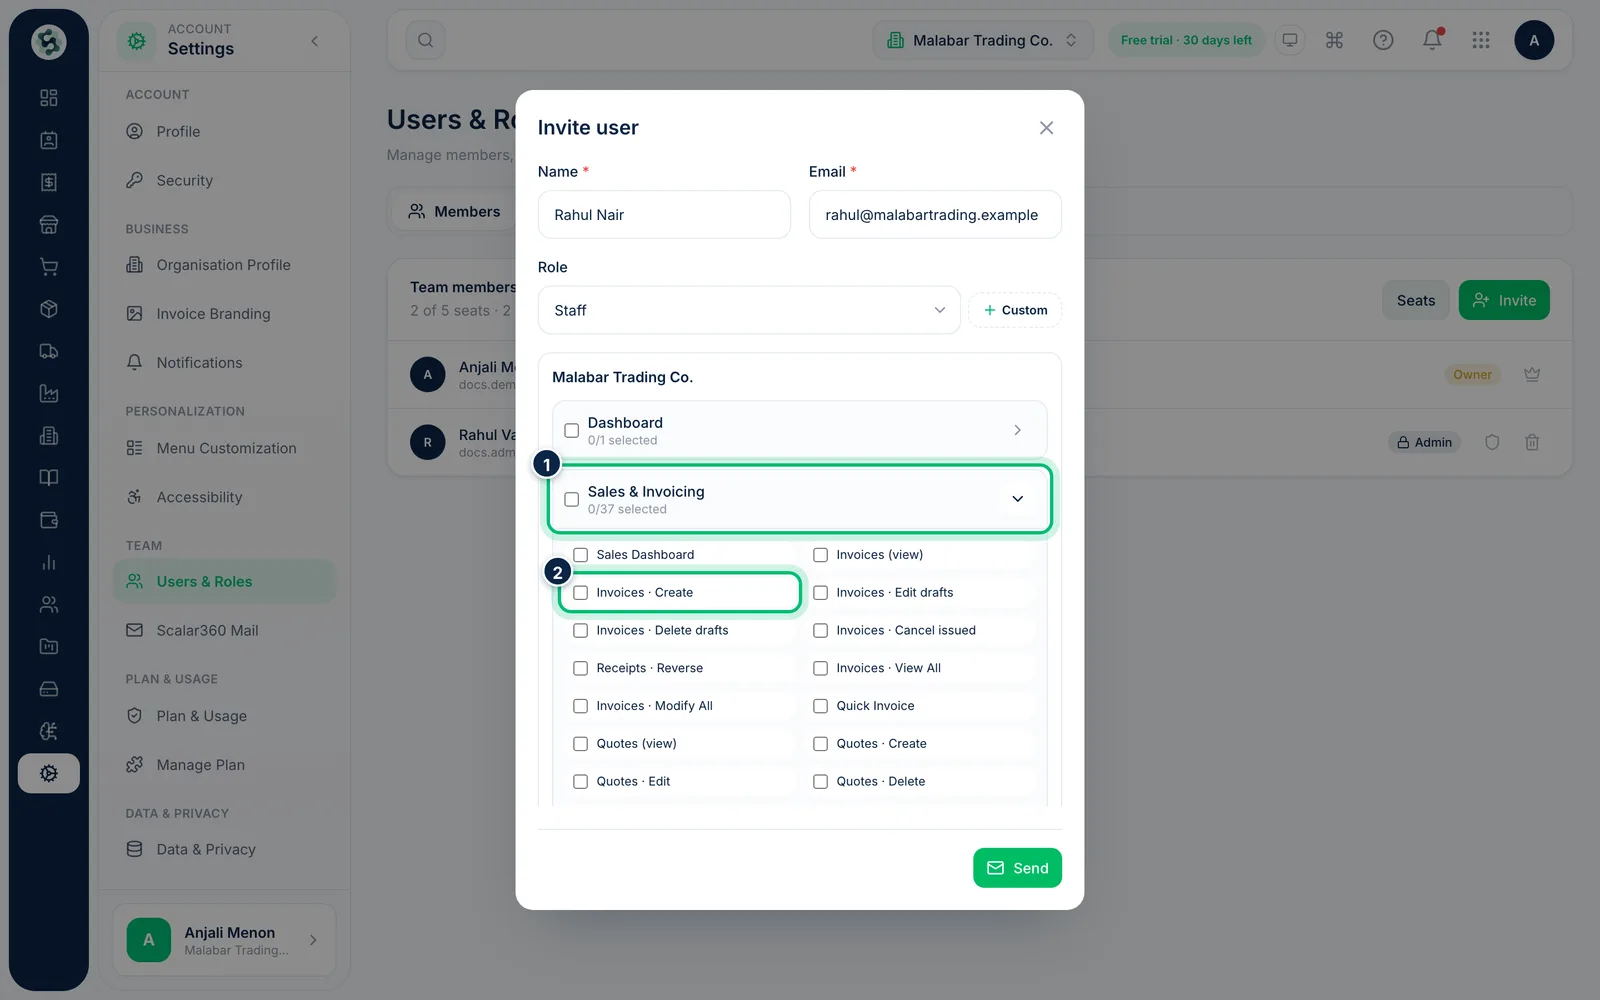
3Fine-tune their permissions
Below the role, tick a whole module, such as Sales & Invoicing, or open it with the arrow to tick individual permissions, such as Invoices · Create. If you picked a saved role, changing its ticks customises it for this person only.
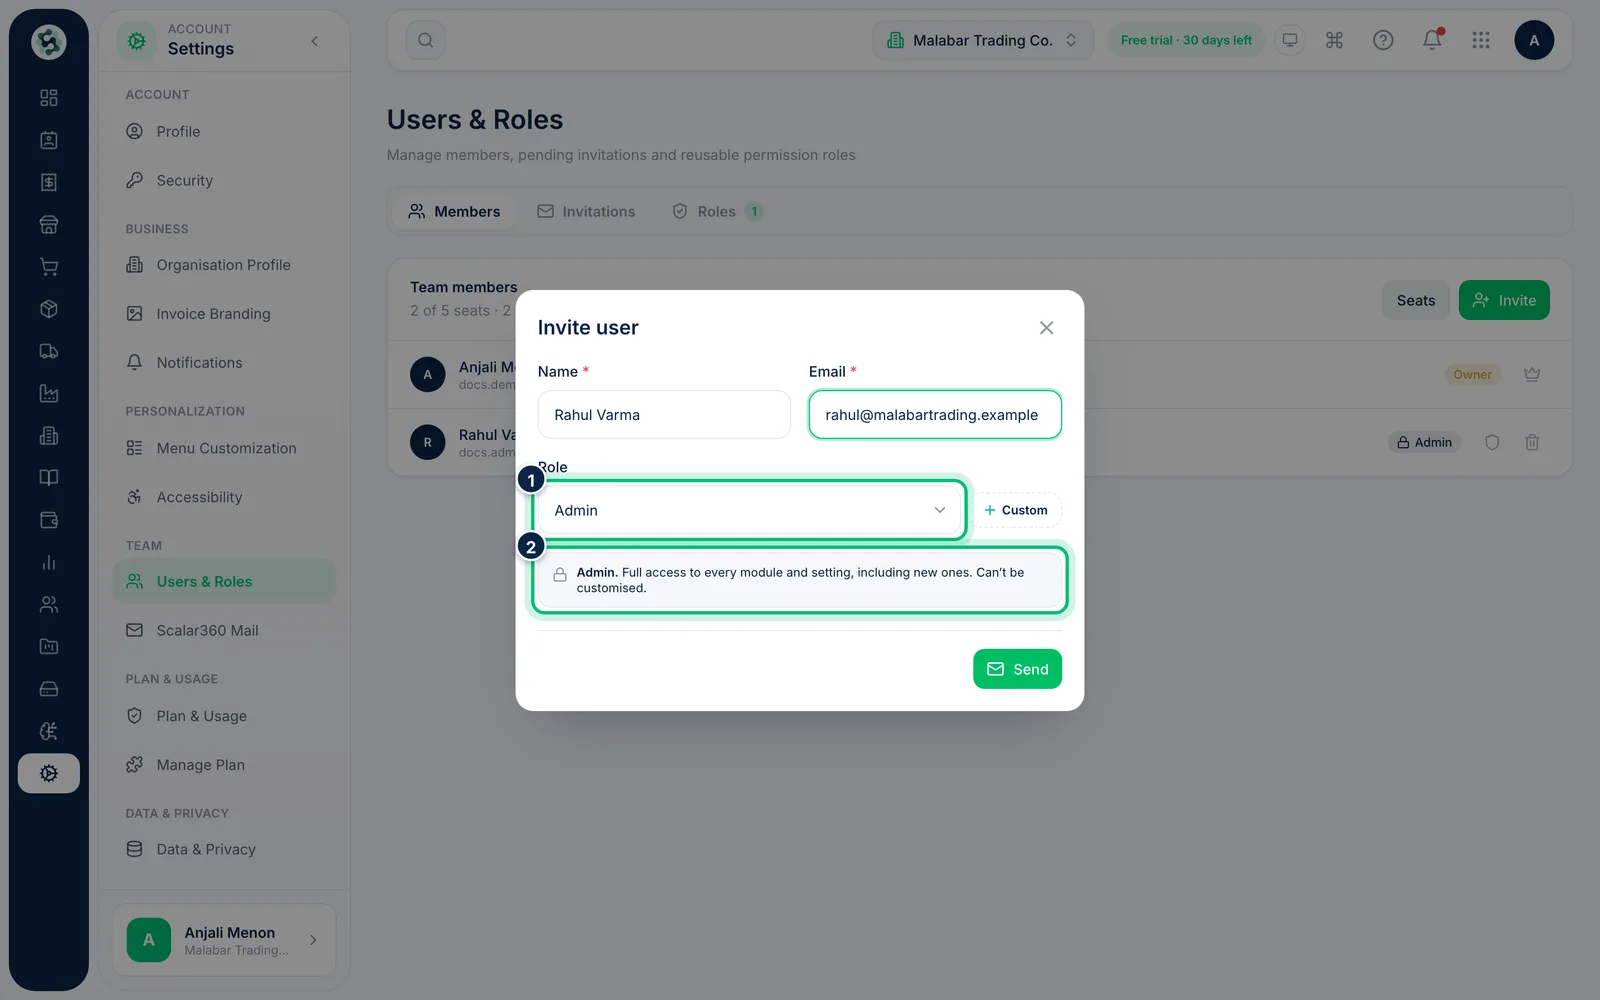
4Give full access with the Admin role
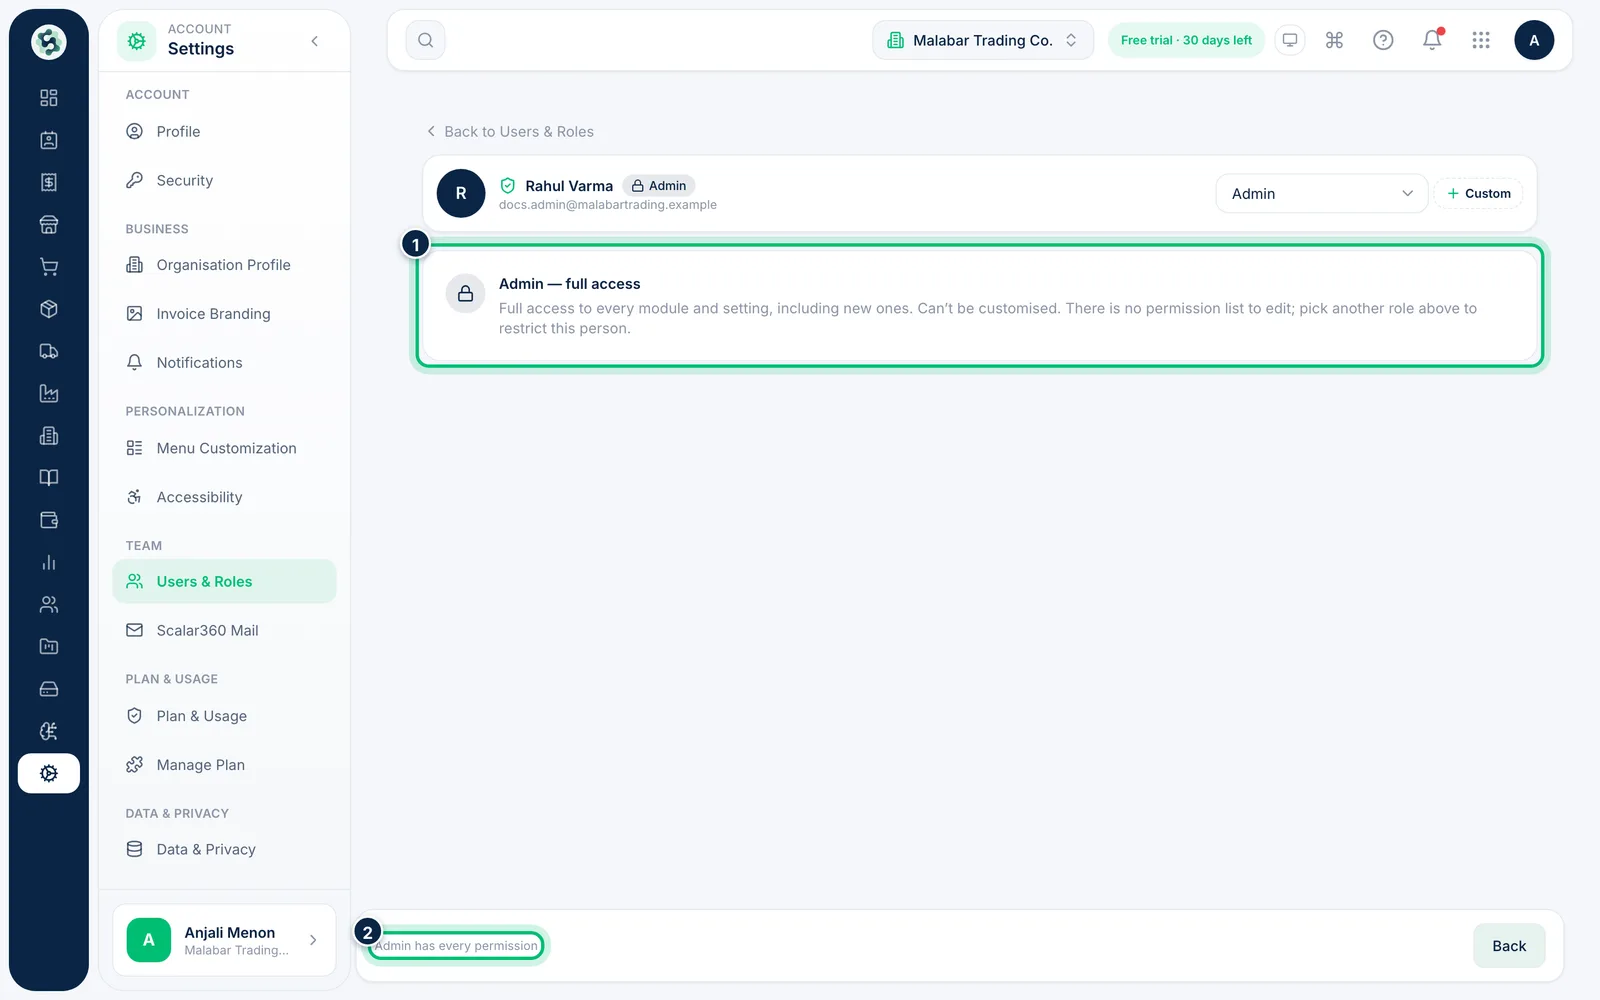
To hand someone everything, set Role to Admin. An Admin has full access to every module and setting, including features added later, and the permission list is replaced by a locked notice because it can't be customised. Only the Owner or an Admin sees this option.
5Check an Admin's access
On the Members tab, choose the Edit access icon next to an Admin. Instead of the permission grid you'll see Admin — full access. To restrict that person, pick another role above the notice and choose Save access.
6Create a reusable role
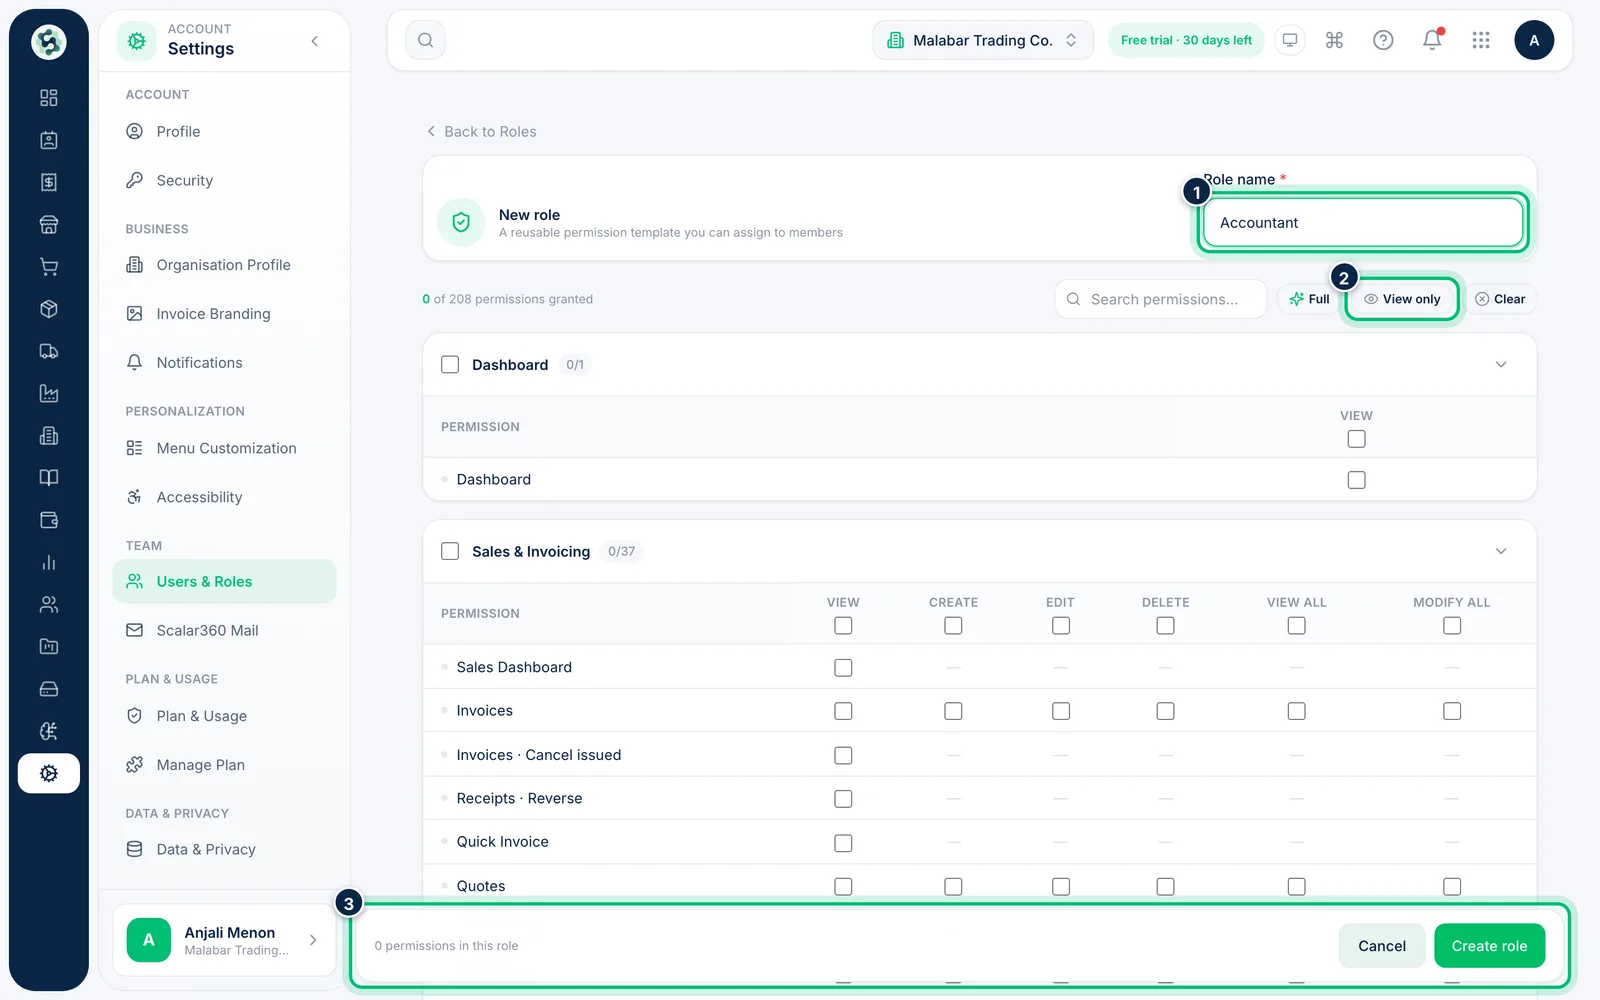
On the Roles tab, choose New role. Give it a Role name, such as Accountant, then tick permissions — or start from Full, View only or Clear. Choose Create role to save it. The name Admin is reserved, so you can't use it for a custom role.
7Check the roles you have
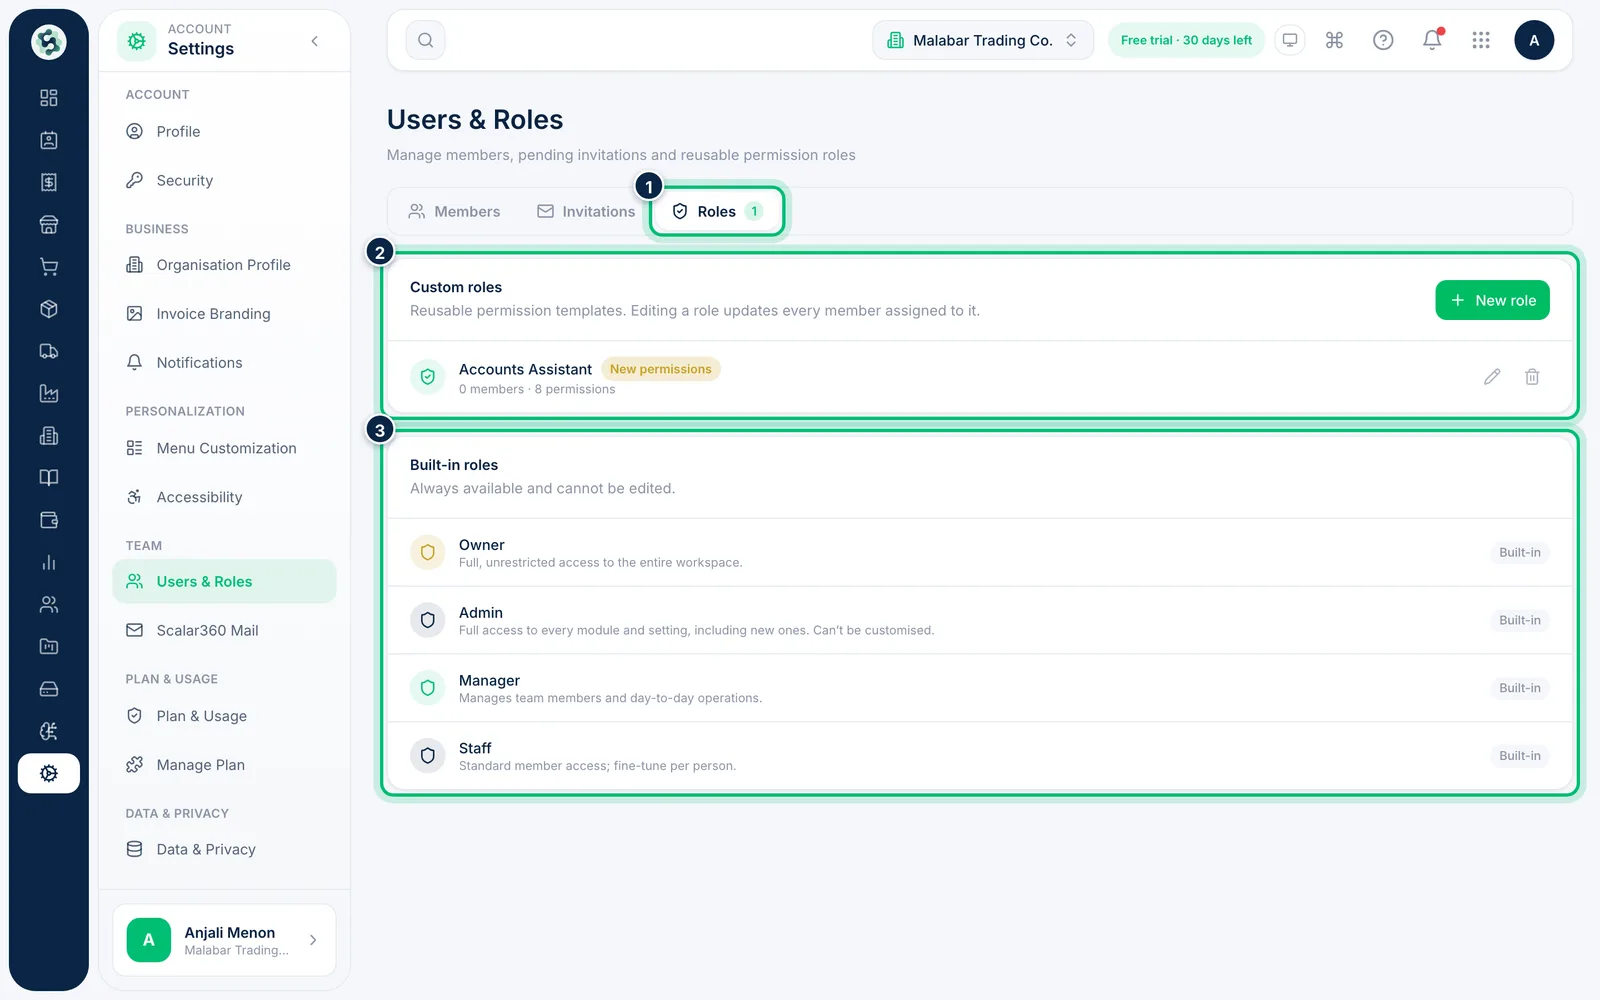
The Roles tab lists your Custom roles, with how many members use each, and the Built-in roles — Owner, Admin, Manager and Staff — which are always available and can't be edited. Use the pencil icon next to a custom role to change it.
8Review new permissions on a custom role
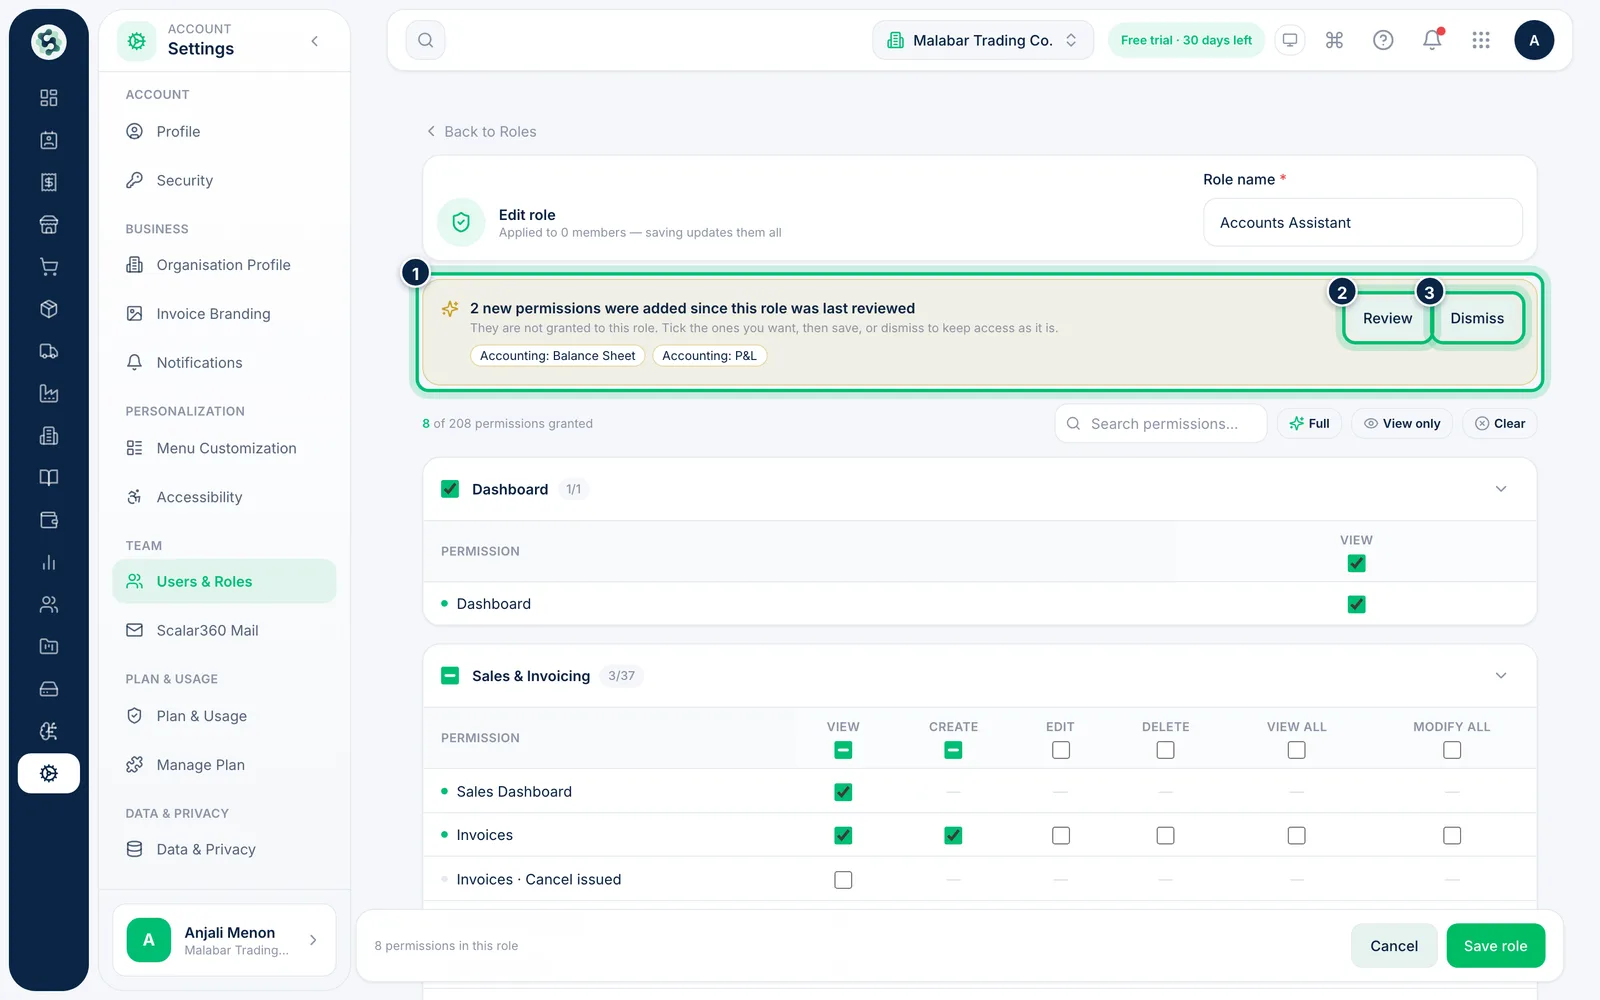
When a Scalar360 update adds permissions, a custom role shows a New permissions badge on the Roles tab. Open it with the pencil icon: a notice says how many new permissions were added since the role was last reviewed. Choose Review to find them in the list and tick any you want, or Dismiss to keep access as it is.
Related guides
Still stuck? Contact our support team — or start a free trial to try this in your own company.