
Expenses · 6 steps
Submit an expense claim with receipts and GST
Record what you spent — travel, hotels, meals, mileage — attach the receipts and send the claim for approval.
Before you start: Your administrator sets up the expense categories first. You need permission to create expense claims.
1Start a new claim
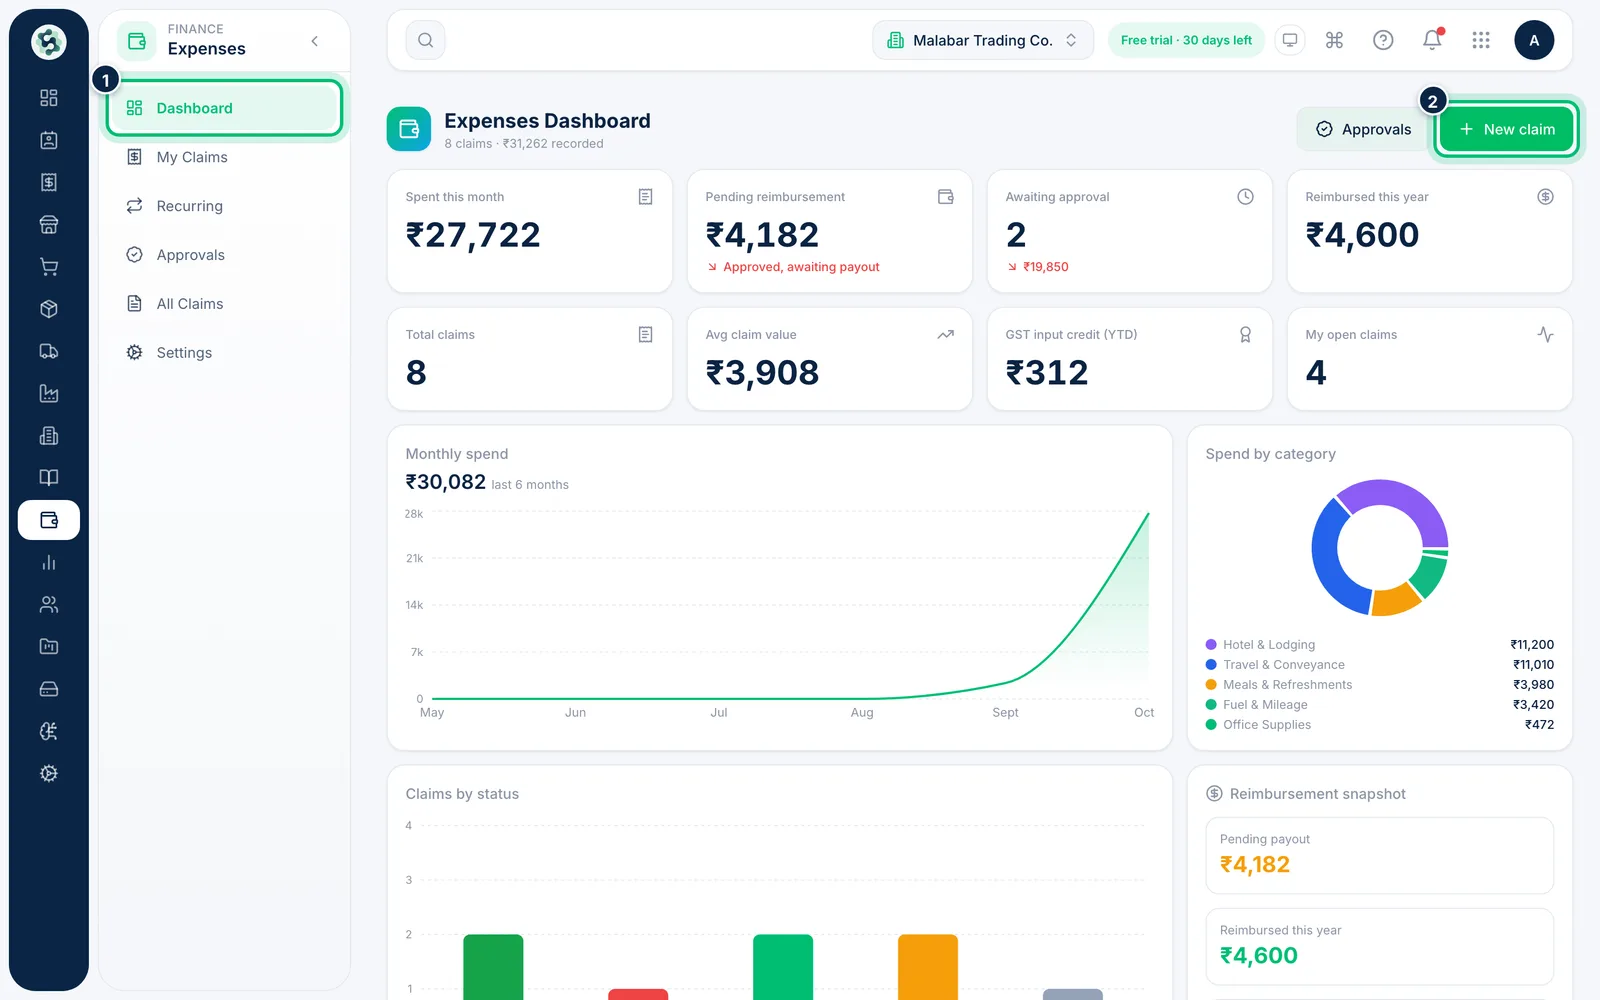
In the left menu open Expenses. The dashboard shows what's been spent and what's waiting. Choose New claim at the top right.
2Give the claim a title
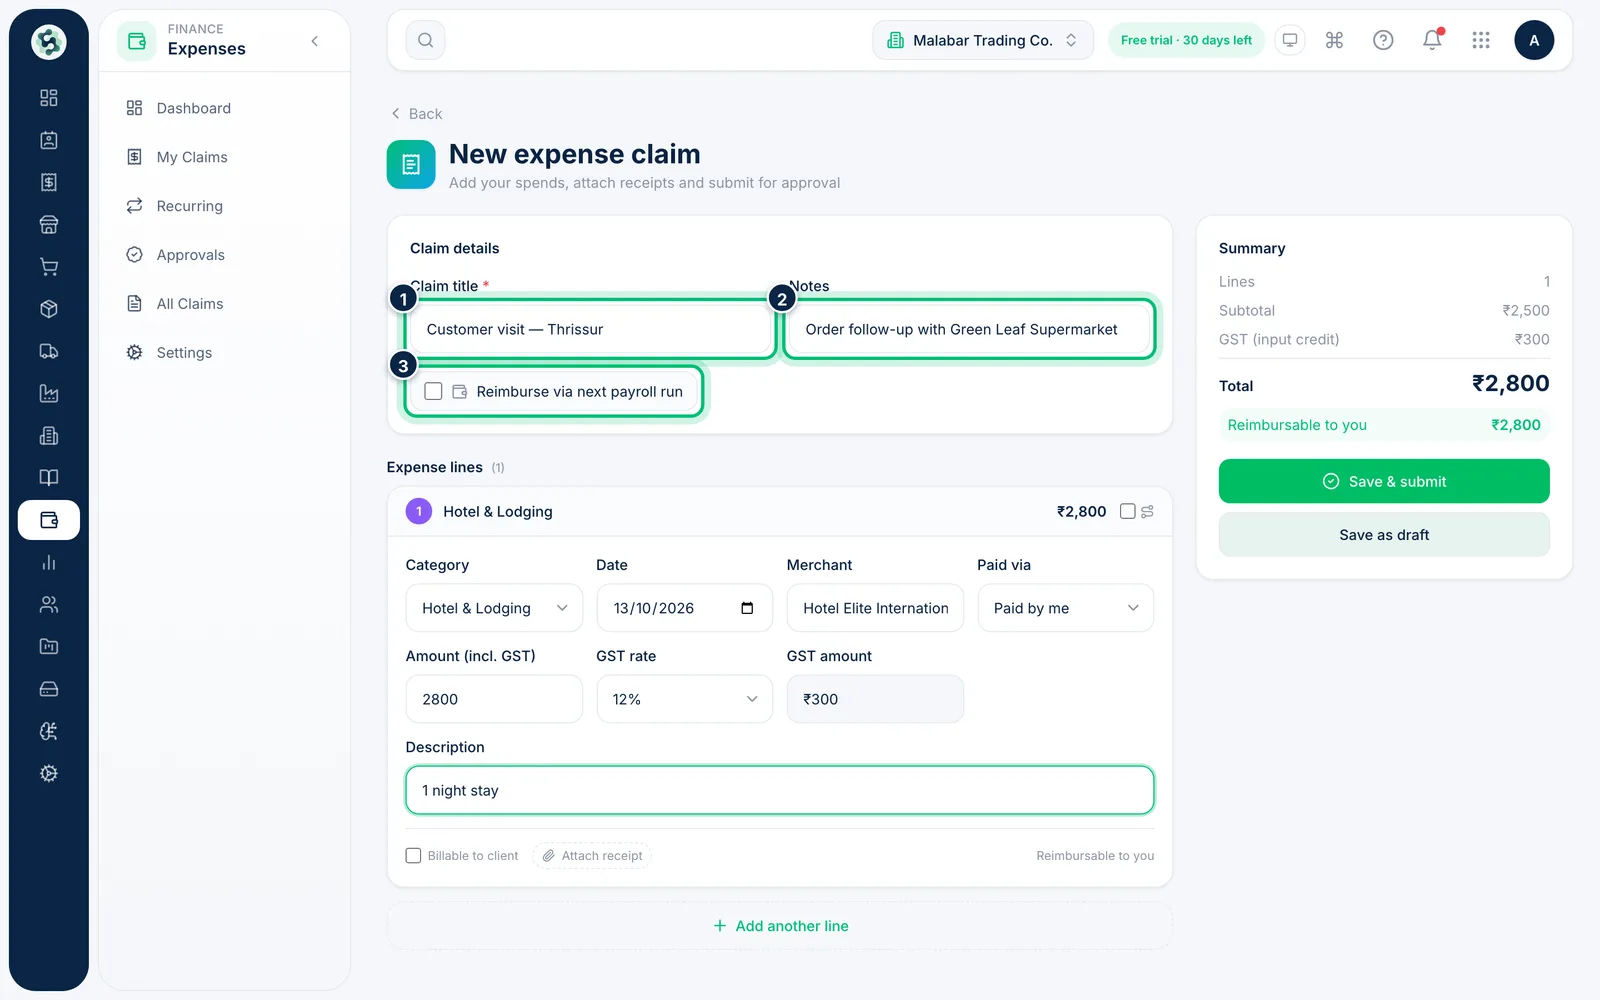
Enter a Claim title — for example the trip or event the spends belong to — and any Notes for your approver. Tick Reimburse via next payroll run if you'd like the money added to your next payslip instead of paid separately. Your account email must match your employee record's email for payroll to find the claim.
3Fill in the expense line
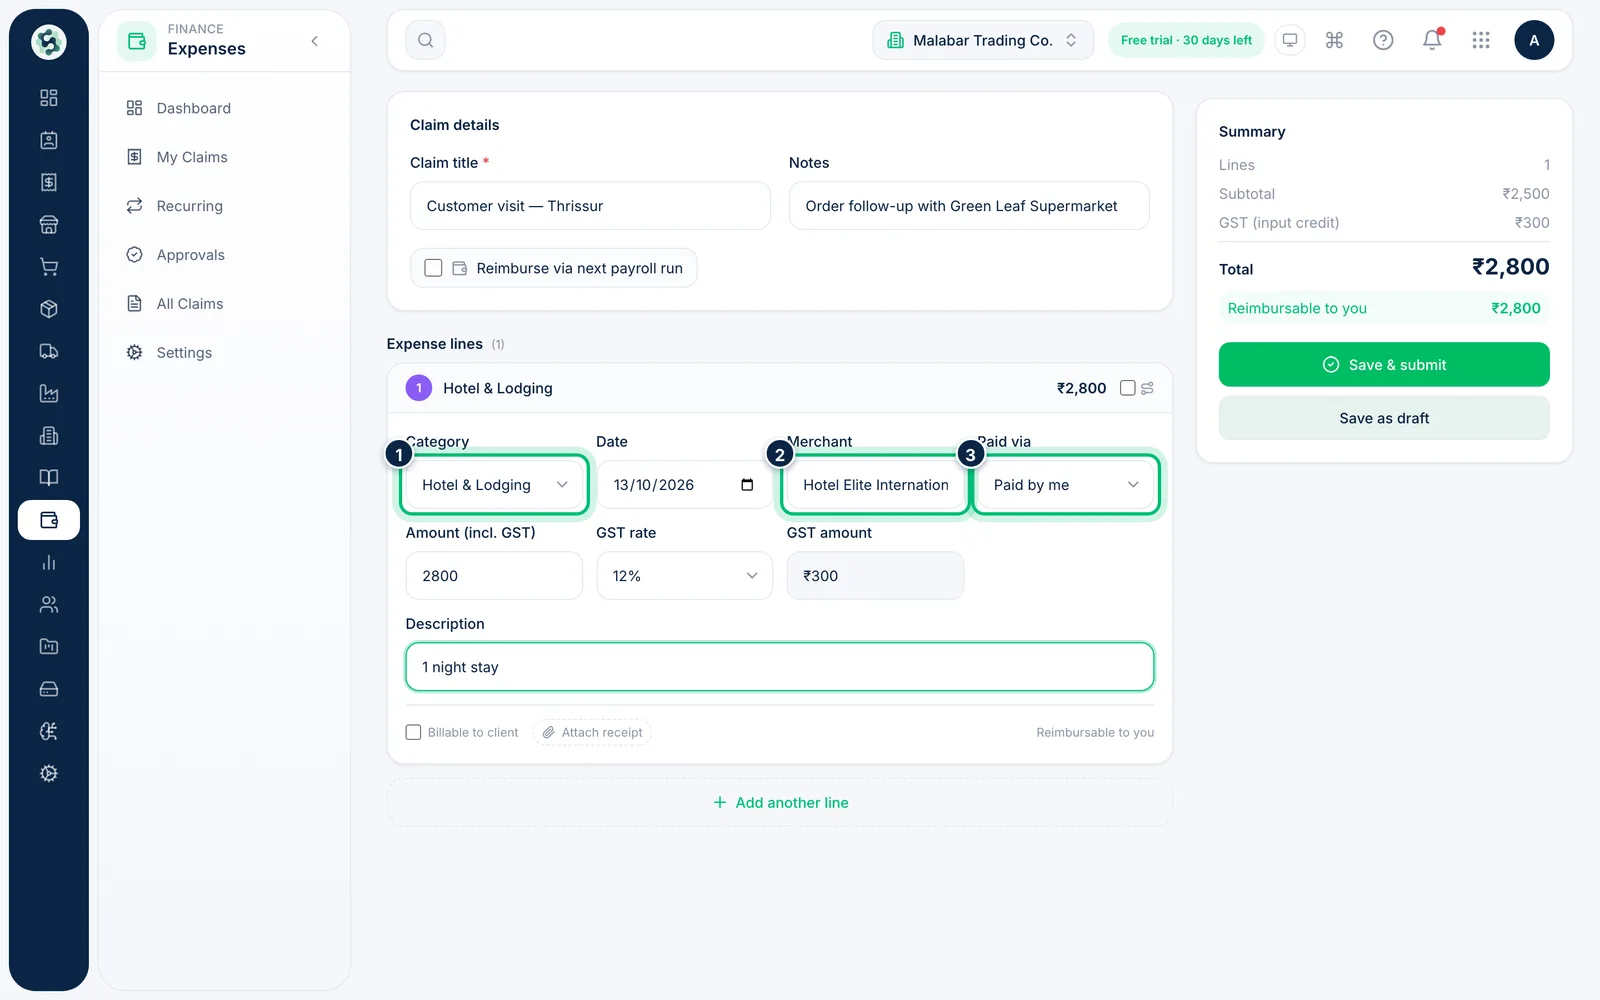
Choose the Category, the Date you spent the money and the Merchant you paid. Under Paid via, pick Paid by me or Cash for money you're owed back, or Company card or Company account if the company paid.
4Enter the amount and GST
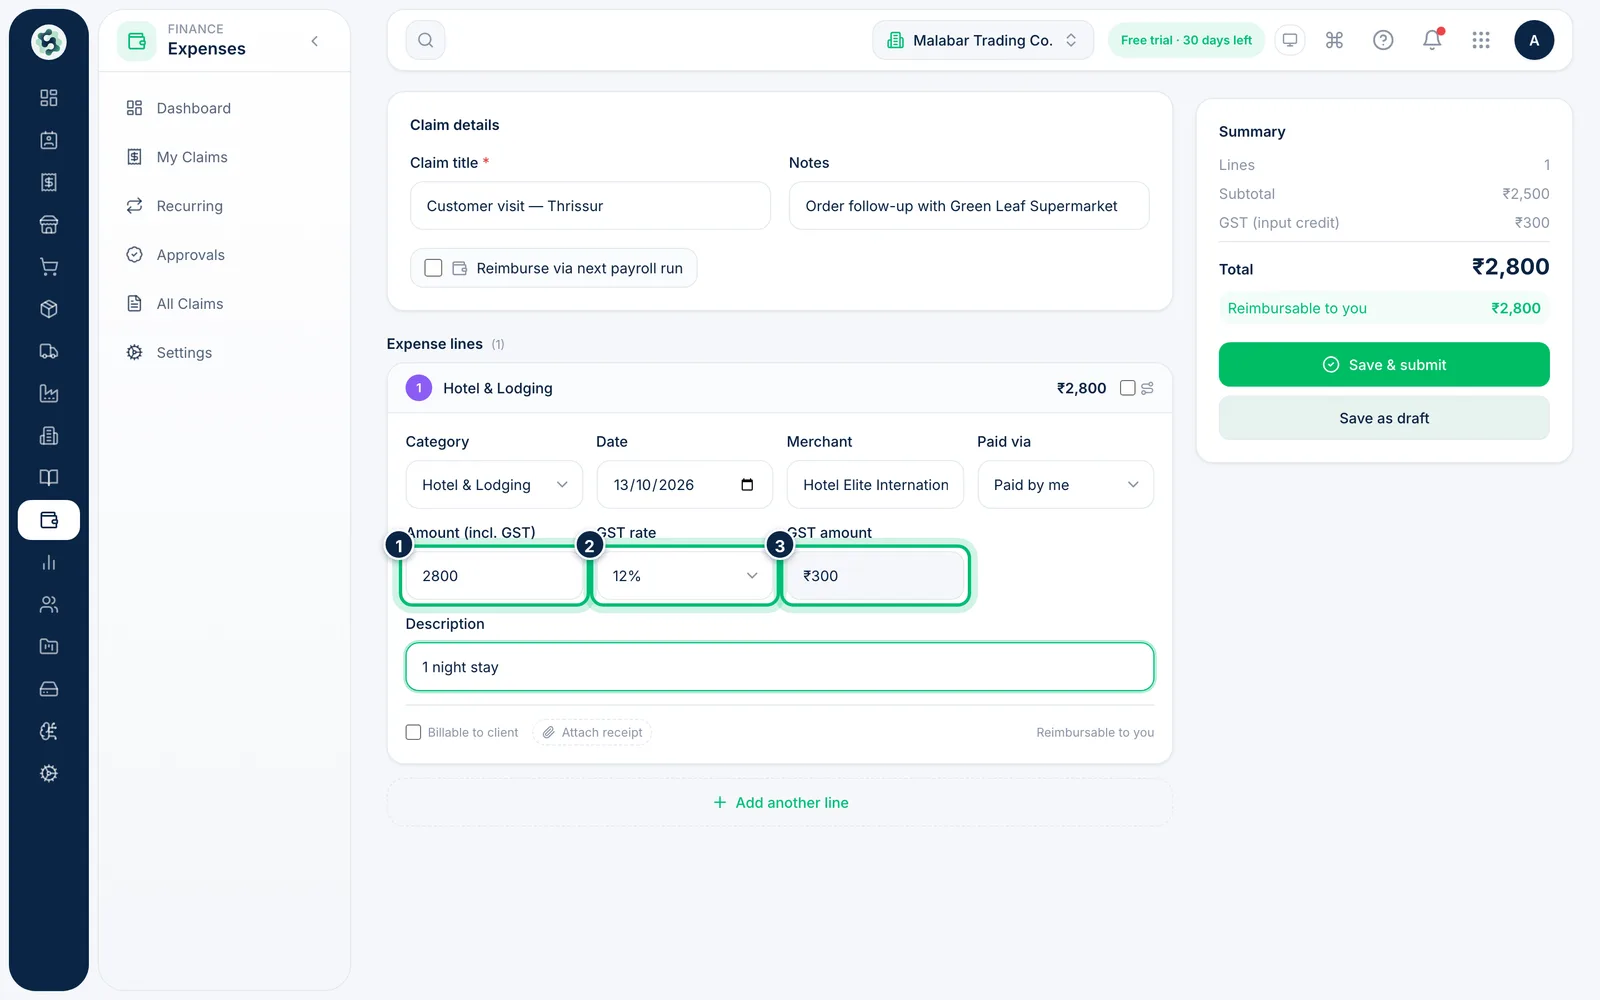
Type the Amount (incl. GST) exactly as it appears on the bill and choose the GST rate. The GST amount inside that total is worked out for you. Add a short Description of what the spend was for.
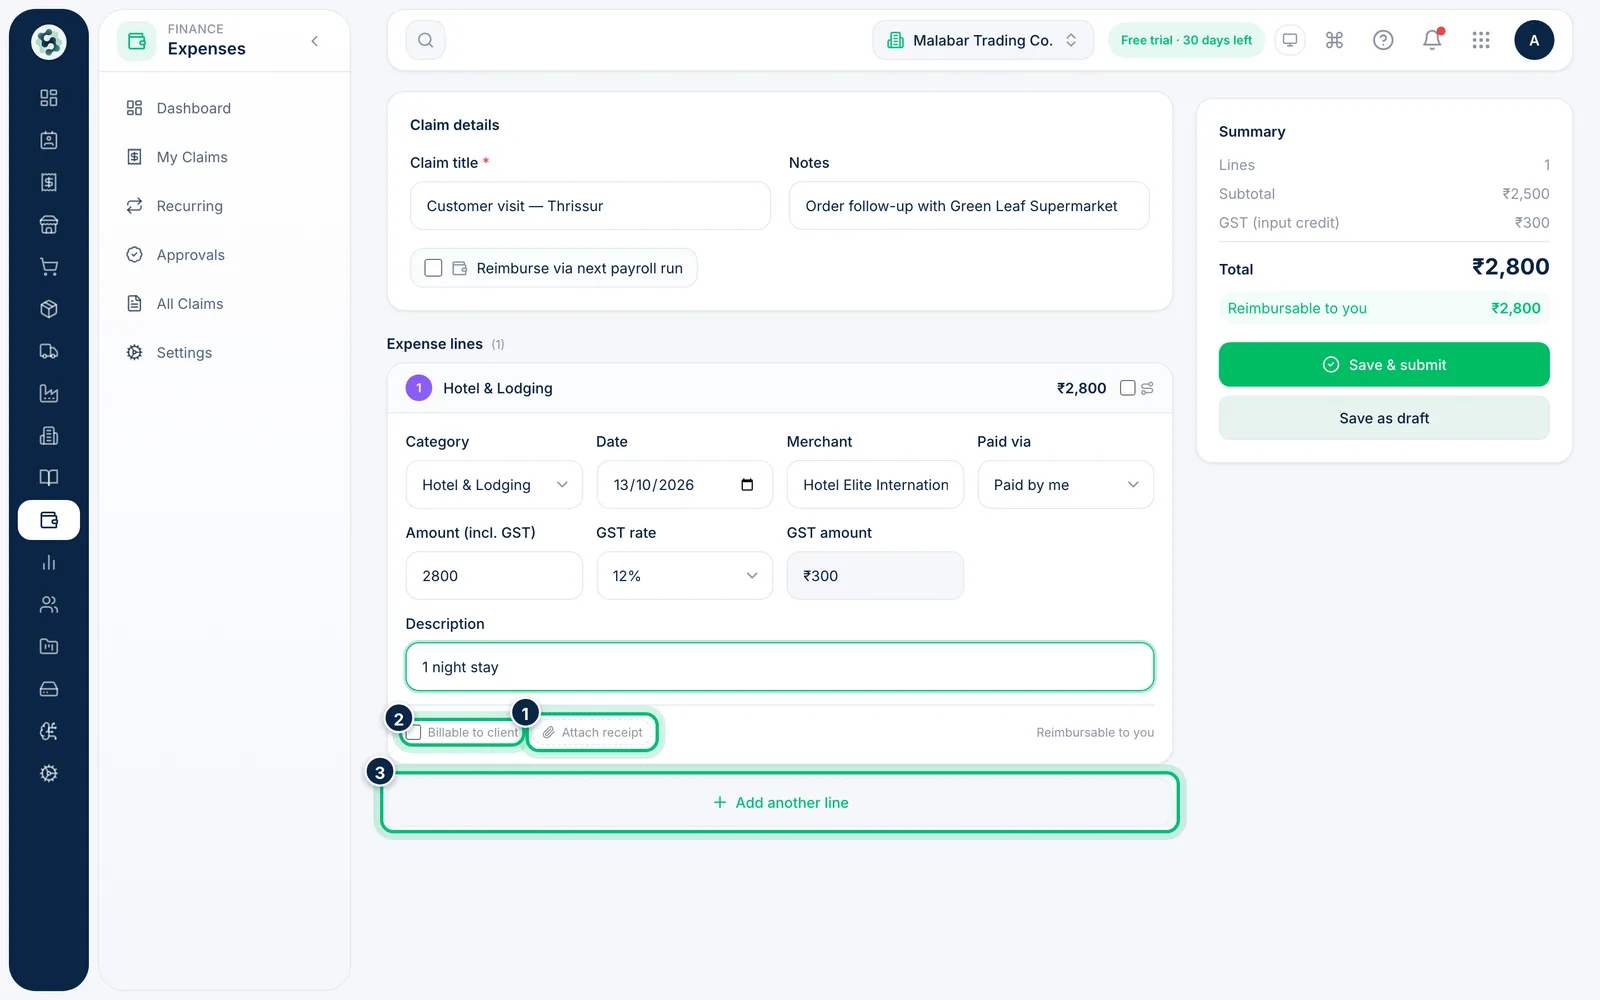
5Attach the receipt and add more lines
Choose Attach receipt to upload a photo or PDF of the bill. Tick Billable to client if you'll charge it on to a customer. Use Add another line for each further spend on the same claim.
6Check the summary and submit
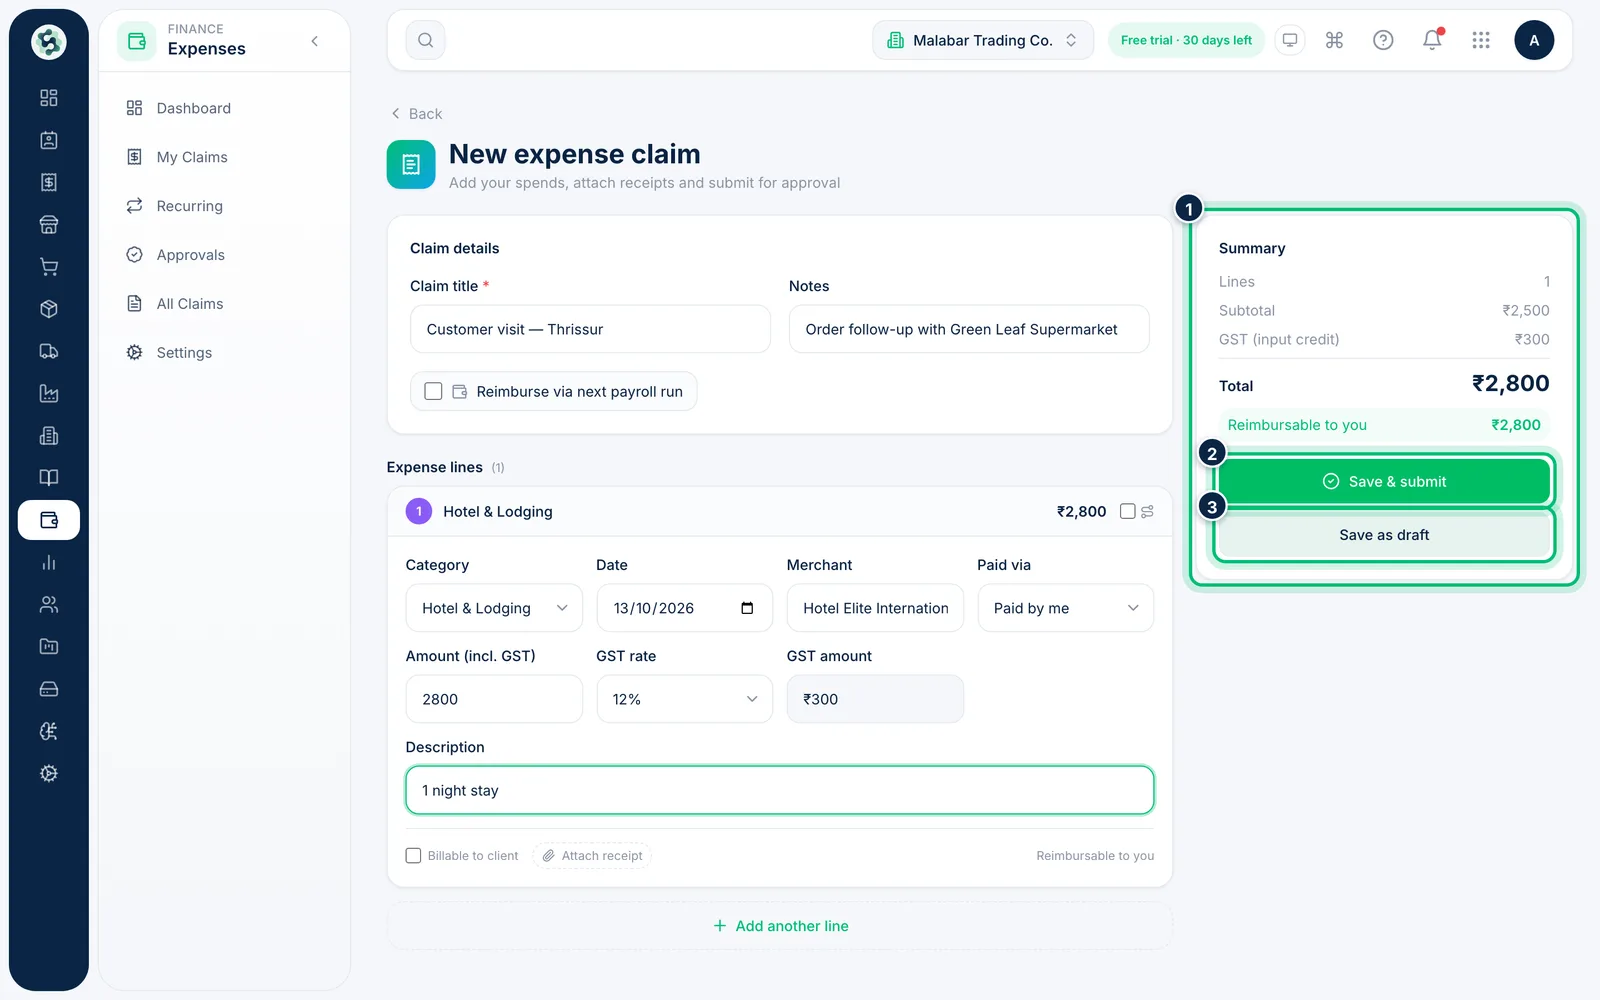
The Summary shows the subtotal, the GST (input credit), the Total and how much is Reimbursable to you. Choose Save & submit to send the claim for approval, or Save as draft to finish it later.
Related guides
Still stuck? Contact our support team — or start a free trial to try this in your own company.