
Purchasing & vendors · 3 steps
Customise purchase fields and columns
Add your own fields to vendors, purchase orders, receipts, bills and debit notes, and choose the columns each list shows.
Before you start: You need edit access to the record type you're customising.
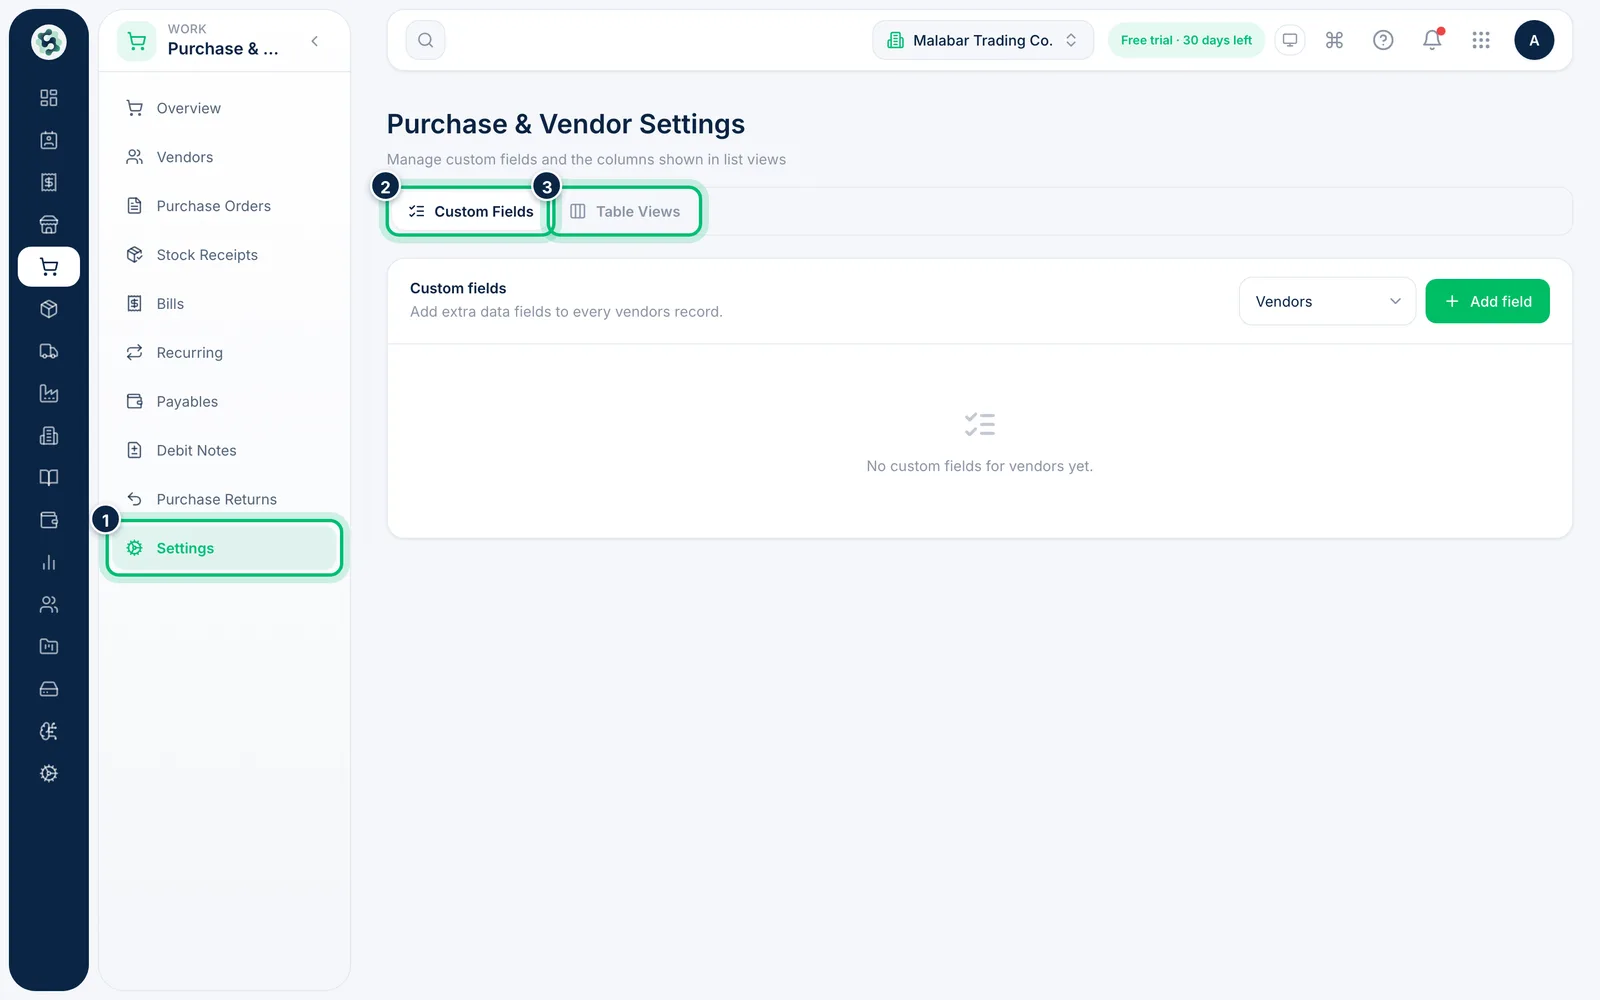
1Open purchase settings
Go to Purchase & Vendors → Settings. The Custom Fields tab lists the extra fields you've added; Table Views controls the columns in each list.
2Add a custom field
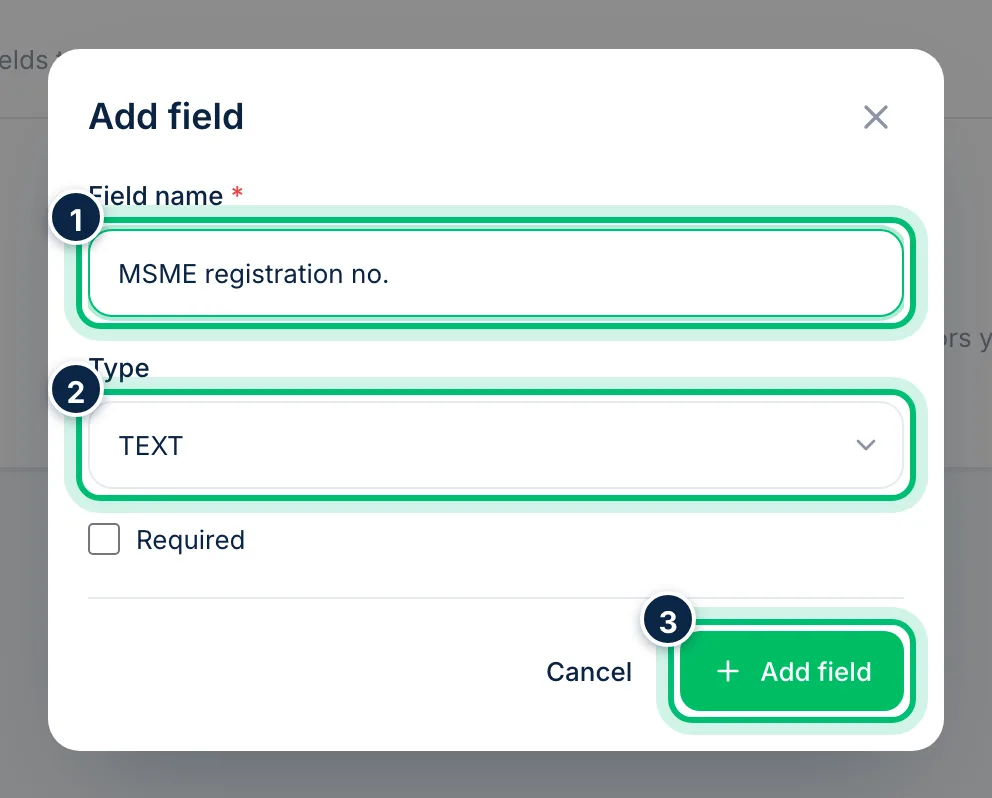
Choose the record type — Vendors, Purchase orders, Receipts, Bills or Debit notes — then choose Add field. Enter a Field name, pick its Type (text, number, date, a list of options, phone or file), tick Required if it must always be filled, and choose Add field.
3Choose the columns in a list
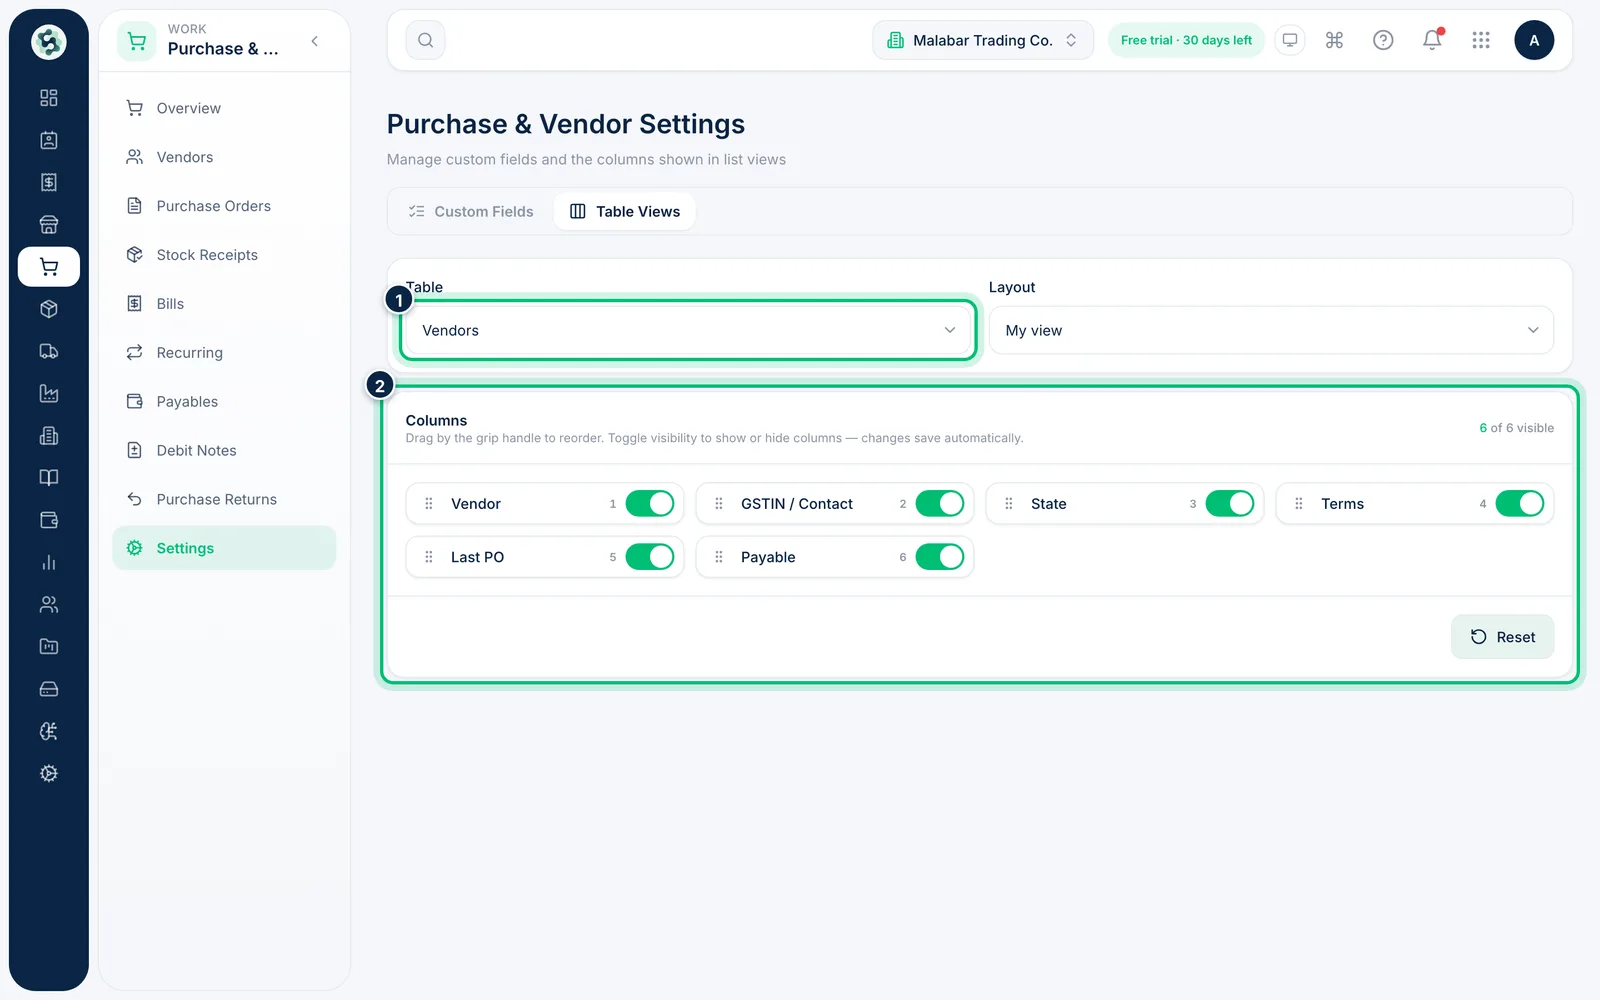
On Table Views, pick the list under Table and choose My view or the organisation default under Layout. Switch columns on or off and drag them into order — changes save automatically.
Related guides
Still stuck? Contact our support team — or start a free trial to try this in your own company.