
Projects · 5 steps
Create a project
Set up a project with an owner, status, priority and dates, so the team has one place to plan and track the work.
Before you start: You need permission to create projects. A new project gets its stages from the template you pick, or the standard Backlog, To Do, In Progress, Review and Done; you can change them later.
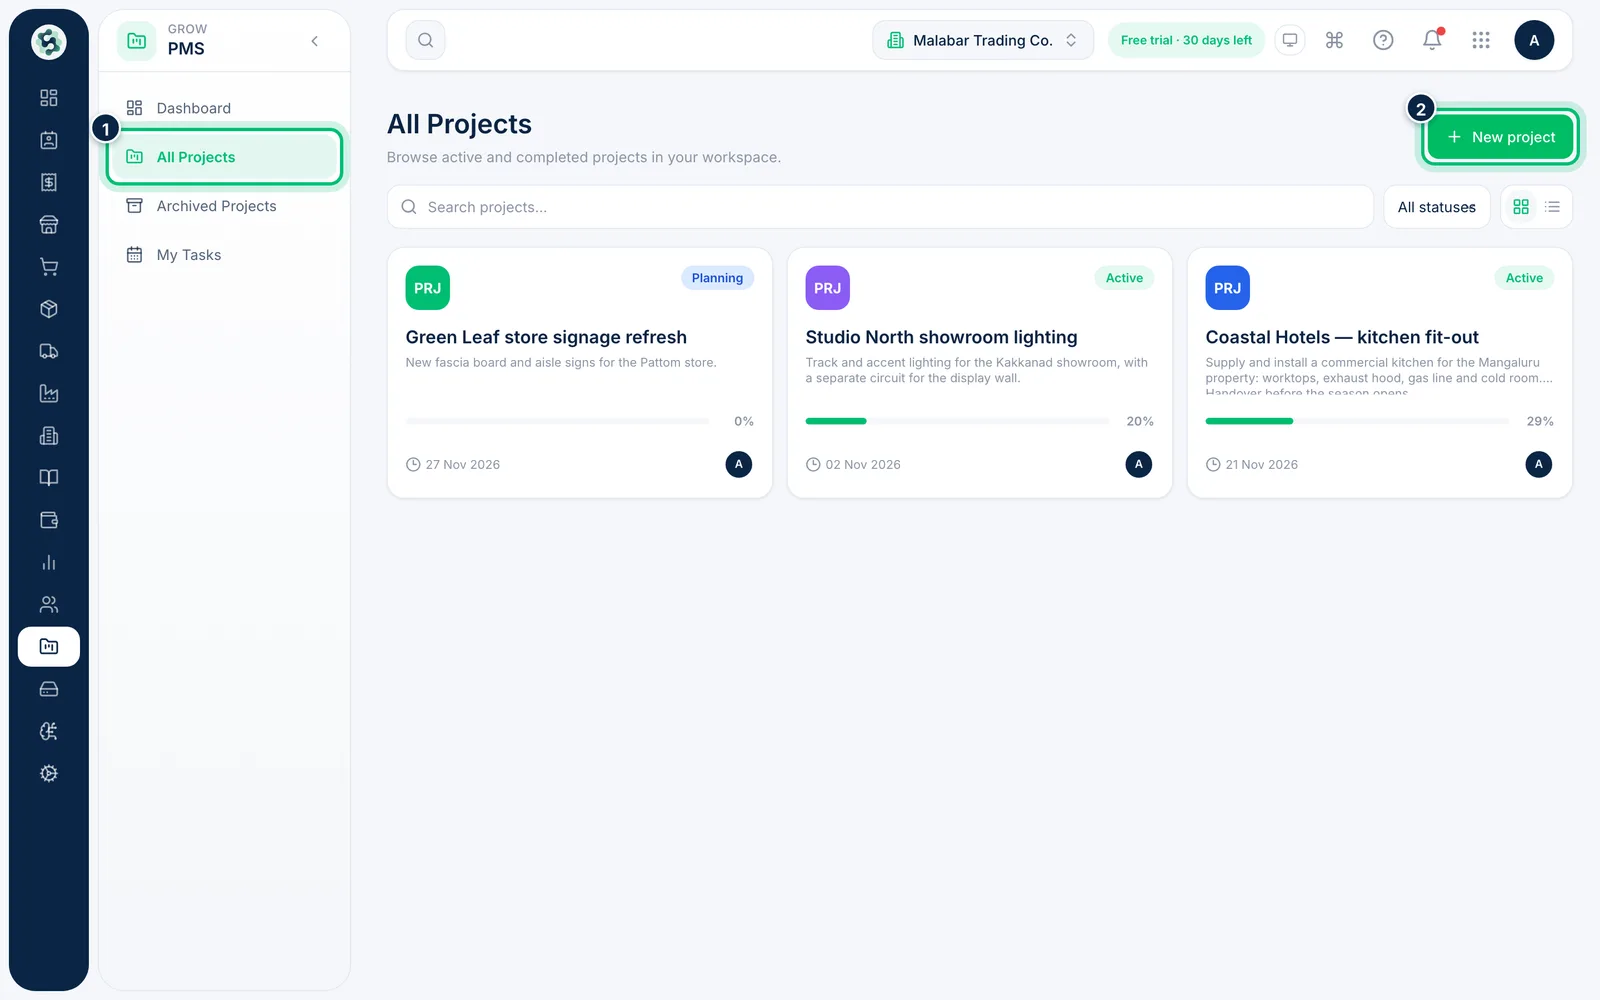
1Open All Projects
In the left menu open PMS → Projects. Your active projects show as cards with their status, progress and due date. Choose New project at the top right.
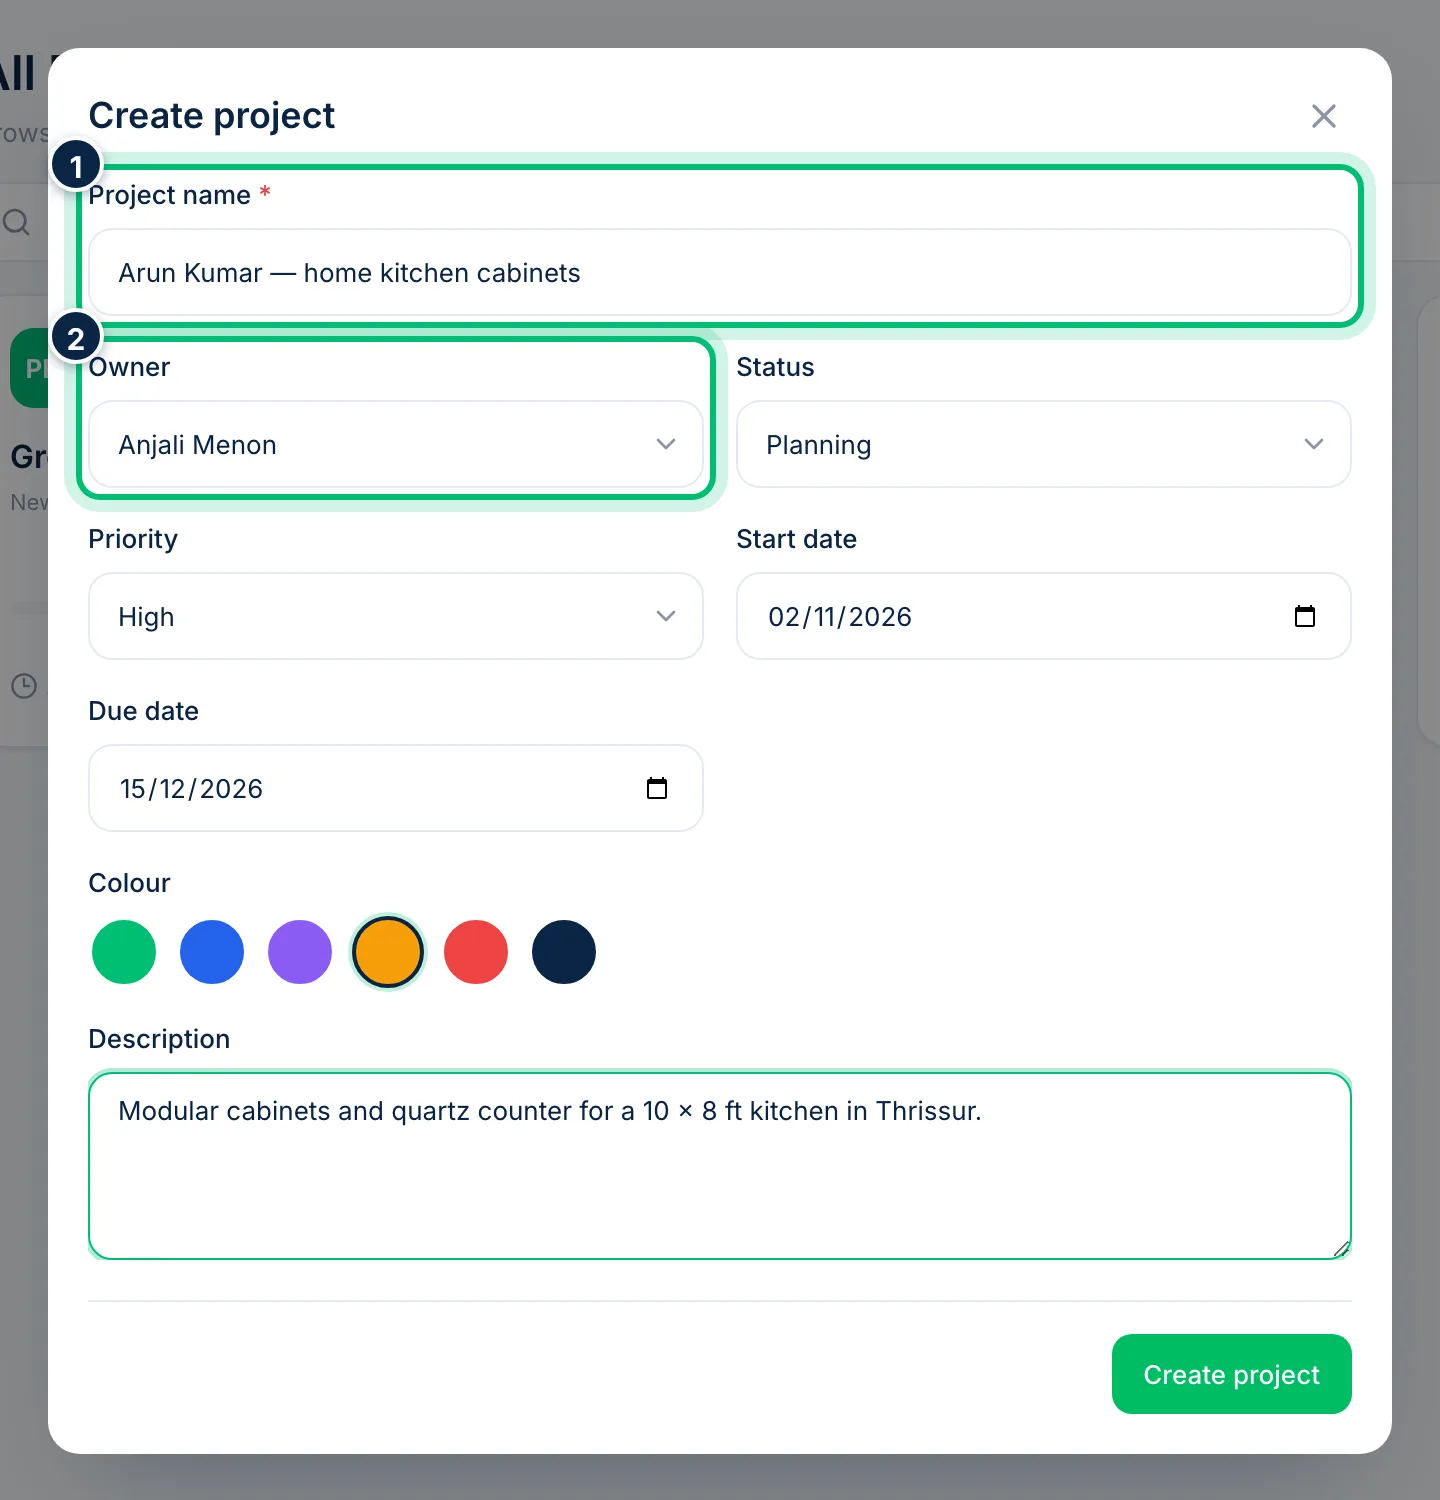
2Name the project and pick an owner
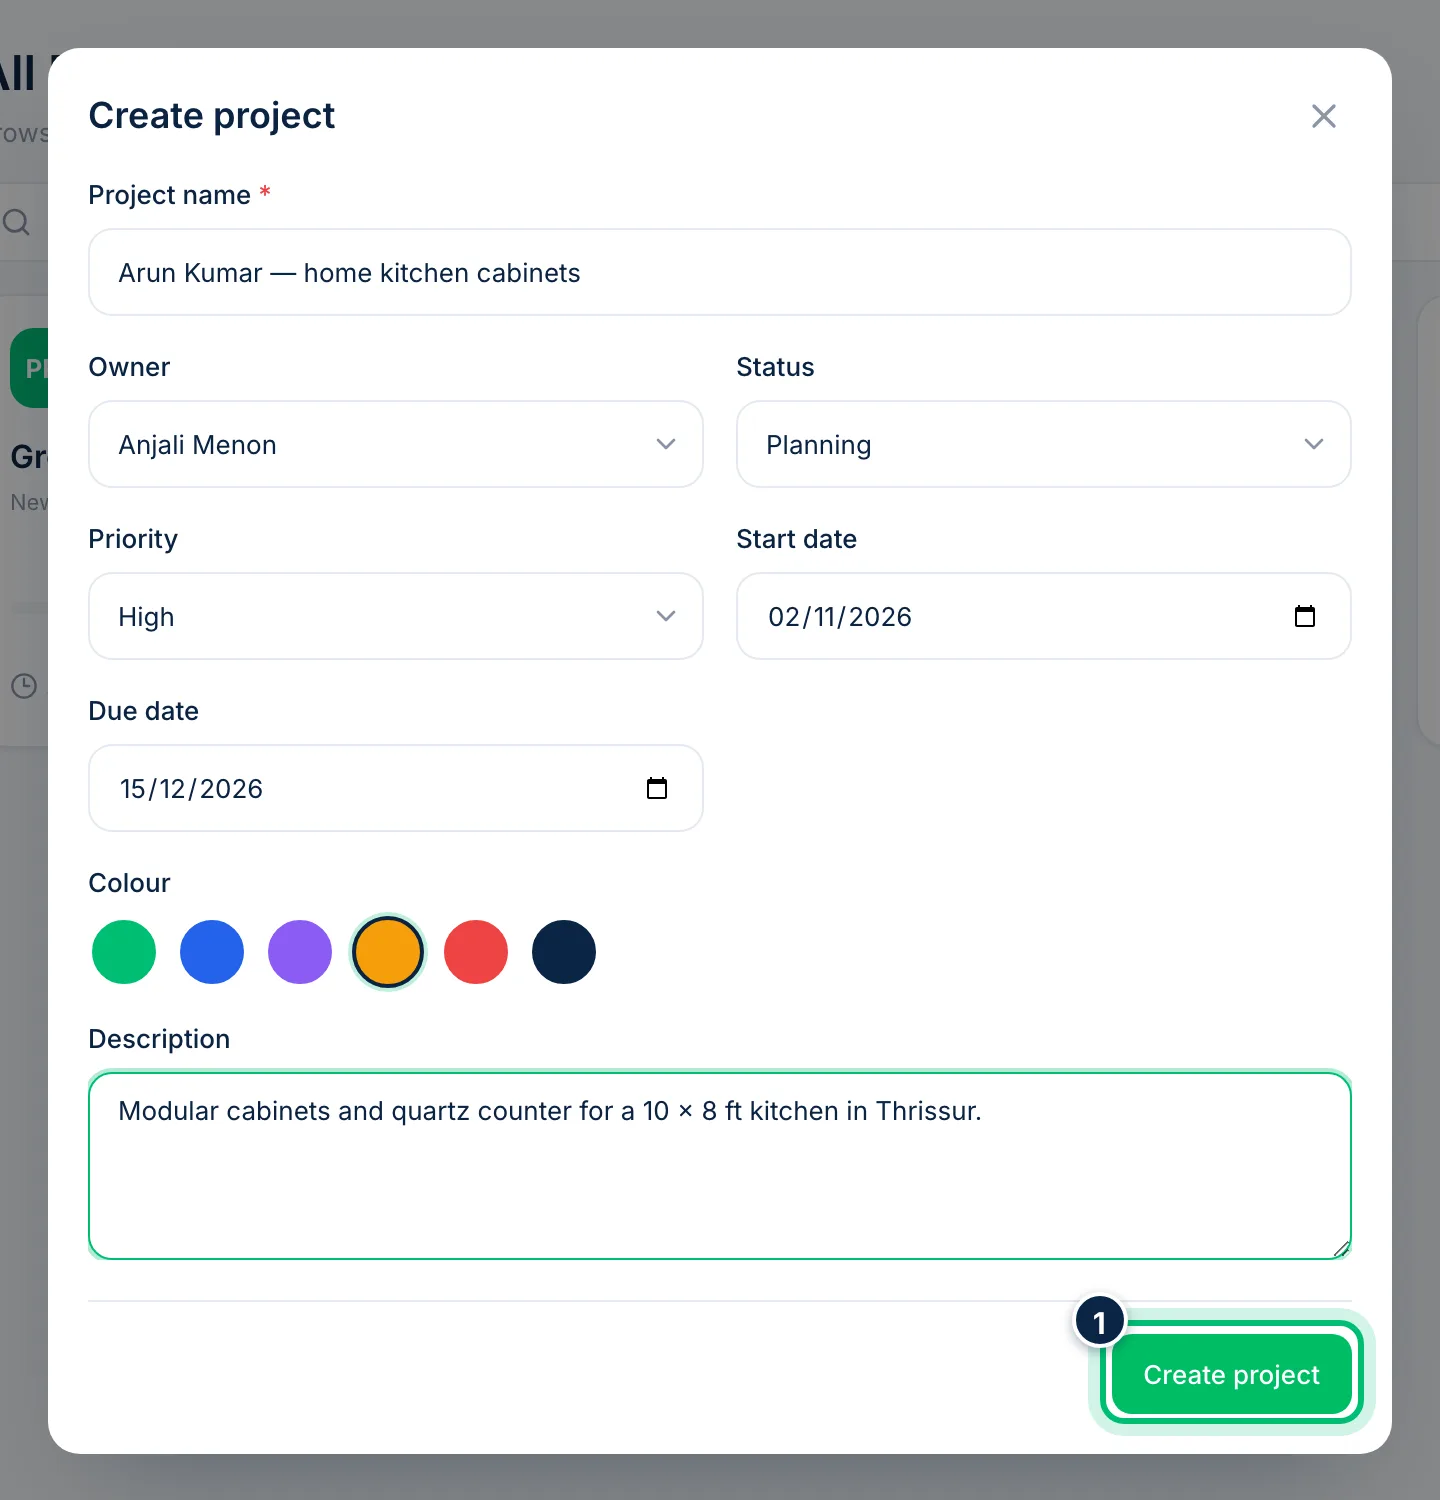
Enter the Project name — it's the only required field. Choose the Owner who is responsible for the project; if you leave it, the owner is you.
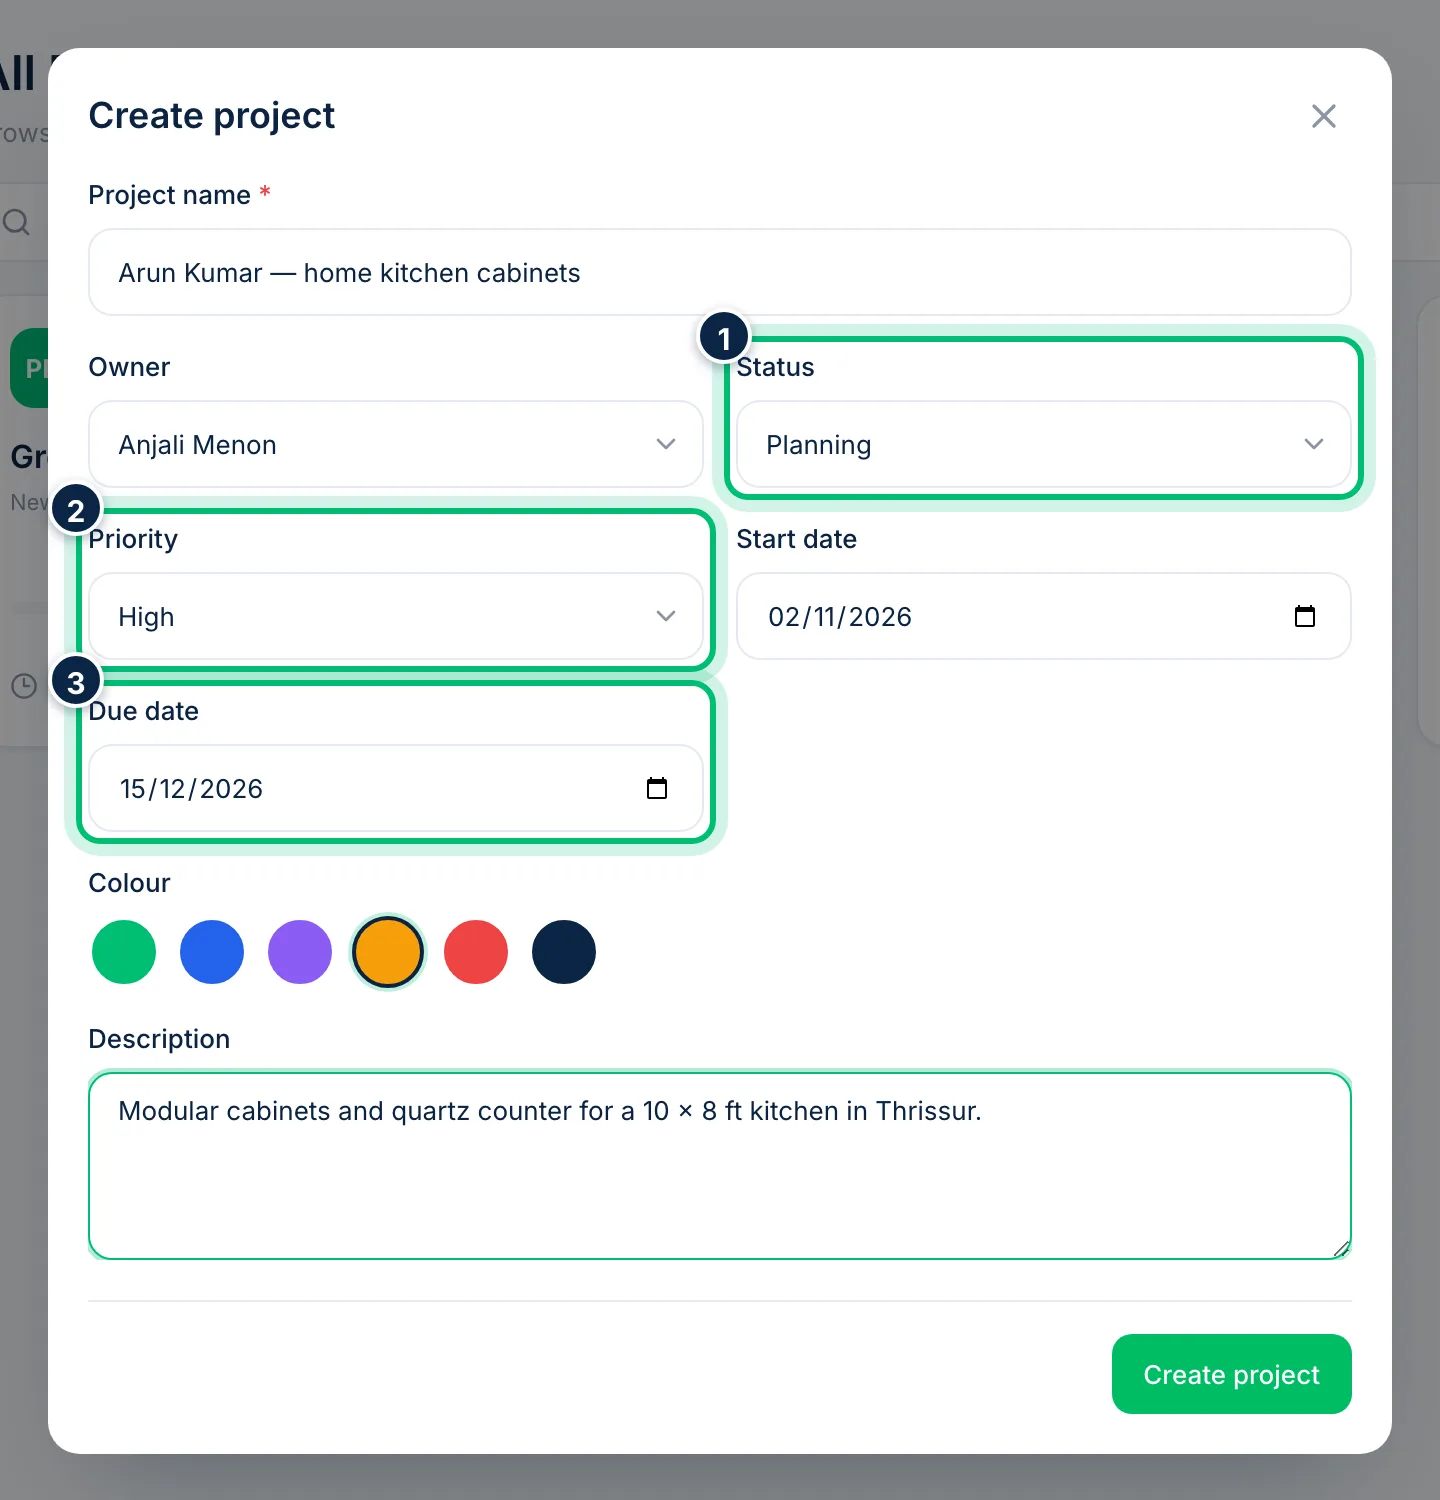
3Set the status, priority and dates
Choose a Status — Planning, Active, On Hold or Completed — and a Priority from Low to Urgent. Add a Start date and Due date; the due date can't be before the start date.
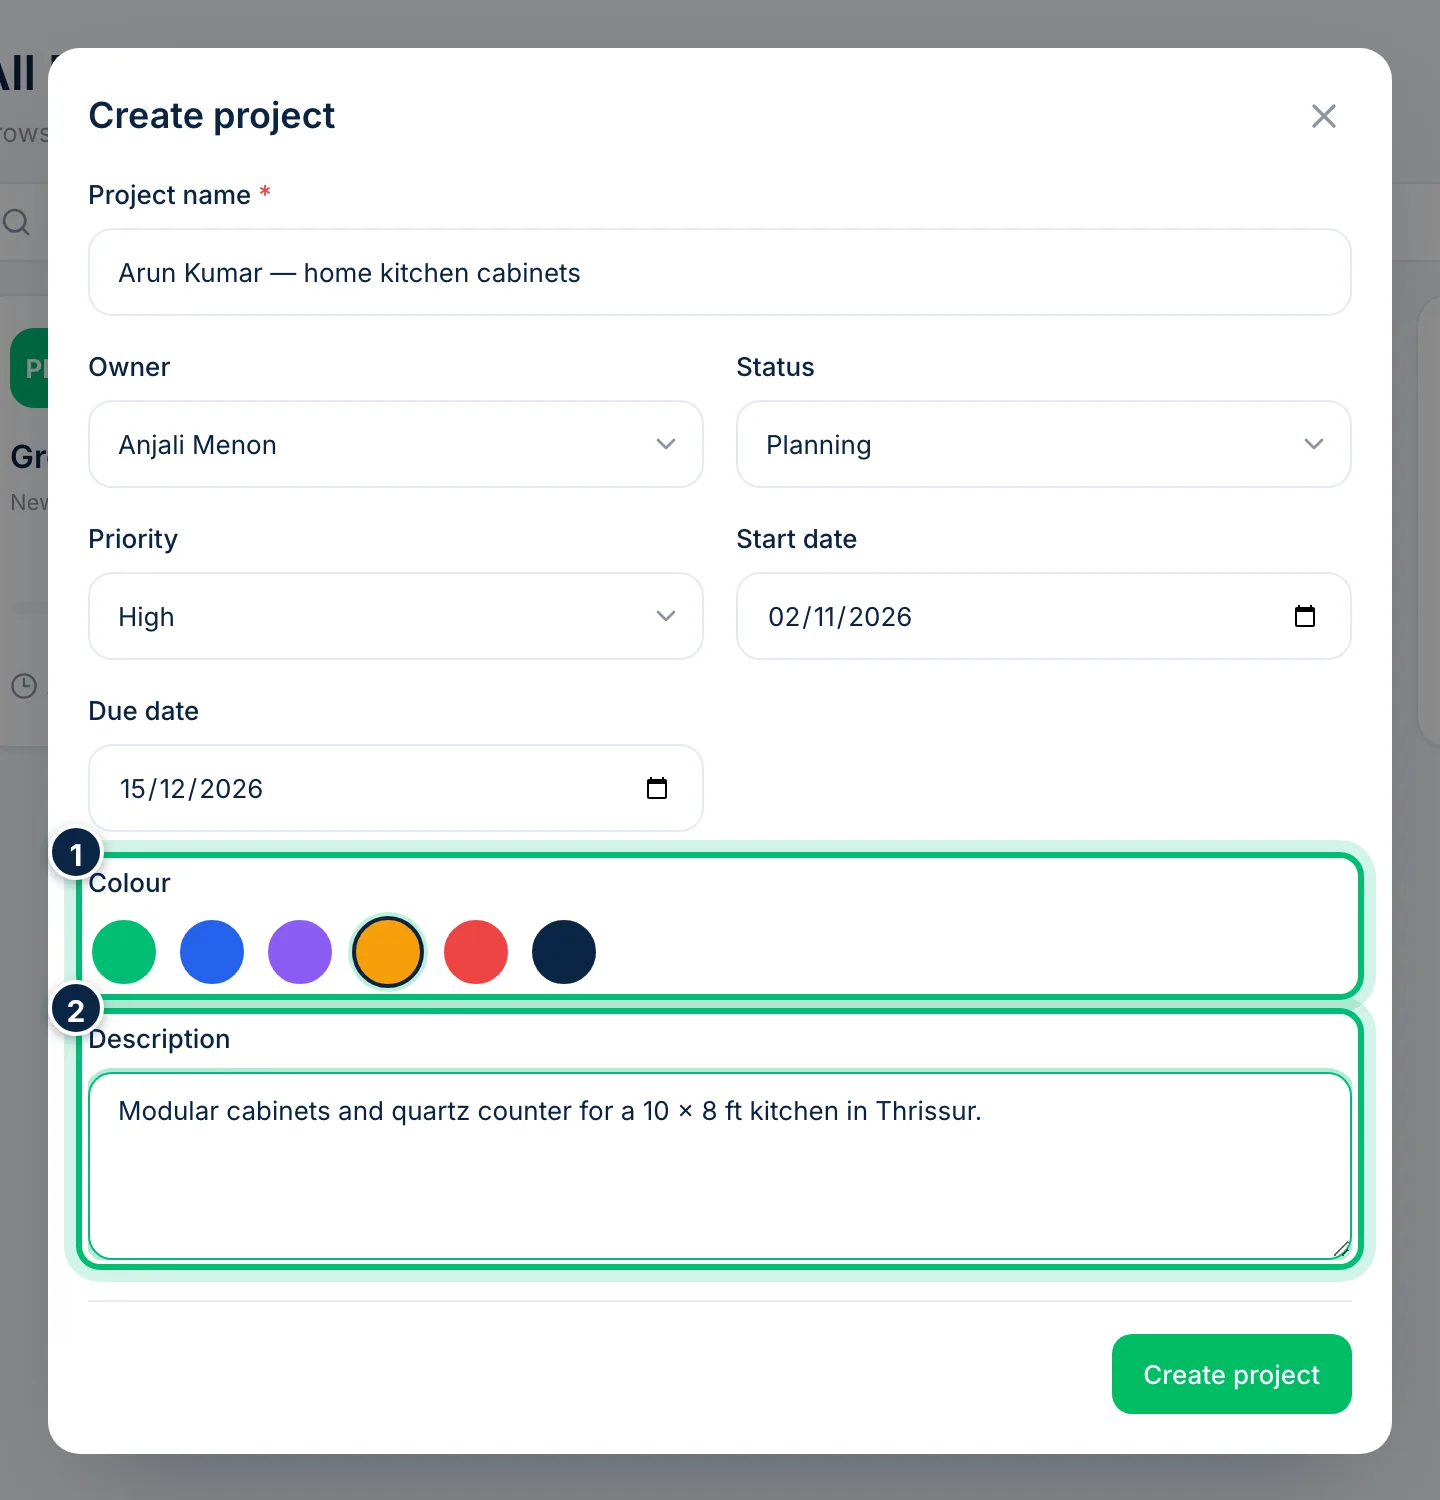
4Pick a colour and describe the work
Choose a Colour to tell the project apart in lists, and add a short Description of what the project should achieve.
5Create the project
Choose Create project. Scalar360 gives it the next project code, such as PRJ-0005, and opens it so you can start adding tasks.
Related guides
Still stuck? Contact our support team — or start a free trial to try this in your own company.