
Getting started · 6 steps
Customise your dashboard
Build dashboards that fit how you work: switch the period, move and resize widgets, add new ones and undo mistakes.
Before you start: Everyone starts with the default Business overview dashboard. It's read-only until you press Customize, which makes your own copy — nobody else sees your changes. You only see widgets for the data your role can access.
1Switch between dashboards
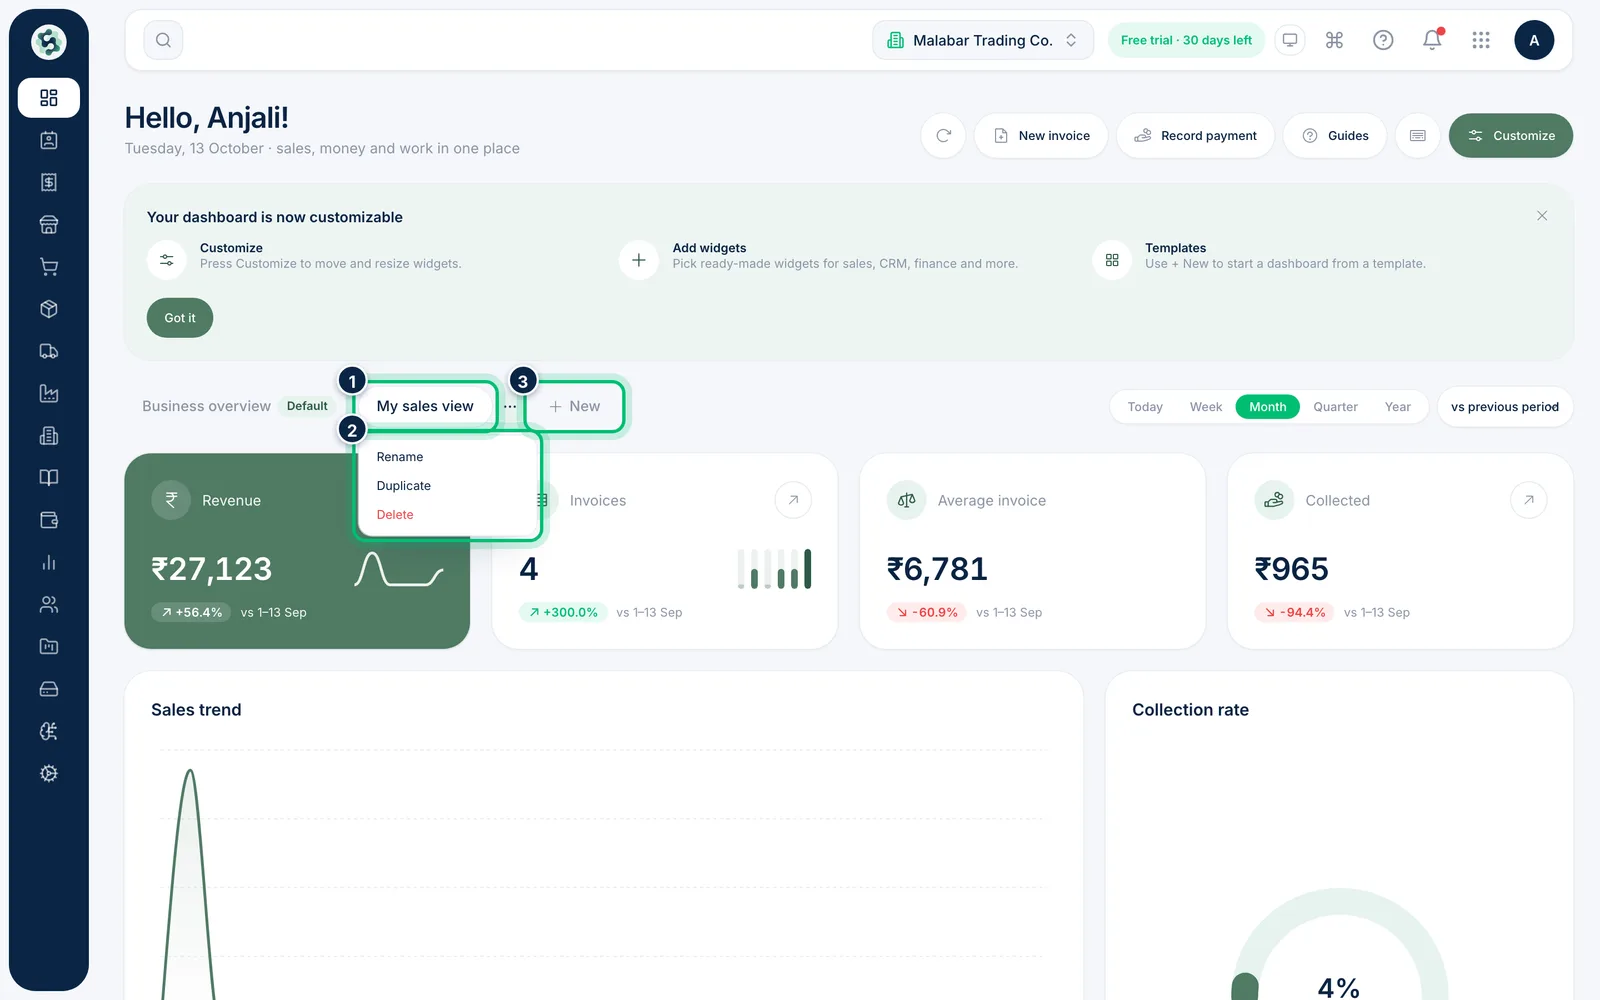
Your dashboards sit in tabs above the widgets. Choose New to start another one from a template or blank, up to 20. The ⋯ button next to the open tab opens its menu with Rename, Duplicate and Delete.
2Pick a period and comparison
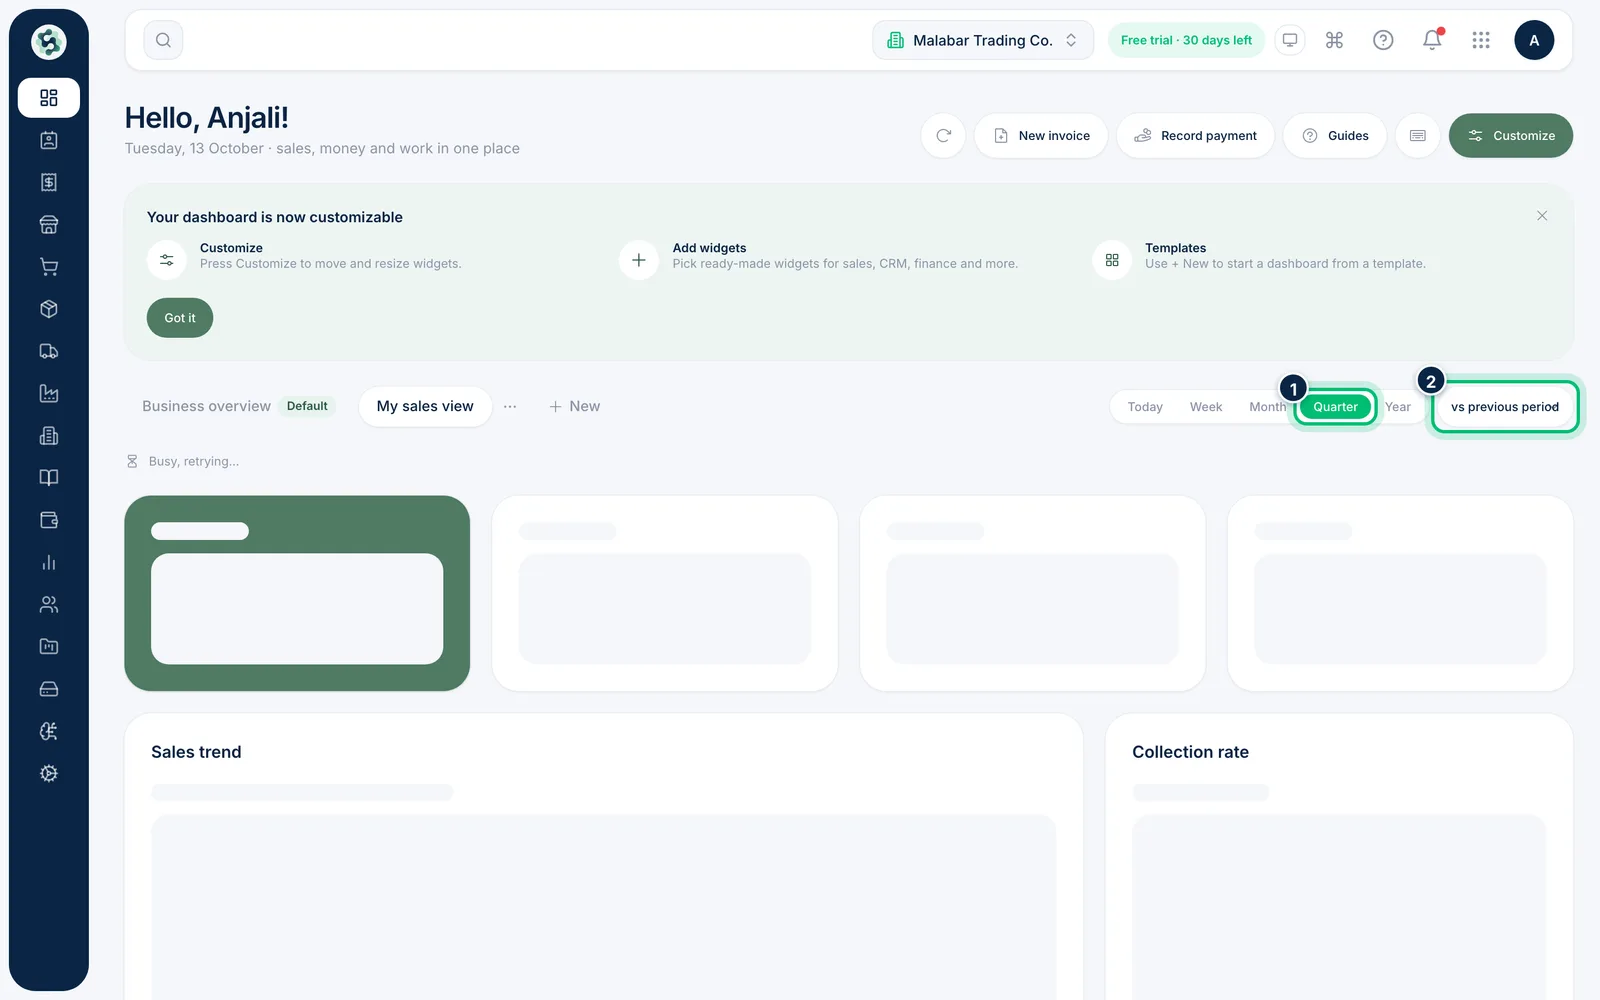
Choose Today, Week, Month, Quarter or Year to change every widget that follows the dashboard period. Next to it, compare with vs previous period, vs last year or No comparison.
3Press Customize
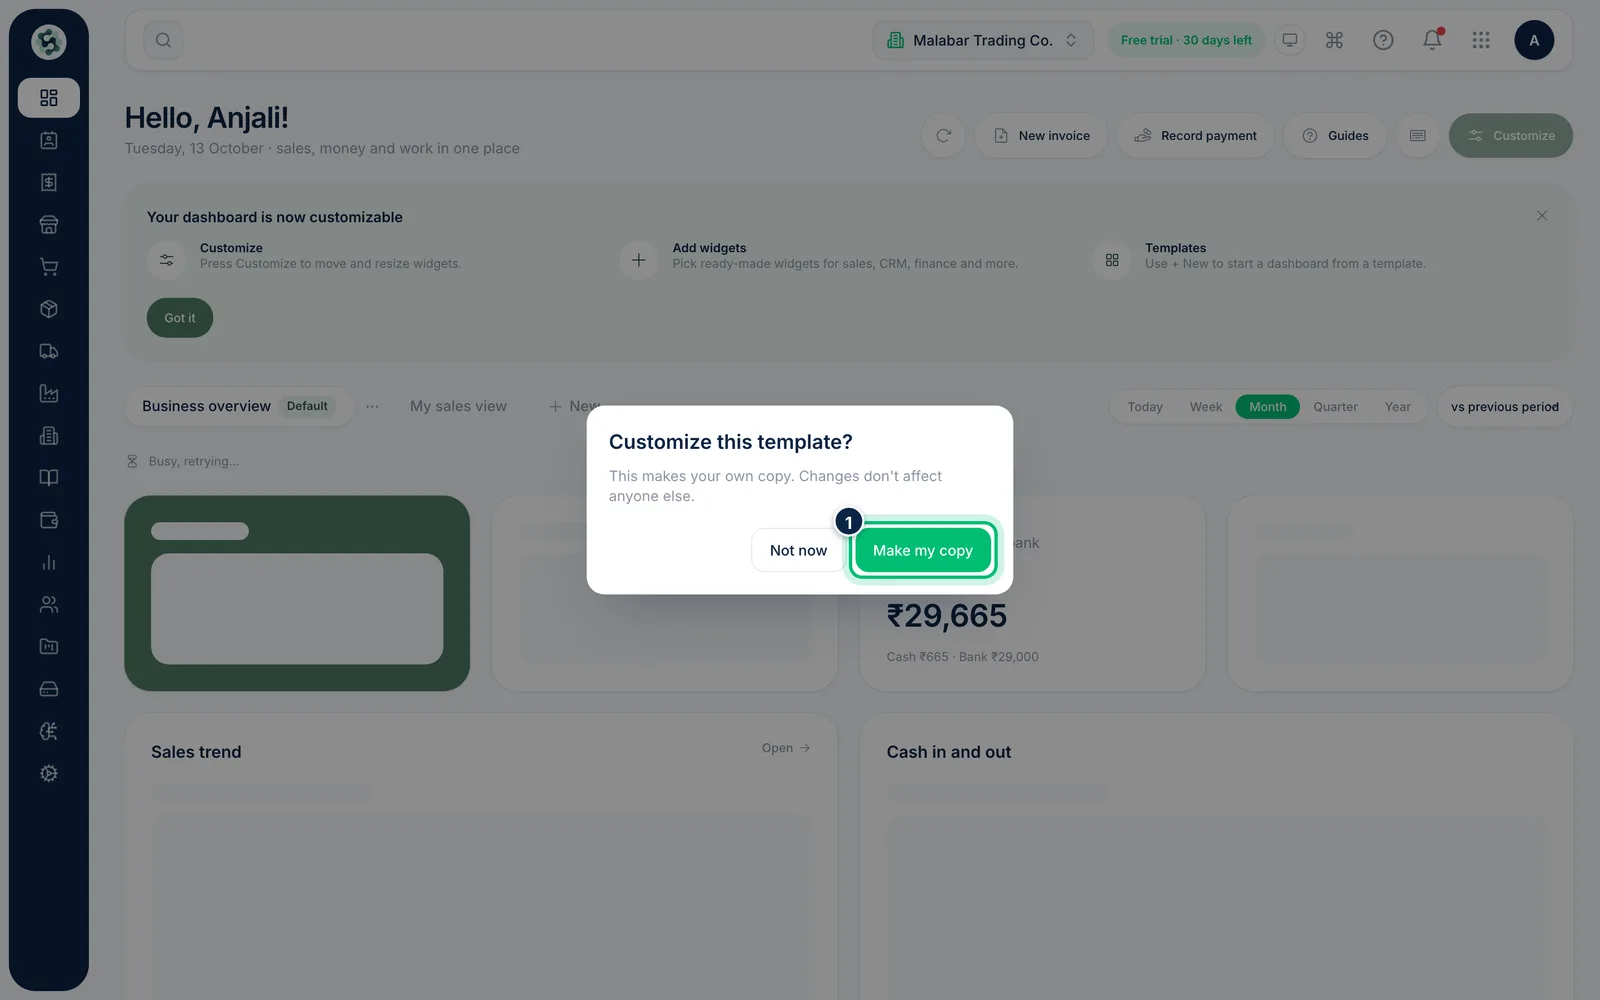
Open one of your dashboards and press Customize. On the default dashboard, Scalar360 first asks to make your own copy: choose Make my copy. Your cards then get a green outline and you can change the layout.
4Move, resize and edit widgets
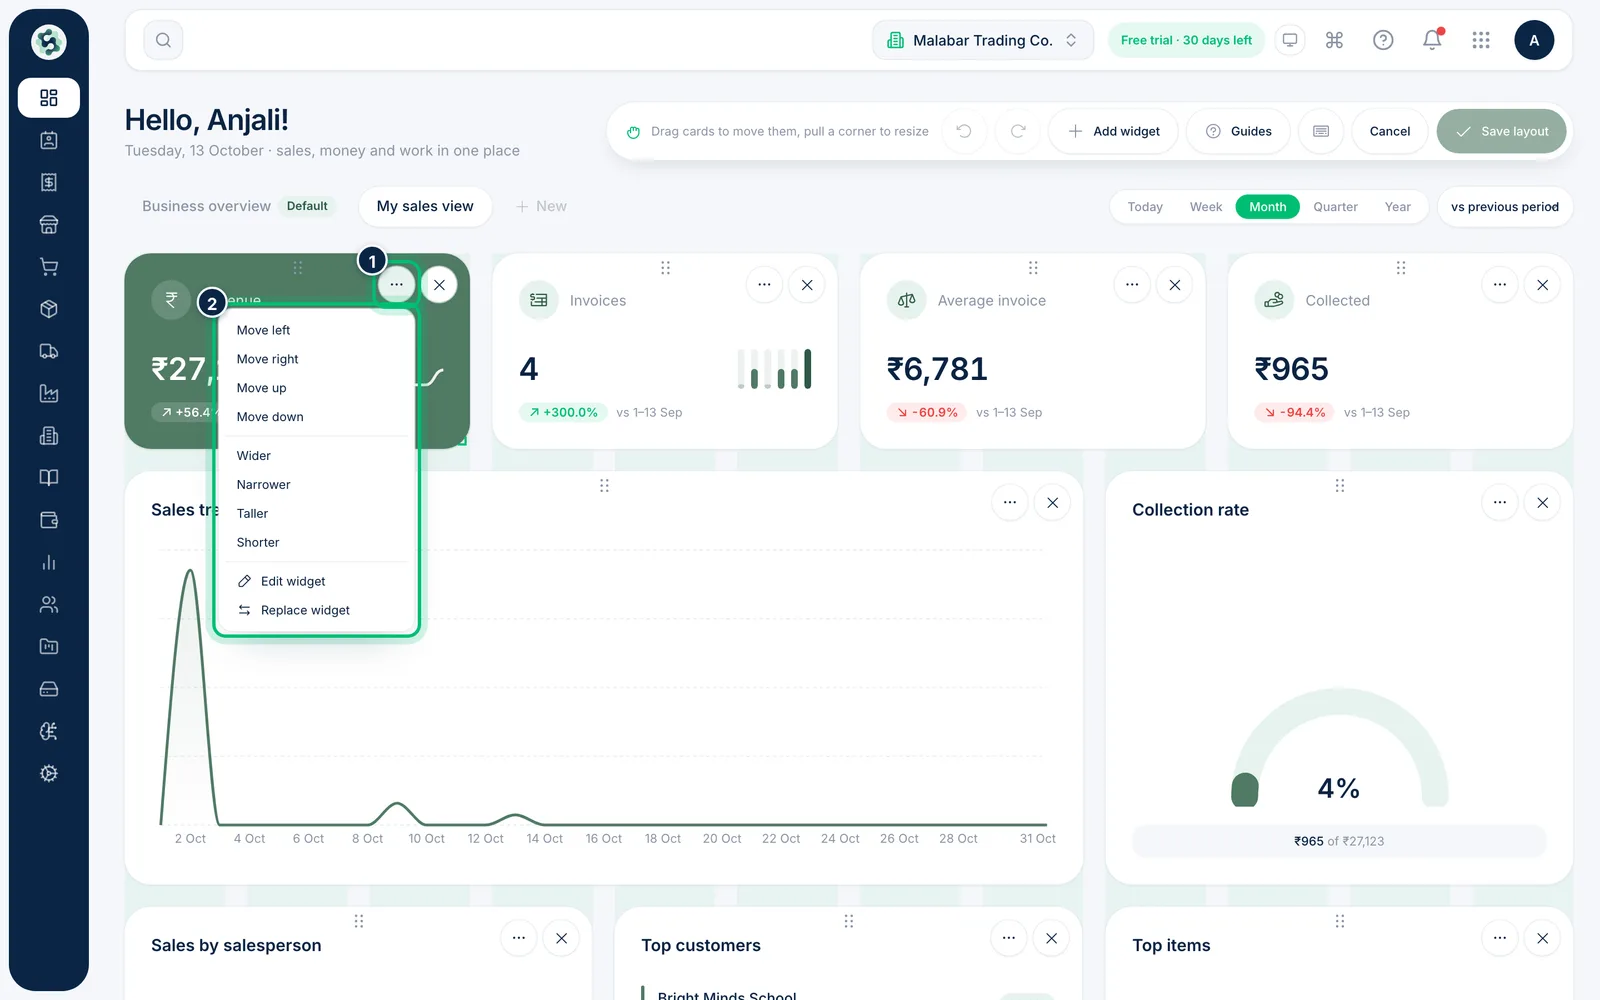
Drag a card to move it, or pull an edge or corner to resize it. The ⋯ menu on each card has Move left, Move right, Move up, Move down, Wider, Narrower, Taller, Shorter, Edit widget — where you set its title, chart, colour and number format — and Replace widget. The X removes a card, and a note with Undo appears.
5Add a widget
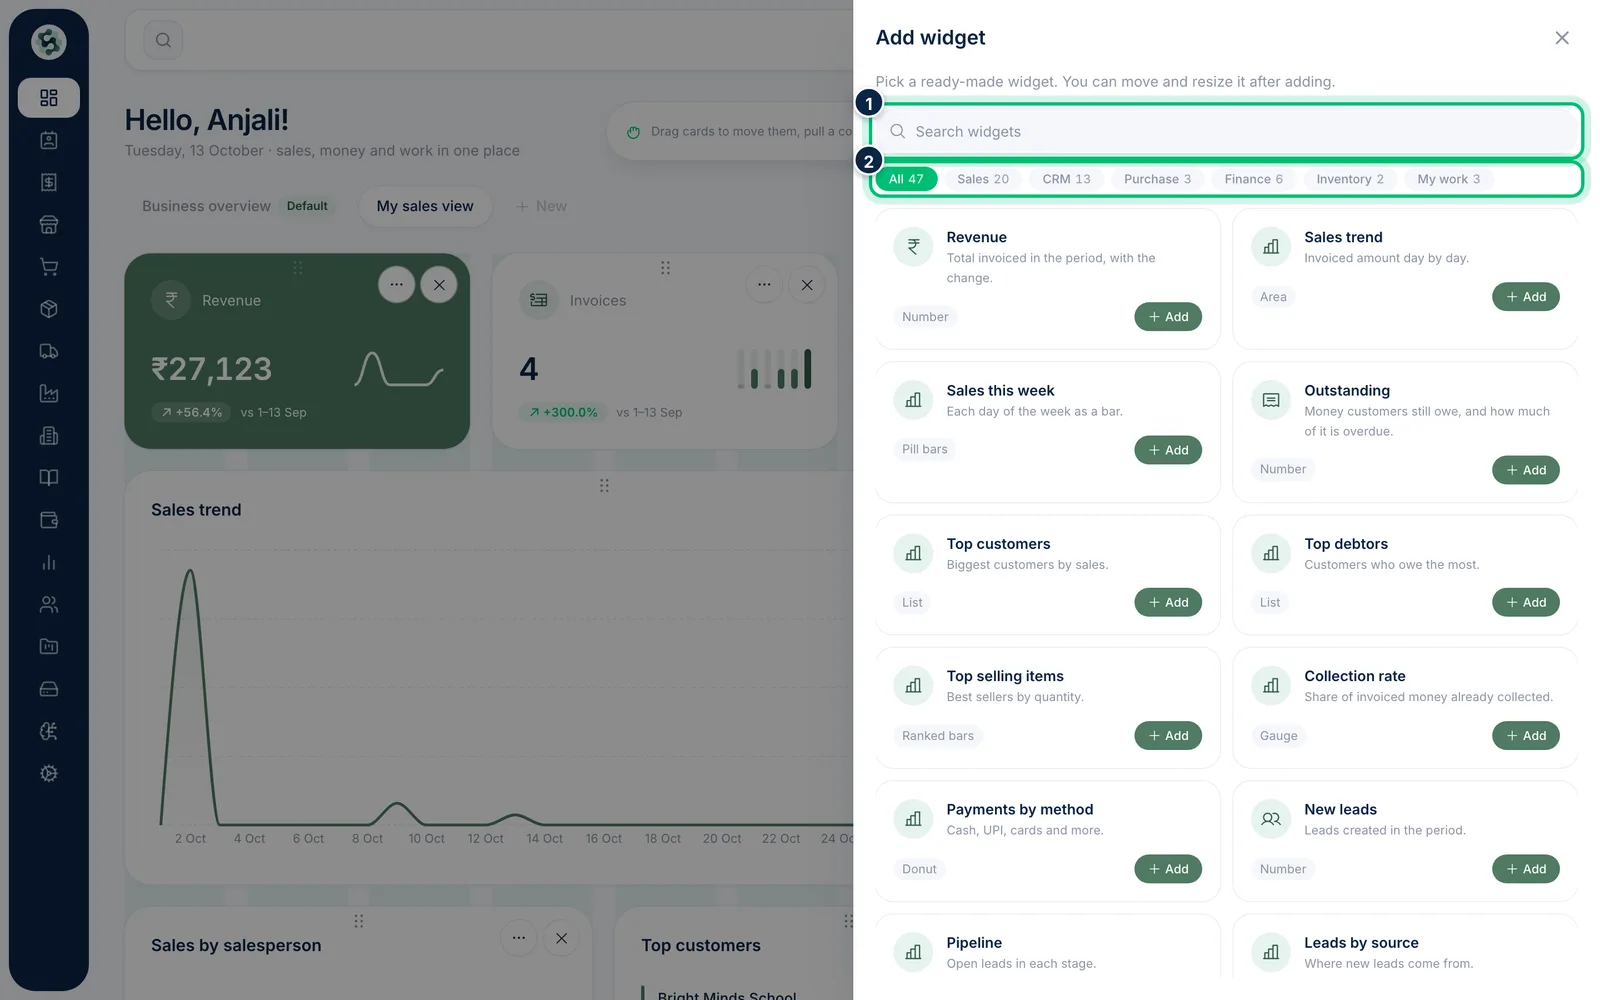
Choose Add widget in the toolbar. Search by name, narrow the list by module — Sales, CRM, Finance, Inventory and more — and choose Add on the widget you want. It appears at the bottom, ready to move.
6Undo, redo and save
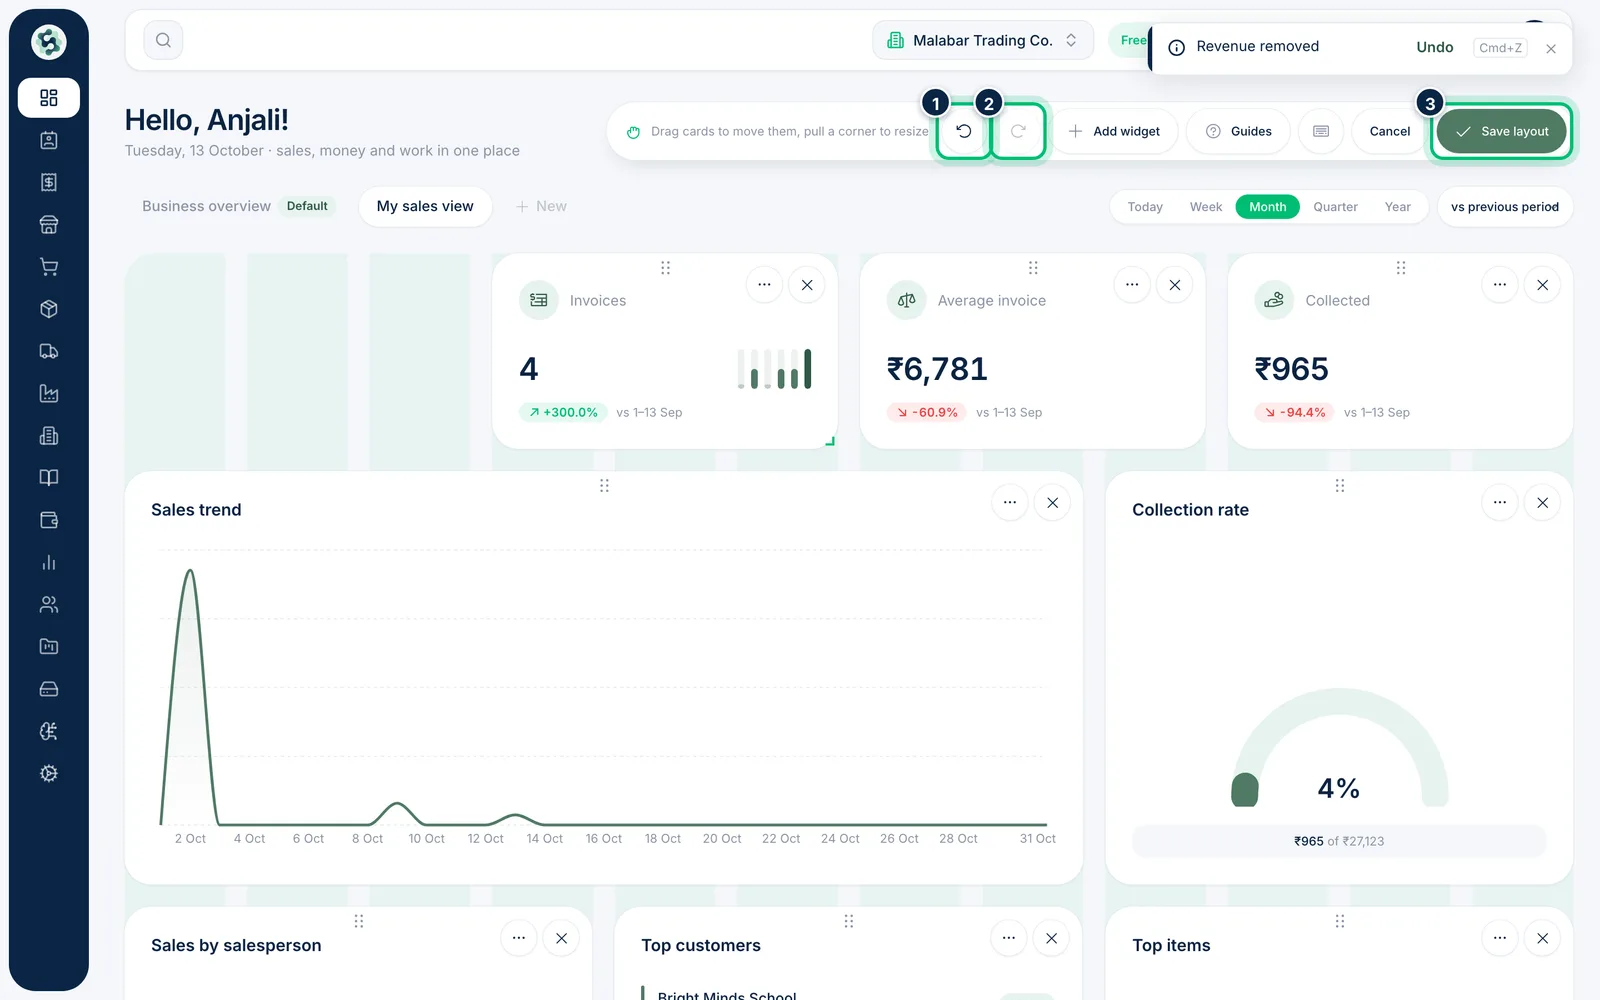
Every change can be taken back. Choose Undo, or press Ctrl + Z (⌘ Z on a Mac), as often as you need, and Redo to put a change back. Choose Save layout to keep your dashboard, or Cancel to leave without saving.
Related guides
Still stuck? Contact our support team — or start a free trial to try this in your own company.