
Point of sale · 6 steps
Ring up a sale on the terminal
Scan or tap items into the cart, change quantities, give a line discount and add the customer.
Before you start: Open a shift on the register first.
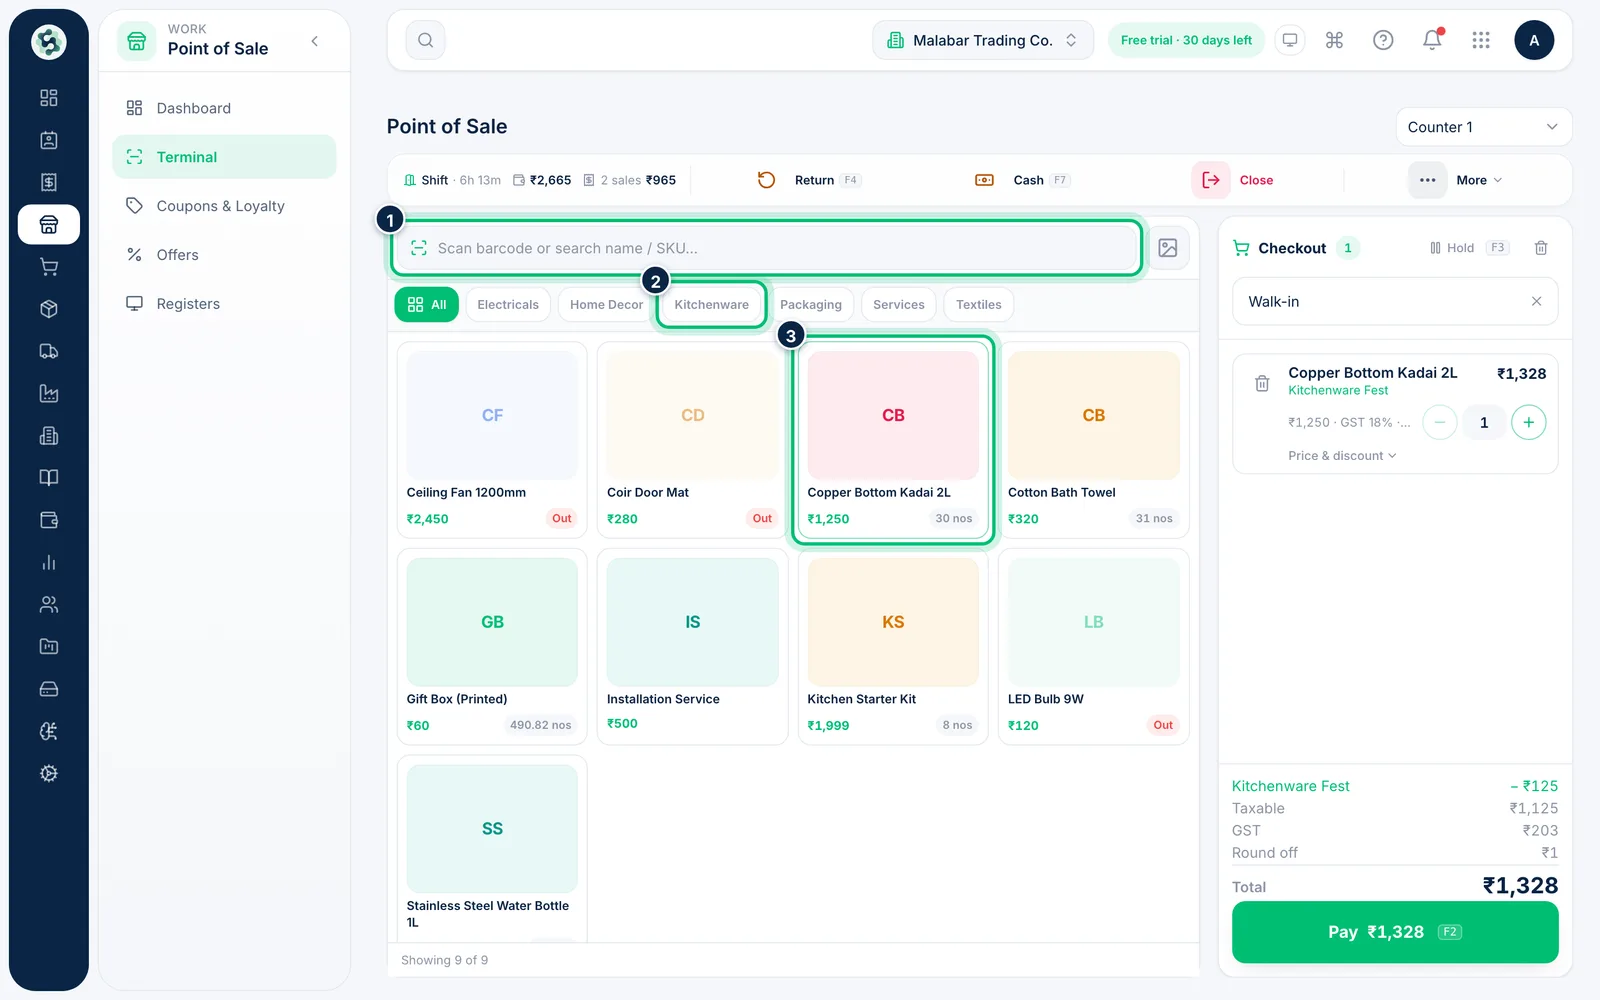
1Scan or search for items
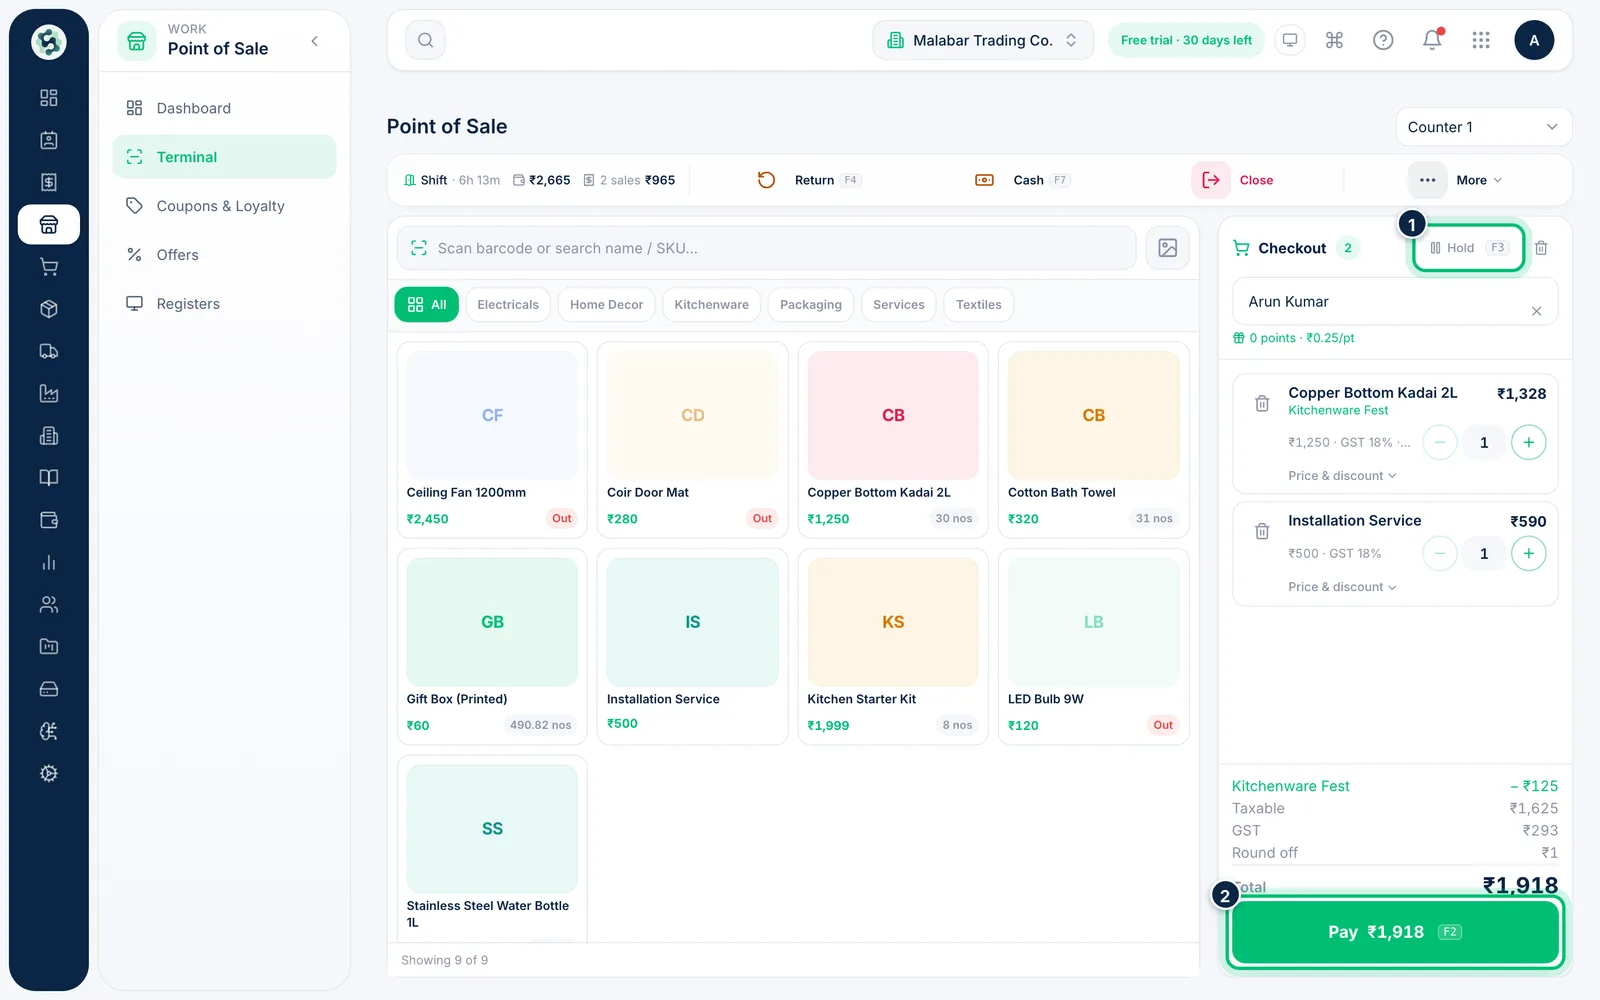
The cursor waits in the Scan barcode or search name / SKU… box, so a barcode scanner rings items up straight away. You can also type a name or SKU, or browse by category. Each tile shows the price and the stock in the register's own warehouse only — tap one to add it. You can't add more than is in stock.
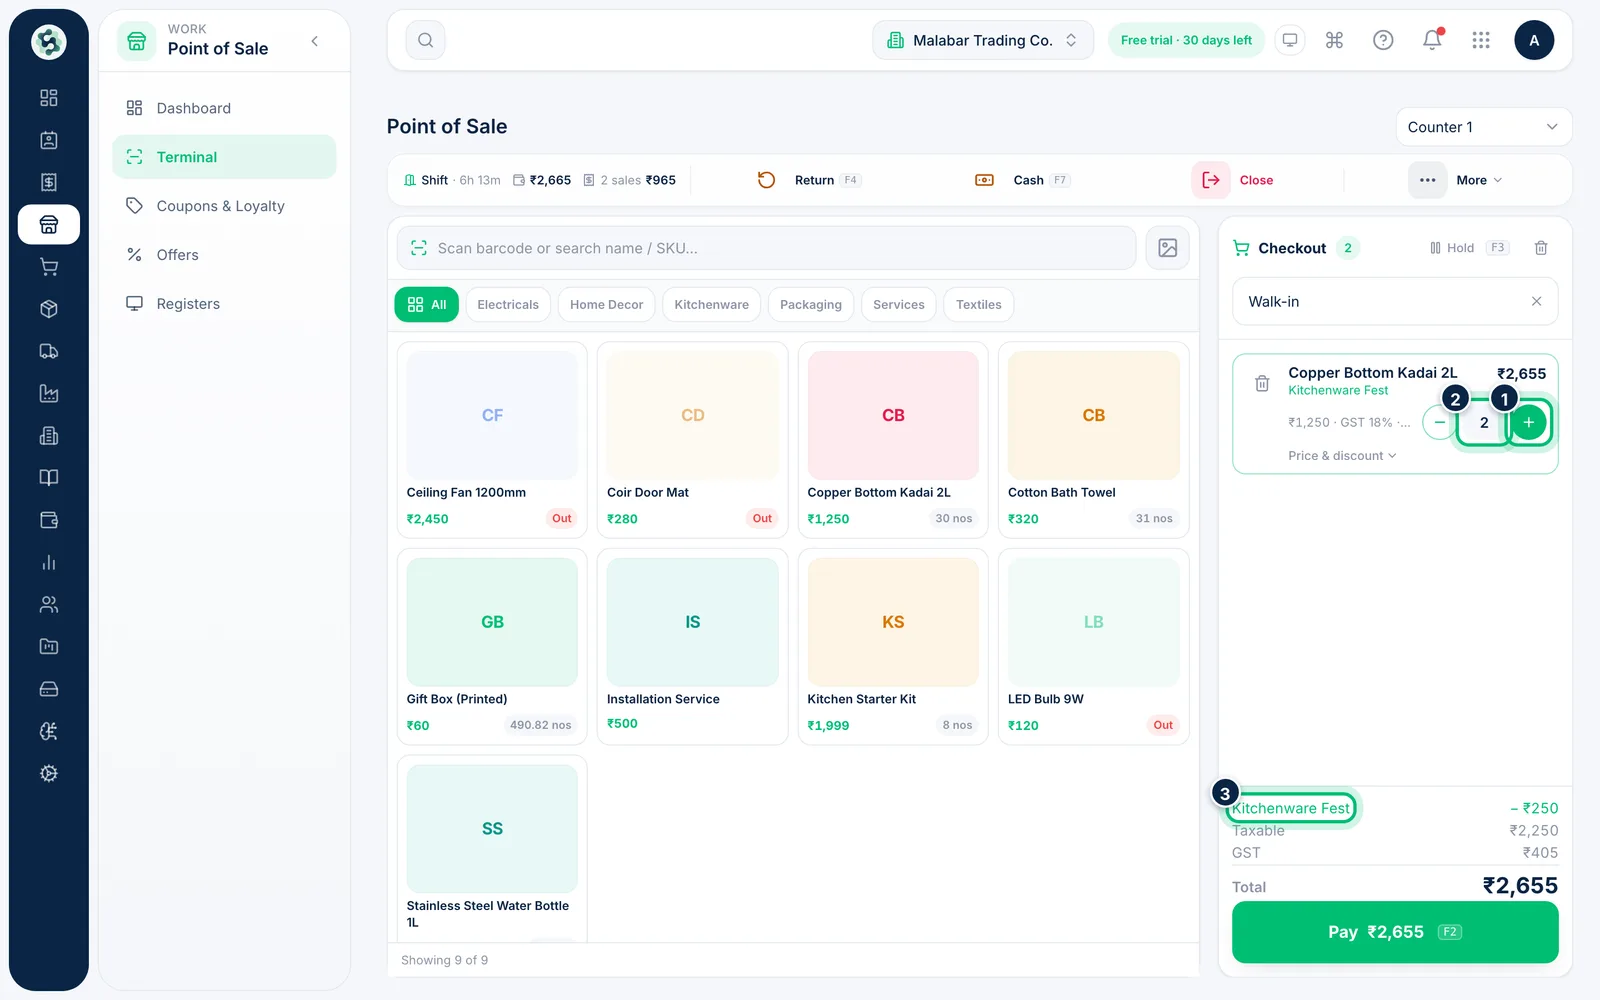
2Change the quantity
The cart on the right lists each line with its rate and the item's GST rate. Use + and − or type the quantity. The bin icon removes a line. Offers that apply are shown in green by name under the item and in the totals.
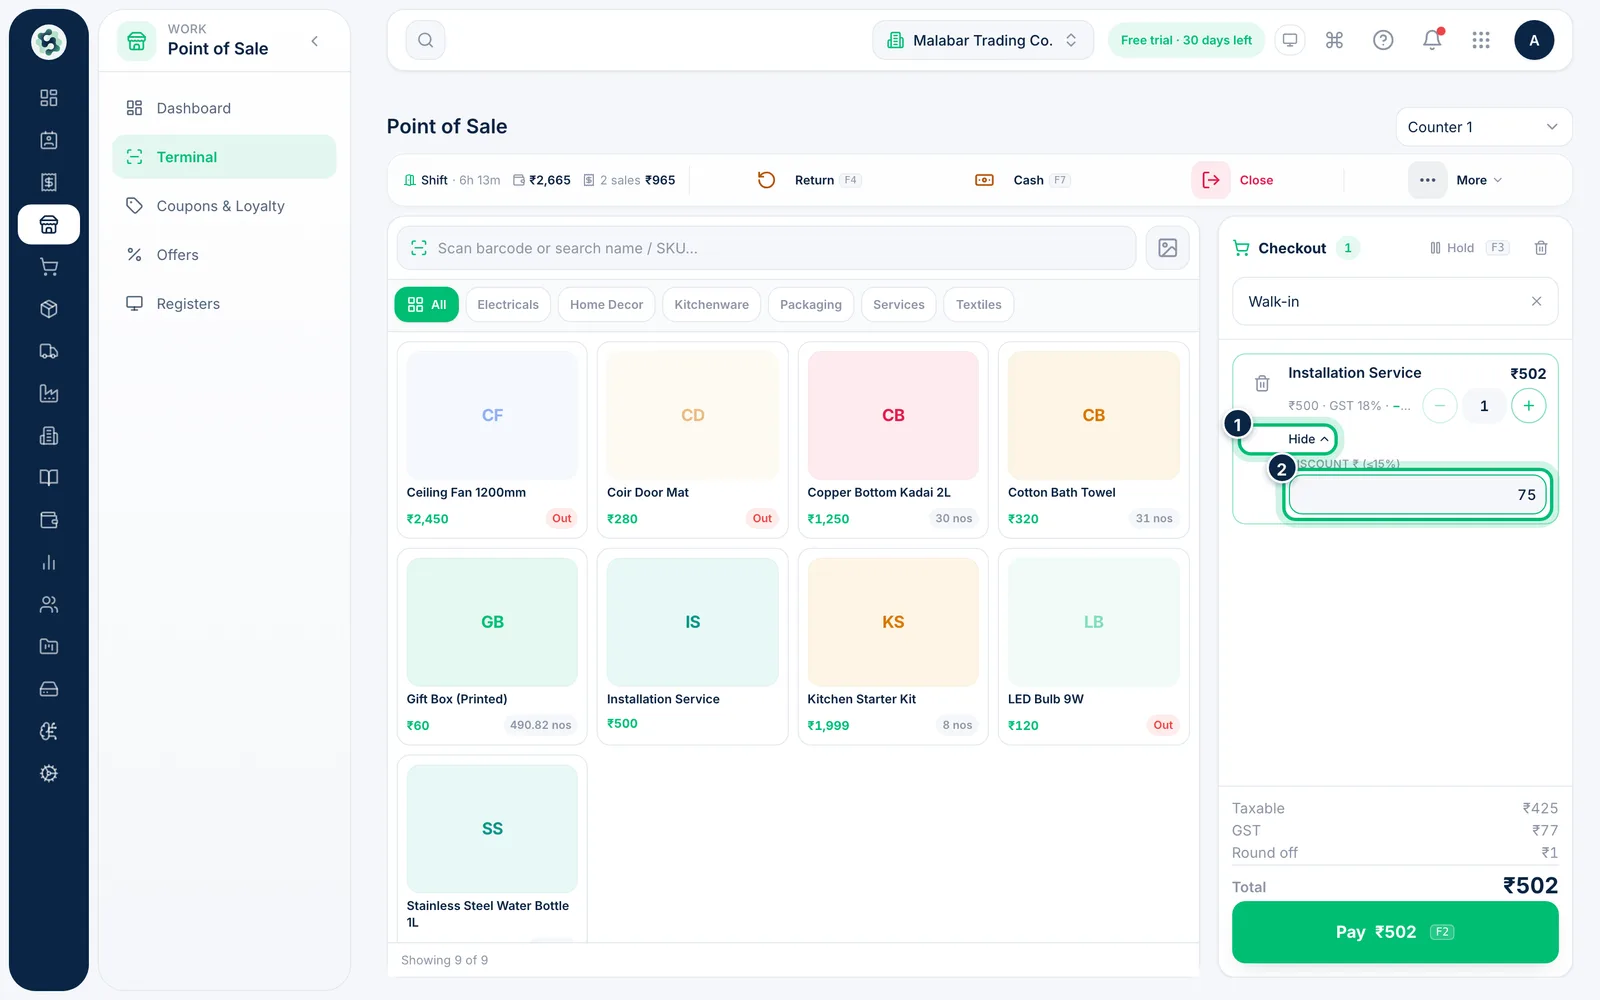
3Give a line discount
Choose Price & discount under a line to enter a rupee Discount on it. The field holds only what you type — automatic offers are never filled into it, they show by name on the line and in the totals. The register's discount limit applies to your discount alone, measured on the price after any offer. If the register allows price override, you can change the Price here too.
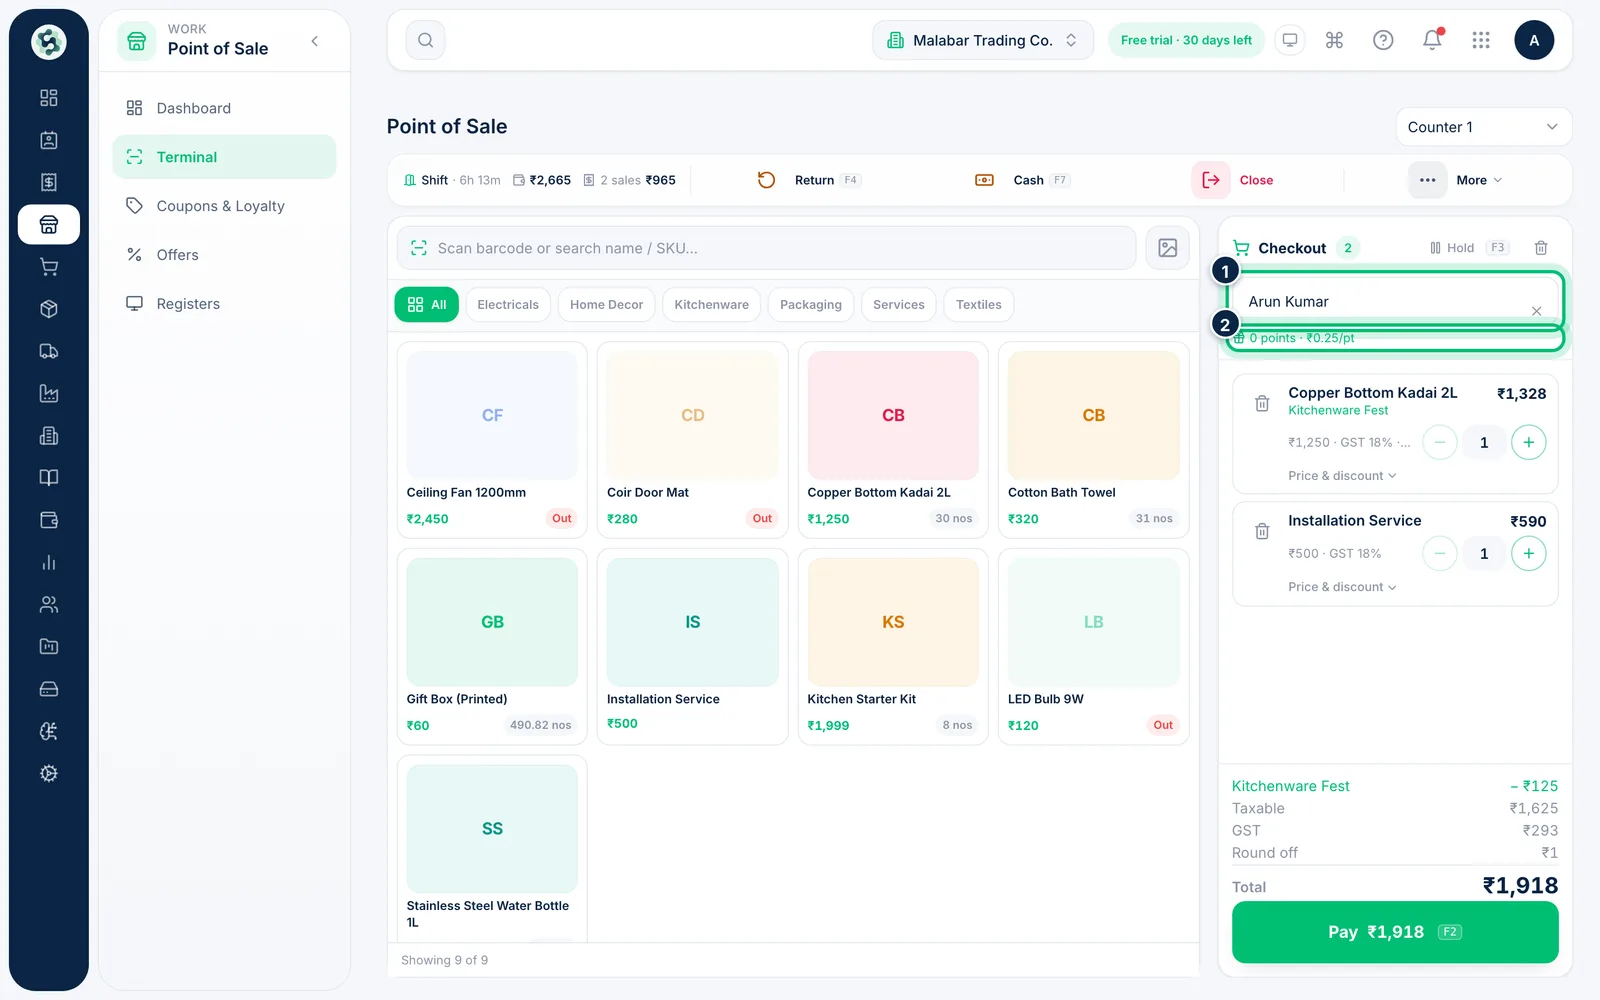
4Add the customer
The Customer box starts with the register's default, such as Walk-in. Type a name or phone number to find a saved customer, or choose Save … as a customer to add a new one. Customers in the loyalty programme show their points balance.
5Hold the sale or go to payment
Need to serve someone else first? Choose Hold (F3) to set the sale aside on this device and resume it later from Held sales. When the customer is ready, choose Pay (F2).
6Selling from a phone or tablet
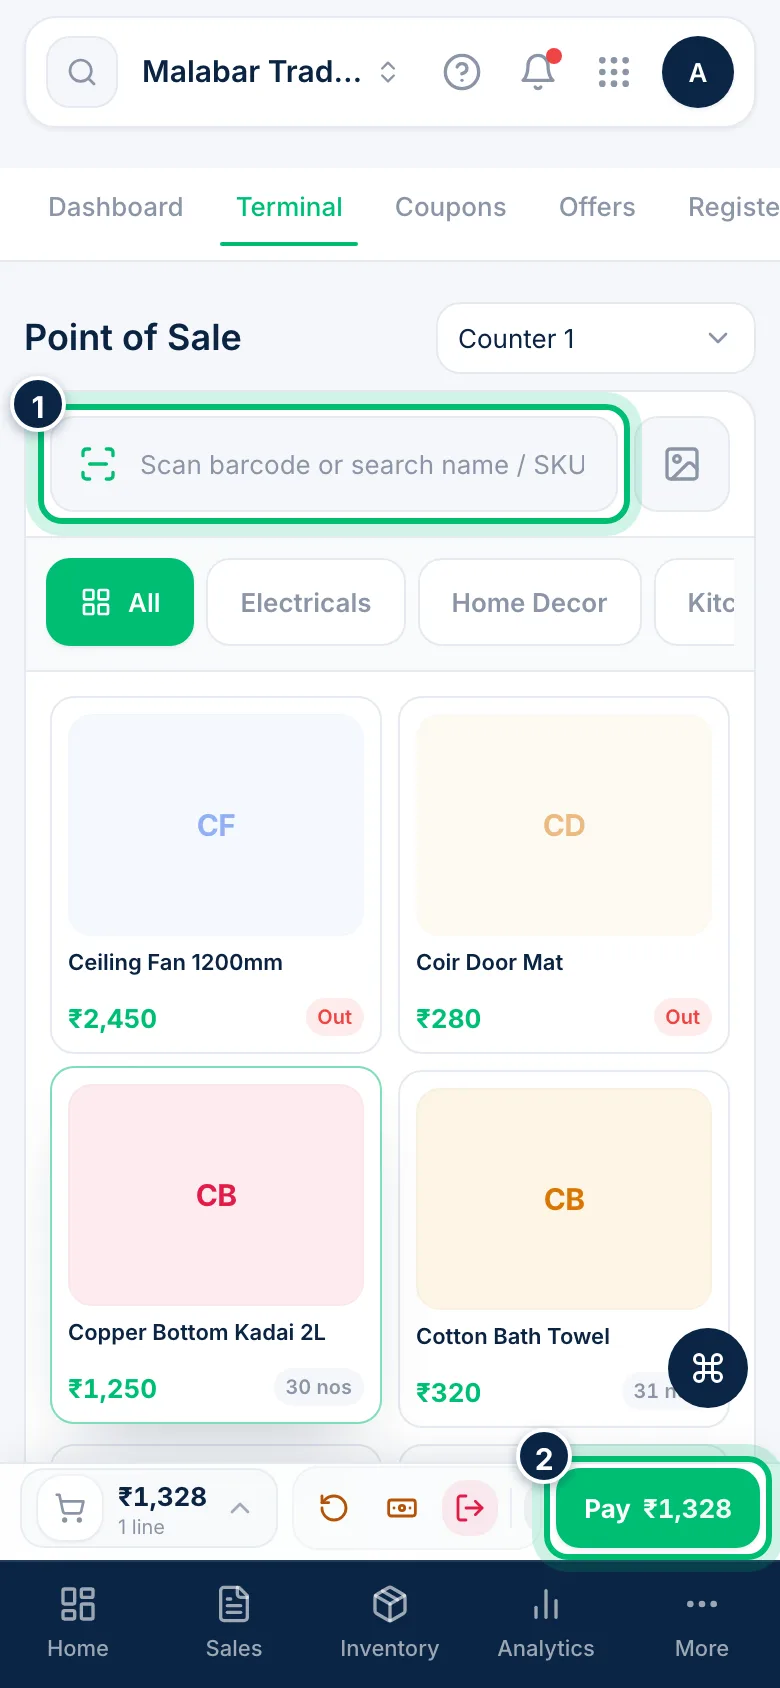
On a small screen the item grid fills the page and the cart becomes a bar at the bottom. Tap the cart total to see the lines, or Pay to take payment.
Related guides
Still stuck? Contact our support team — or start a free trial to try this in your own company.