
Point of sale · 5 steps
Turn on POS and set up a register
Switch on Point of Sale for your organisation and add a register for each counter, with its own warehouse, receipt and checkout rules.
Before you start: Only an owner or admin (anyone who can edit POS settings) can turn POS on and change registers. Create the warehouse the counter sells from first.
1Open Registers and check POS is on
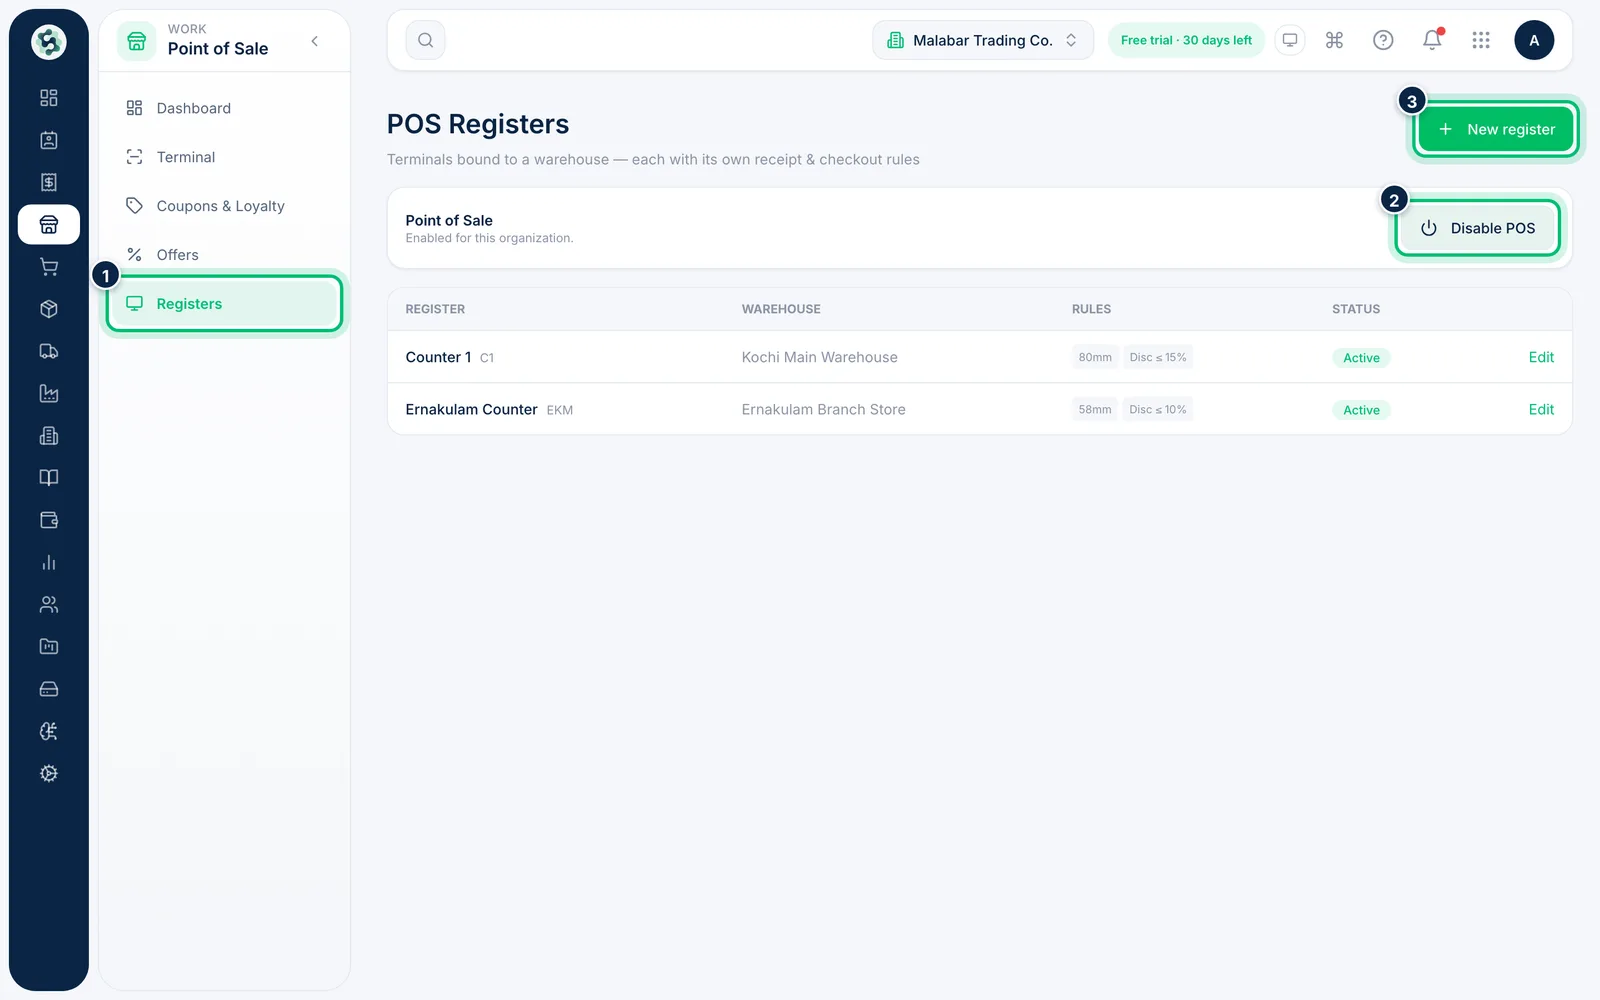
In the left menu open Point of Sale → Registers. The Point of Sale card shows whether POS is enabled for your organisation. If it's off, choose Enable POS. Then choose New register.
2Name the register and bind it to a warehouse
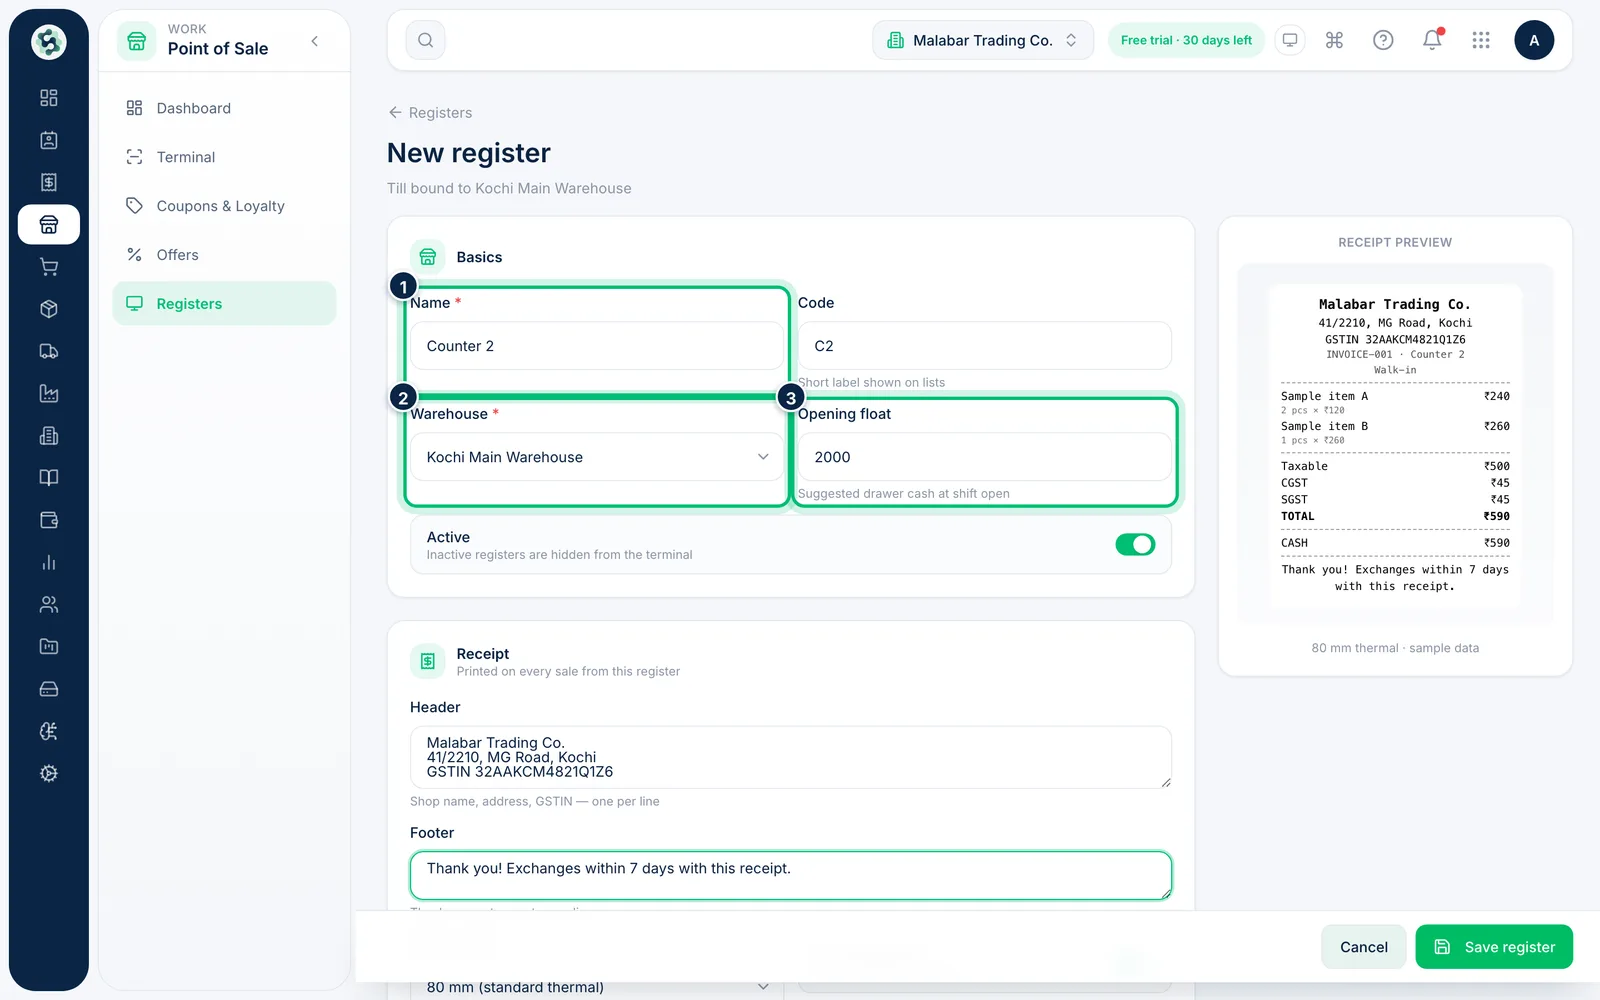
Under Basics, enter a Name such as Counter 2 and an optional short Code. Choose the Warehouse this counter sells from — stock for every sale is taken from there. Opening float is the cash suggested when a cashier opens a shift.
3Set up the receipt
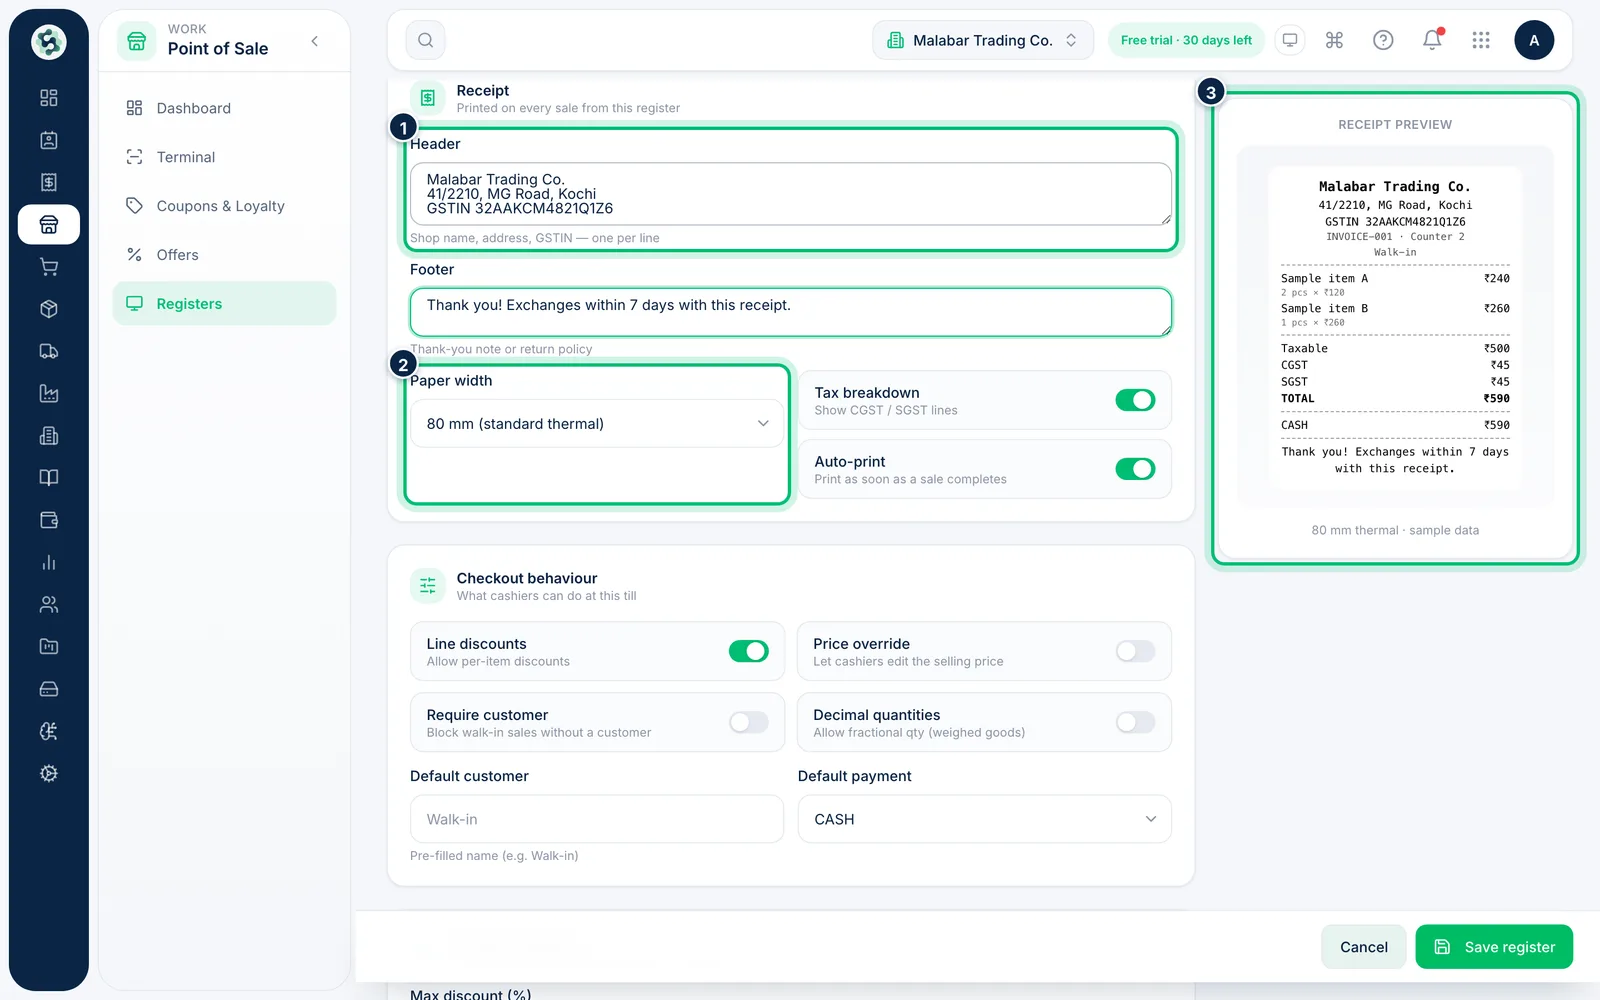
Under Receipt, type your shop name, address and GSTIN in Header, one per line, and a thank-you note or return policy in Footer. Pick the Paper width of your thermal printer — 80 mm or 58 mm. The Receipt preview on the right updates as you type.
4Choose what cashiers can do
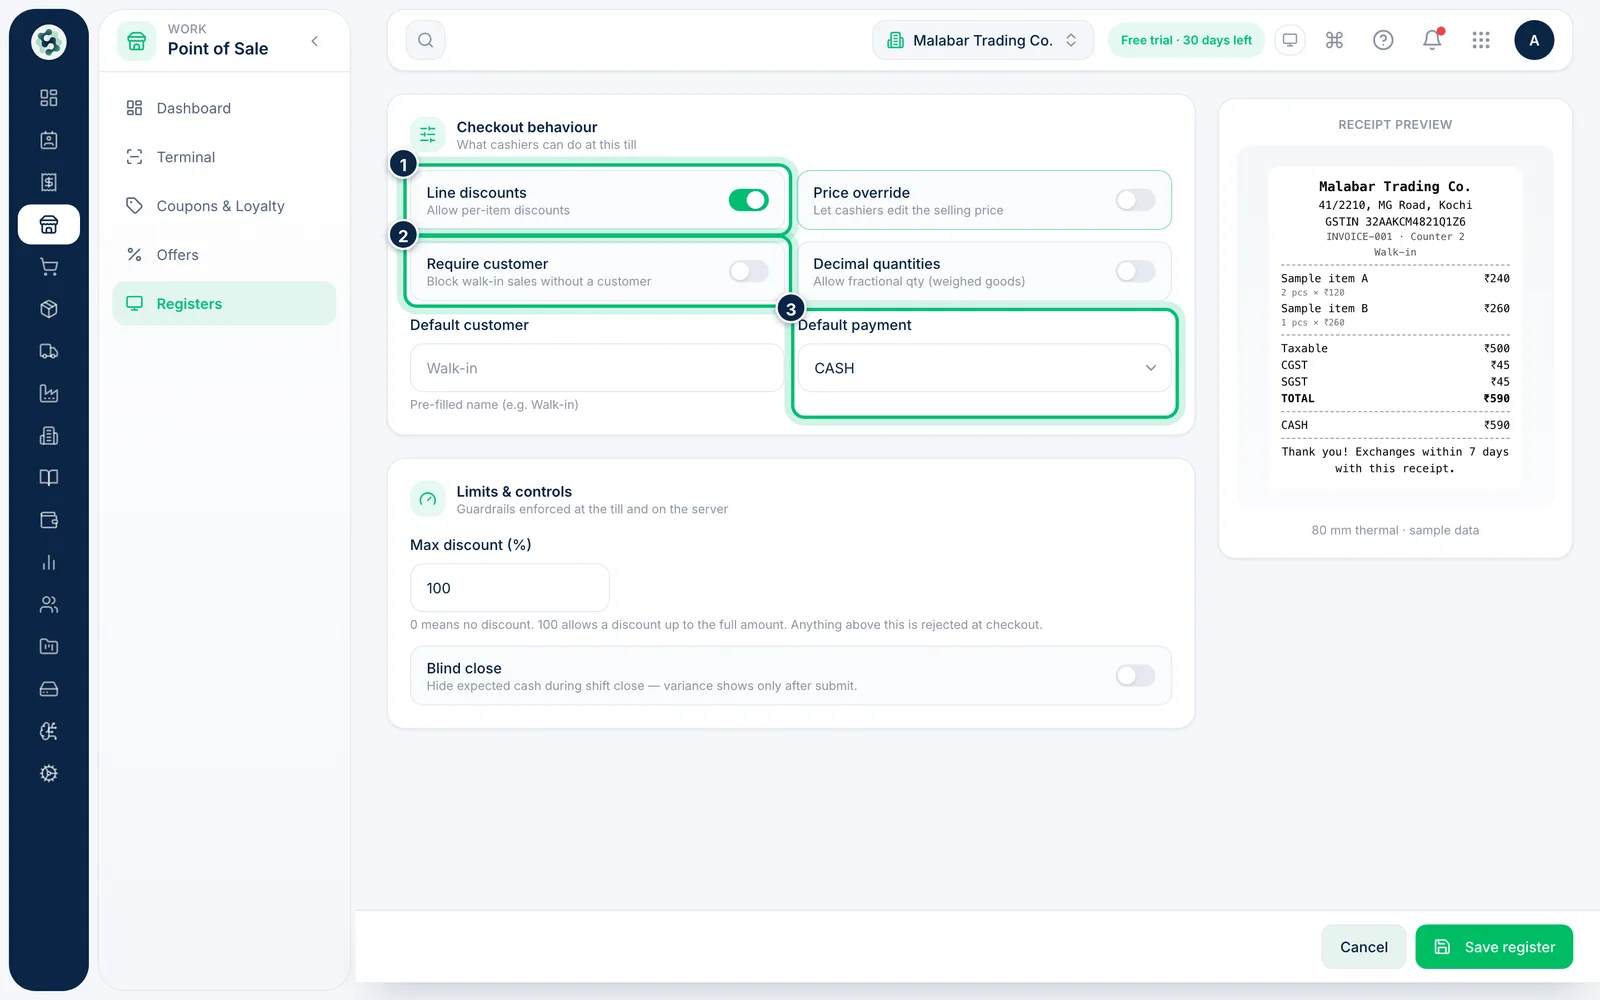
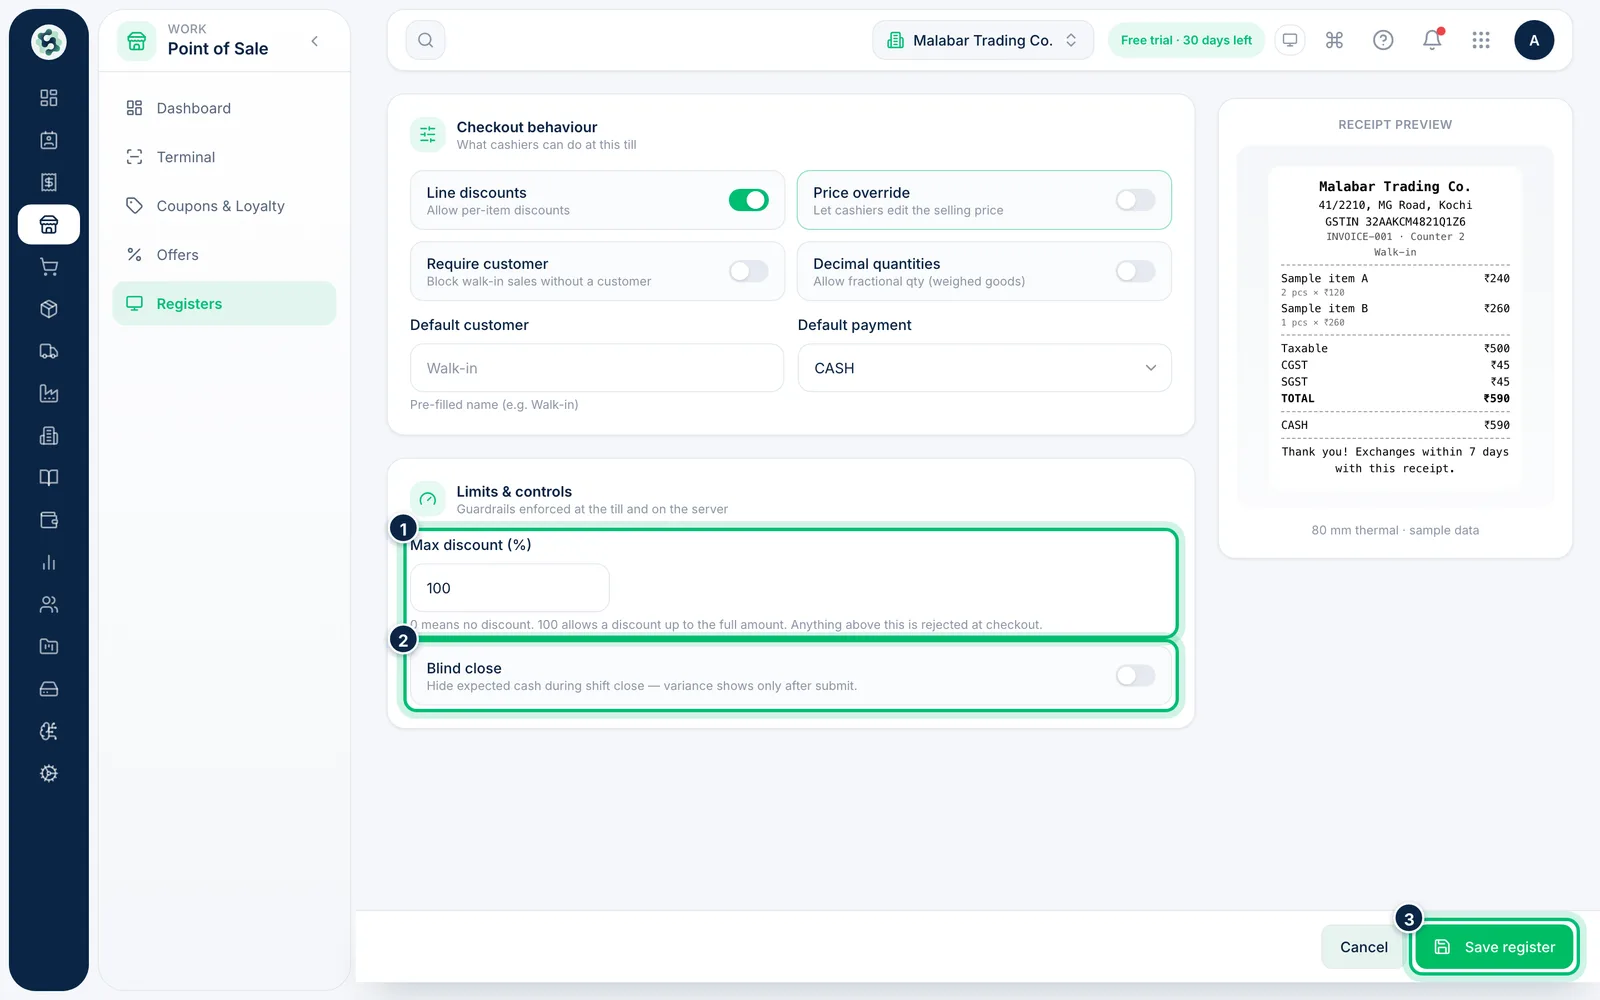
Under Checkout behaviour, turn Line discounts, Price override, Require customer and Decimal quantities on or off for this till. Set the Default customer name (for example, Walk-in) and the Default payment method.
5Set limits and save
Max discount (%) caps the discount a cashier types on a line at this till — anything above it is rejected at checkout. Automatic offers don't count toward it. Turn on Blind close to hide the expected cash from the cashier while they count the drawer. Choose Save register.
Related guides
Still stuck? Contact our support team — or start a free trial to try this in your own company.